I learned to respect blocking the hard way, standing in a finished bathroom with a stud finder in one hand and a grab bar in the other, realizing the “perfect” mounting height landed dead center between studs. That is the moment you remember the golden rule: plan it before you close the wall. Strategic in-wall blocking is not fancy carpentry, but it is the difference between hardware you trust and hardware you hope holds.
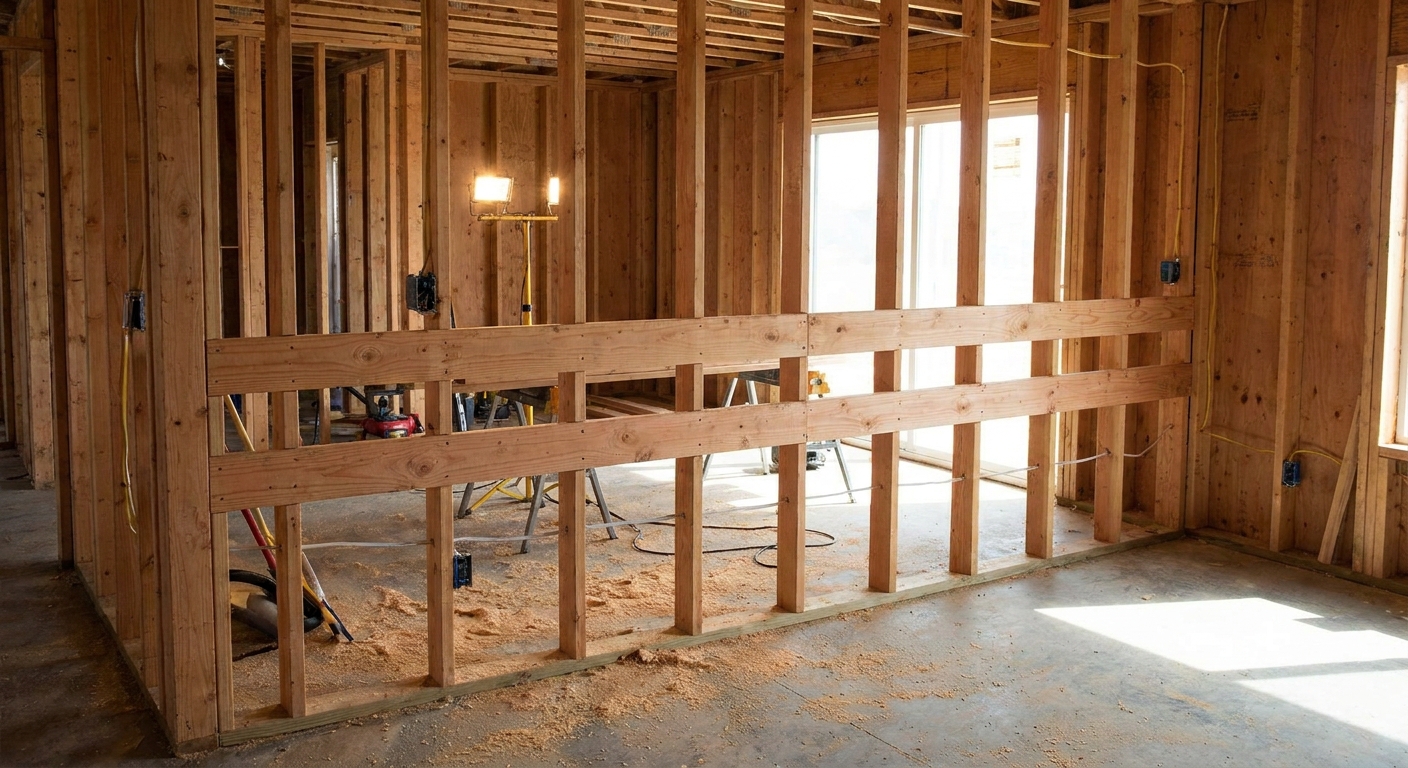
This is a jobsite habit that pays off twice. Once when the install goes smooth, and again years later when someone changes a vanity, adds a TV, or needs a mobility upgrade. Here is how I lay it out and build it so the anchor points are exactly where you need them.
What blocking is (and what it is not)
Blocking is solid wood or rated structural material installed between studs to provide a strong, predictable fastening surface behind drywall. Think of it as a built-in backer for future screws and bolts.
- Blocking is not a substitute for proper hardware. A grab bar still needs the right screws and must hit solid material.
- Blocking is not just for “heavy stuff.” It is also for things that must not loosen, like handrails and towel bars in high-traffic bathrooms.
- Blocking is easiest when the wall is open. Retrofitting later is always slower, dustier, and usually uglier.
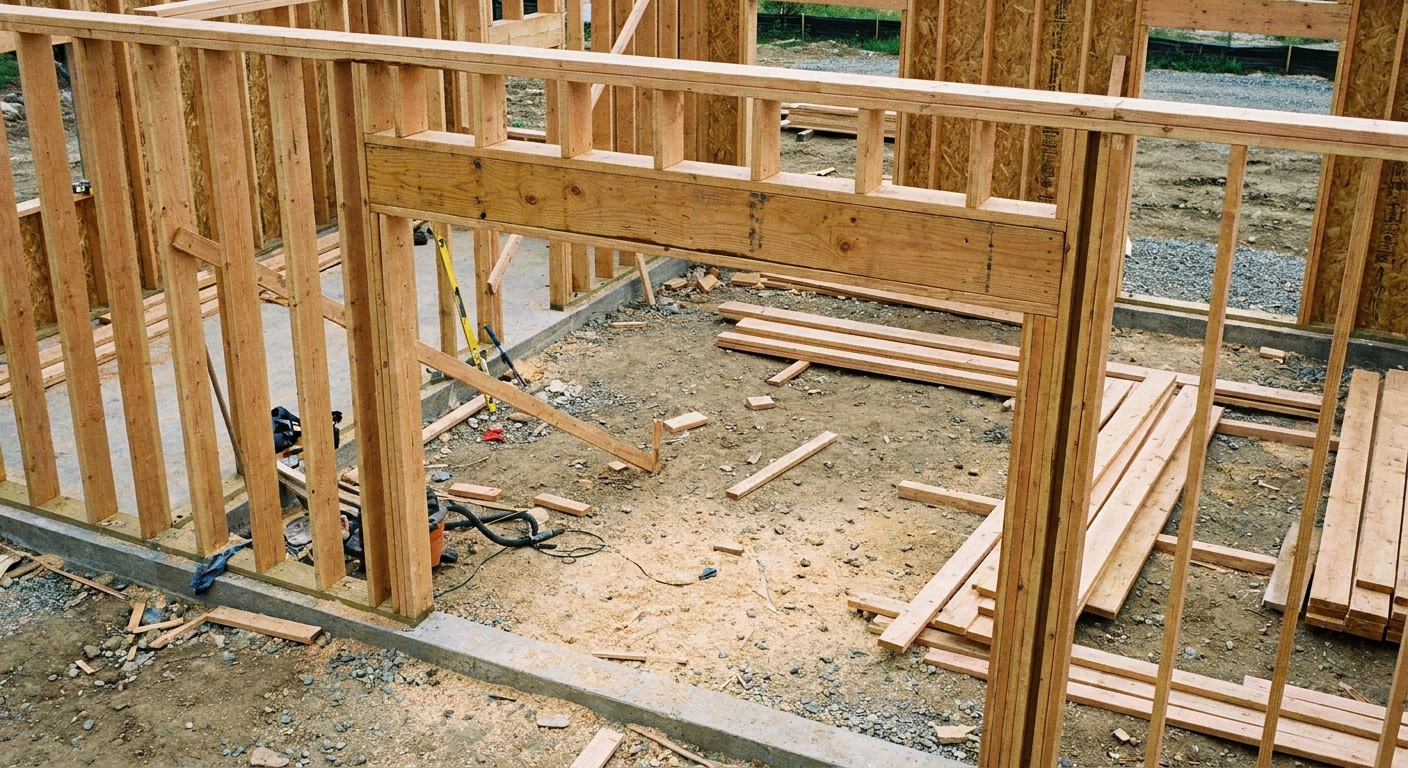
If you are framing new walls or opening a wall for a remodel, this is the perfect moment to think ahead. If you are doing structural changes, see How to Frame a Load-Bearing Wall in a Remodel for the bigger picture of keeping loads and layout under control.
Plan anchor points before you cut wood
The cleanest blocking jobs start with a 10-minute “where does everything land” walkthrough. I like to do it with a tape measure, a pencil, and the actual fixtures if I have them.
Start with a quick blocking map
- Cabinets: uppers, lowers, pantry towers, floating shelves
- Bathroom safety and accessories: grab bars, towel bars, toilet paper holder if you want it rock solid
- TVs and media: TV mount height, soundbar, in-wall power kit location, low-voltage pass-through
- Other common misses: handrail brackets, wall-hung vanities, large mirrors, sliding barn door track (needs serious backing)
Work from finished dimensions
Blocking height is based on finished floor and finished surfaces, not subfloor and bare studs. In remodels especially, I mark a reference line for finished floor so everyone is reading the same tape.
My simple approach:
- Confirm finished floor thickness (tile, underlayment, hardwood).
- Confirm wall finish thickness (usually 1/2 inch drywall, sometimes 5/8).
- Mark key heights on studs in pencil: cabinet rails, grab bars, TV centerline.
Typical ranges (not universal): In a lot of homes I frame and remodel, grab bars end up in the general 33 to 36 inch range above finished floor, and stair handrail brackets often land around 34 to 38 inches. Treat those as starting points only. If you have a plan, a spec sheet, or a real user need, that wins every time.
If you are framing partition walls and want them dead true before you start adding backing, it helps to square your assemblies early. This walkthrough pairs well with How to Square a Wall Frame Before Standing It.
Best blocking material choices
Most of the time, standard dimensional lumber is the right call. You want solid material, good screw bite, and enough width to hit even if your installer is off by a half inch.
My default picks
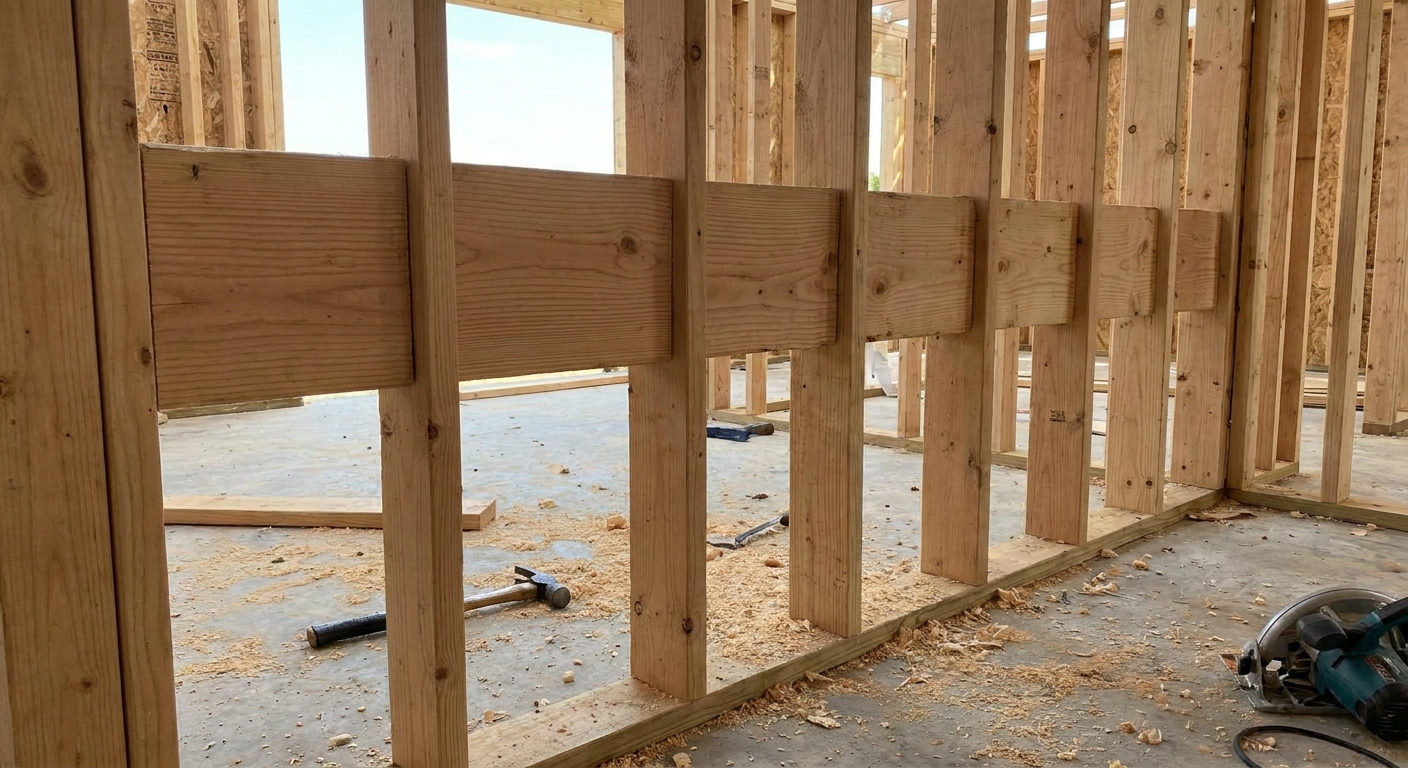
- 2x6 blocking for grab bars and handrails when the wall is framed 2x4. It is my go-to because the extra width gives you more “target” behind the drywall. Go wider or use plywood if the mounting footprint is spread out.
- 2x8 or 2x10 blocking where you need a wide fastening field, like TV mounts or floating vanities.
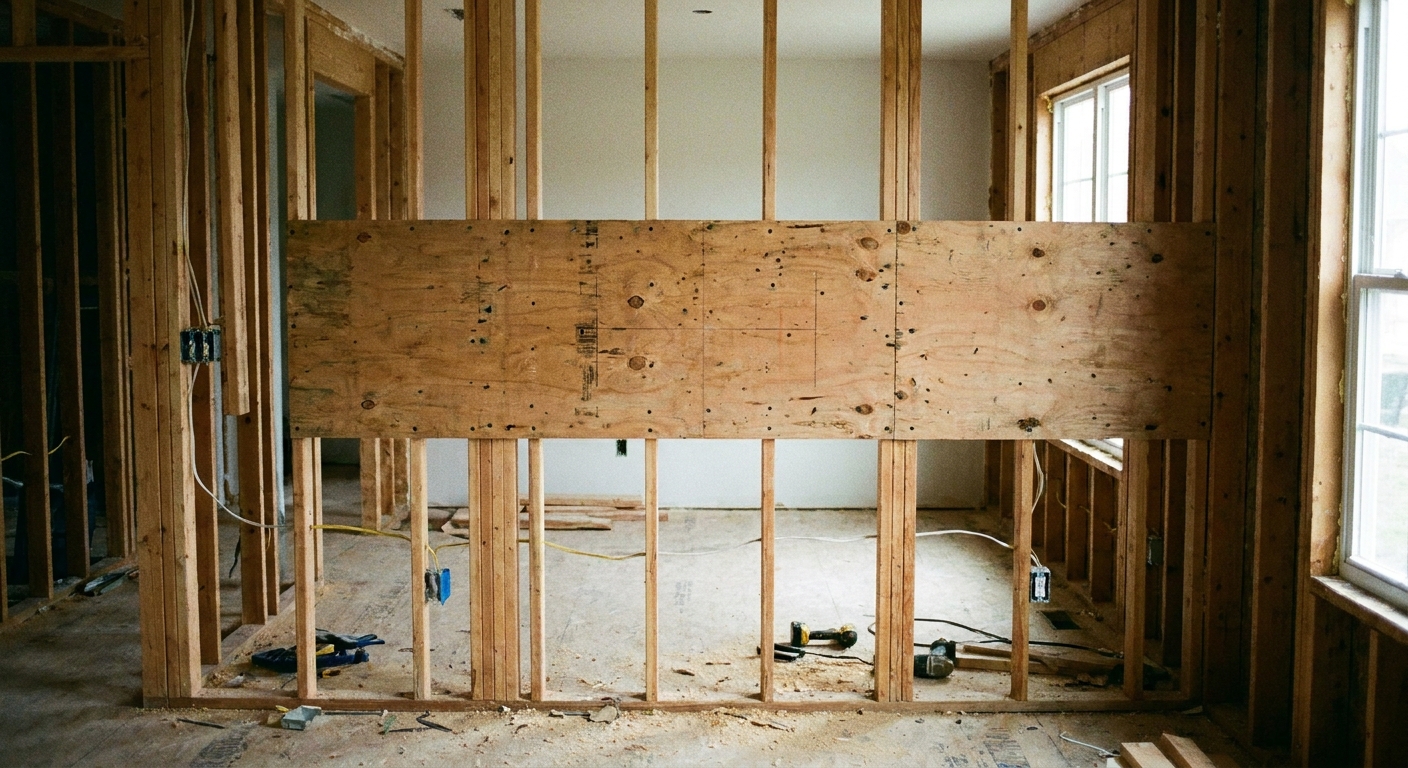
- Plywood backing (1/2 inch to 3/4 inch) when you want continuous coverage across multiple bays, like a long run of upper cabinets or a wall of accessories.
Pressure-treated lumber?
Indoors, I avoid pressure-treated blocking unless it is required for a specific moisture or contact condition. It can be wet, it can twist as it dries, and it can corrode the wrong fasteners. In bathrooms, good ventilation and correct waterproofing are the real protection.
Where engineered framing matters
On some projects you will encounter engineered studs or special shear wall requirements. In that situation, you may need to follow the manufacturer rules for drilling and fastening. For floor framing comparisons that often come up alongside remodel planning, see Dimensional Lumber vs Engineered I-Joists for Floor Framing.
Blocking by application
1) Wall cabinets and pantry cabinets
Most wall cabinets are hung on a rail or screwed through the cabinet back into studs. Blocking makes the install faster and more forgiving, especially when cabinet widths do not line up perfectly with stud spacing.
- Height: install blocking where the cabinet hanger rail or top mounting screws will land. For many kitchen uppers, that usually means a band of blocking in the upper third of the cabinet back.
- Approach: I like continuous plywood strips or a series of 2x blocks that span each bay.
- Bonus: add a second line lower if you expect heavy loads or you are hanging pantry units with multiple fastening points.
2) Grab bars (bathrooms and showers)
Grab bars deserve your best work. They are not decor. Someone is going to load that bar unexpectedly, with body weight, and they need it to hold.
- Match the blocking to the bar: different bars have different mounting footprints. I aim for a wide target (2x6, wider lumber, or plywood) that covers the likely screw pattern and leaves forgiveness for layout changes.
- Cover the whole mounting zone: bars vary, and installers vary. If you block a wide band, you rarely miss.
- Account for tile: tile thickness does not change the blocking location much, but it does affect fastener length and pilot hole habits.
Code and guidance note: Accessibility requirements vary by project type. ADA standards apply to many public accommodations and common areas, while private homes often use similar guidelines as best practices unless a local rule, funding program, or specific project scope says otherwise. When in doubt, follow the grab bar manufacturer instructions and local requirements. ADA standards are published by the U.S. Access Board: https://www.access-board.gov/ada/.
3) TV mounts and large wall-mounted displays
TV mounting fails usually come from one of two things: poor fasteners into drywall only, or a mount that lands between studs and gets “made to work.” Blocking turns that into a non-event.
- Install a wide target: I like 2x10 or a piece of 3/4 inch plywood spanning multiple studs.
- Think beyond the TV: add backing for a recessed box, a soundbar, or a media shelf while the wall is open.
- Plan wiring routes: blocking should not pinch your cable path. Do not bury junction boxes behind drywall, and protect cables from future fasteners with nail plates when the wiring runs close to the stud face.
4) Floating vanities and wall-hung fixtures
Floating vanities look clean because the structure is hidden. That means the hidden structure has to be solid.
- Use continuous backing where the mounting rail will land.
- Do not guess on height: confirm vanity spec sheets or have the vanity on site.
- Mind plumbing and drains: you may need to split blocking around a trap arm or vent.
5) Handrails and stair guard returns
Rail brackets always seem to land where you least want them. A couple well-placed blocks makes rail installs feel like you cheated.
- Block at bracket zones, not just “somewhere in the middle.”
- Use structural screws later, and give them real wood to bite into.
How to install blocking
Here is my repeatable method. It is fast, strong, and drywall-friendly.
Tools and fasteners
- Impact driver or framing nailer
- Level and tape measure
- For fastening blocking to studs: 10d nails, or #9 or #10 construction screws, or structural screws where it makes sense. Pick fasteners rated for framing, not drywall screws.
- Construction adhesive (optional, but helpful for stiffening)
If you are choosing between nailers for this kind of work, I broke down the pros and cons here: Cordless vs Pneumatic Framing Nailers.
Step-by-step
- Mark heights on both studs. I mark the top and bottom of the blocking band so I can see it from any angle.
- Cut blocks tight. Loose-fitting blocks are harder to keep flush, and they can turn into little noise makers over time.
- Set the block flush. Keep the face of the blocking flush with the stud faces so drywall sits flat.
- Fasten from both sides when possible. Two fasteners into each stud end is a good baseline. If you are toe-nailing or working with wider stock, adjust your fastener choice and length so you get solid bite without splitting.
- Use multiple blocks for a band. For grab bars and accessories, I prefer a continuous band across several bays rather than a single lonely block.
- Check for conflicts. Look for plumbing, wiring, and venting before you commit. Relocate or notch only when allowed and only as much as permitted.
Keep fire safety in mind
Blocking can affect how cavities are subdivided, and in some cases fire blocking is required at certain intervals and at penetrations. When you are opening walls, it is smart to think about both at the same time. I cover the basics in Fire Blocking in Residential Framing.
Wet walls and exterior walls
In showers and exterior walls, you are not just thinking about strength. You are thinking about water and air control. Coordinate blocking with your waterproofing and vapor strategy so you are not forcing extra penetrations later. If a system relies on a continuous membrane or specific fastener pattern, follow the manufacturer instructions and place blocking so the wall assembly can still do its job.
Fastening fixtures into blocking
Blocking sets you up for a solid install, but the finish hardware still matters.
- Use the manufacturer fasteners (or an approved equivalent) for grab bars, rails, and heavy mounts. The screws that come in random kits are not always the right answer.
- Pre-drill when needed, especially near the ends of a block or when you are driving larger diameter screws. It helps prevent splitting and keeps your layout accurate.
- Do not over-torque. Cranking down too hard can strip wood, crush drywall, or crack tile.
- Use corrosion-resistant fasteners in wet areas, and seal penetrations in tile per the trim or grab bar instructions.
Mark it so you can find it after drywall
Even perfect blocking is useless if nobody can locate it later. I do three things:
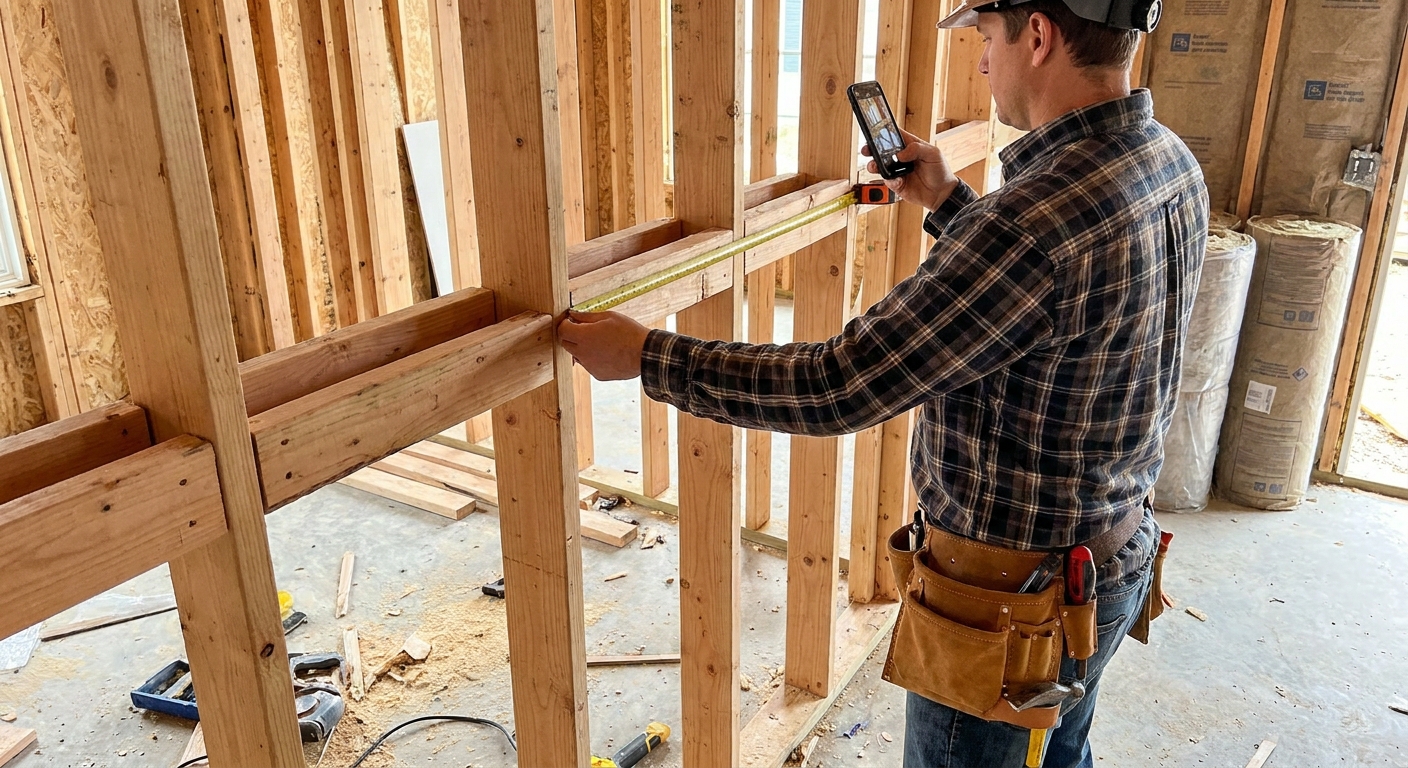
- Take photos straight-on of each wall section before insulation and drywall. Include a tape measure in the photo if you can.
- Measure off a fixed reference like a corner or the centerline of a window rough opening and write it down.
- Use subtle layout notes on the subfloor in pencil if the wall is not up yet, then transfer to a notebook or job folder.
On remodels with lots of moving parts, I also like making a cut list and a materials plan before I start. It keeps blocking lumber from becoming an afterthought. See Make a Cut List Before Buying Wood.
Common mistakes I see
- Blocking too narrow. A single 2x4 in a grab bar zone gives you very little forgiveness. Go wider or use a band.
- Blocking installed crooked or proud. If it sits past the stud face, drywall will bulge. Keep it flush and flat.
- Forgetting finished floor height. A 3/4 inch difference can put hardware at an awkward height, especially for accessories.
- Not coordinating with plumbing and electrical. Blocking goes in after you have eyes on routes, not before.
- Assuming studs will line up with cabinetry. Sometimes they do, often they do not. Blocking is how you make it not matter.
Quick reference targets
These are not universal rules, but they are solid starting points when you do not have specs in hand yet.
- Kitchen uppers: continuous backing band across the run where the hanging rail or top fastening line will land.
- Grab bars: a wide band of blocking spanning likely mounting heights and multiple bays, sized to the bar mounting footprint.
- TV mounts: wide plywood panel or 2x10 backing that spans at least two studs, ideally more.
- Floating vanity: continuous backing at the rail height, plus extra where side panels may get fastened.
- Handrails: blocking at expected bracket spacing zones, especially near ends and transitions.
If you are building out a full project and want more step-by-step carpentry planning, the hub pages are a good place to browse: Carpentry Projects Guide and Framing Guide.
When to get a second opinion
If the wall is load-bearing, part of a shear wall, or packed with plumbing and electrical, it can be worth slowing down and verifying your approach. Blocking is simple, but the wall system is doing multiple jobs at once.
When you need eyes on something specific, you can reach me through the site: Contact.