

I have hung enough solid wood and steel and iron exterior doors to learn one lesson the hard way: the door is rarely the problem. The rough opening is. A heavy slab will find every weak link in your framing and telegraph it as a sticky latch, a rubbing corner, or a gap that grows at the head over time.
This is how I frame rough openings for heavy exterior doors so the load has a clean path to the foundation, the jamb stays straight, and the reveal stays tight through wet winters and hot summers.
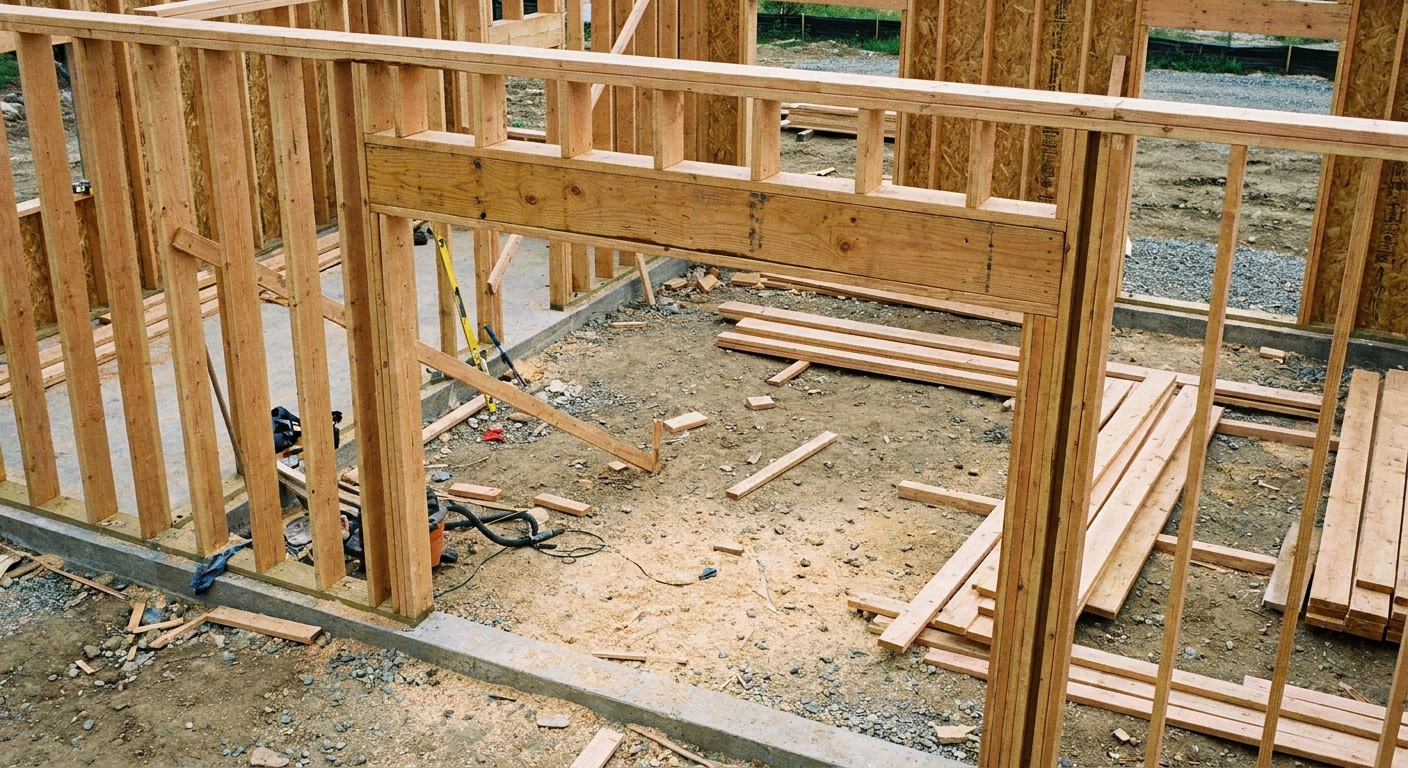
Start with the right numbers
Before you touch a saw, confirm what you are actually installing. “36-inch door” can mean a few different things depending on the prehung unit, jamb thickness, sill style, and exterior trim plan. Engineered plans and the door manufacturer’s instructions override every rule of thumb.
Typical rough opening rules
- Width: many prehung units want the door slab width plus 1 1/2 to 2 inches (room for jambs, shimming, and a little forgiveness).
- Height: many units land around slab height plus 2 to 2 1/2 inches, but this can vary a lot with composite or adjustable sills, pans, and finished floor buildup.
Heavy exterior door systems often come with manufacturer-specific RO requirements, especially when you have a tall unit, a thick jamb, a multi-point lock, or sidelites. If you have the unit on site, measure the actual frame and read the install sheet. If not, get the exact model specs from the door supplier before you lay out the wall.
A quick example
For a common 3-0 x 6-8 prehung exterior door, a very common spec is 38 inches wide by 82 1/2 inches tall. You will also see plenty of units in the real world that call for roughly 37 1/2 to 38 inches wide and about 82 1/4 to 82 1/2 inches tall. Treat those as checkpoints, not gospel. Always confirm the exact unit and the sill and floor stack.
If you want a broader framing refresher before you lay out openings, I keep the fundamentals collected in the site’s Framing guide.
What makes heavy doors different
A standard exterior door already concentrates a lot of weight at the hinge side. When you step up to thick solid wood, a door with glass, or a steel or iron door, the hinge-side load goes up fast and the margin for error goes down.
Here is what I change compared to a light interior opening:
- More bearing: doubled jack studs, and sometimes a third jack depending on load and header span.
- Stiffer header: sized for the span and load, built and installed to resist roll and bearing crush.
- Better connection: intentional nailing or structural screws so the header and studs act like a unit.
- Better backing: blocking behind hinge locations so the jamb cannot bow when you snug hinge screws.
On multi-panel entries and sidelite systems, assume you are dealing with a manufacturer-designed assembly. Those often call out specific bucking, fastening locations, and backing details. Follow that paperwork first, then build your framing to support it.
Header sizing: stiffness matters
Headers are structural beams. For an exterior door, the header is carrying roof, floor, or wall loads above, not the door itself. Door problems can come from several places, but header deflection is one contributor that shows up as a tightening reveal at the head and latch-side binding.
What controls header size
- Span: width of the rough opening.
- Loads above: roof only, one floor, multiple floors, snow load, and whether the wall is bearing.
- Species and grade: SPF vs DF-L changes capacity.
- Wall thickness: 2x4 versus 2x6 affects header build-up and bearing details.
My job-site approach: if the wall is bearing and the door is a main entry with a heavy unit, I lean toward a stiffer header build rather than the smallest thing that might pass a table. Less movement is what keeps the unit operating smoothly for years.
Header options that work
- Built-up dimensional header: two plies of 2x material (often 2x10 or 2x12) with a spacer to match wall thickness. Good when spans are modest and loads are typical.
- Engineered header (LVL or glulam): very stiff for its size and consistent. A great choice for wide openings, heavy loads, or when you want minimal movement.
Header sizing is governed by your local building code and load conditions. If you are not sure what’s above the opening, or you are in a high snow or wind zone, it is worth a quick call to your building department or engineer. The cost of upgrading a header is usually tiny compared to fighting a door that will not stay aligned.
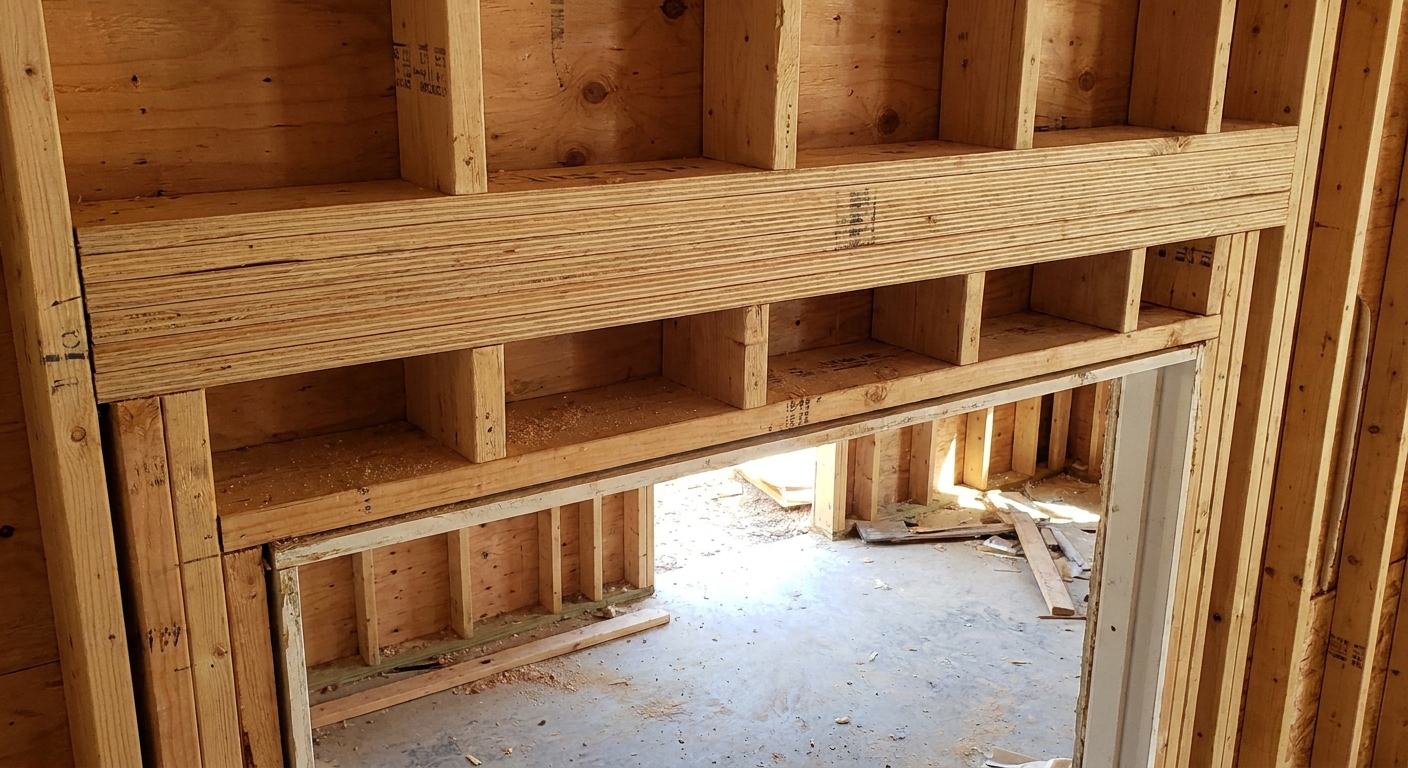
Double jack studs
Jack studs (trimmers) carry the header down to the bottom plate and ultimately to the foundation. For heavy exterior doors, I like doubled jacks as a baseline on the hinge side and usually on both sides when the wall is bearing.
When doubled jacks make sense
- Heavy slab: solid wood, oversized, iron, or heavy glass units.
- Bearing wall: any roof or floor load coming down onto that header.
- Wide opening: bigger span equals bigger header and higher reactions at the ends.
- Windy exposure: tall walls and big openings see more racking stress at corners and openings.
Layout and cut tips
- Cut jacks dead consistent: even small differences in jack height can turn into uneven bearing and extra movement later.
- Crown awareness: if you are using dimensional lumber for jacks, pick straighter sticks and orient crowns the same way.
- Full bearing: keep the jack top square and clean. No splits, no blown-out fibers.
Fasten the jack-to-king pack
I want the king and jack acting together, not sliding past each other. Typical practice is a solid nailing pattern (for example, 16d nails staggered every 12 to 16 inches). In high load situations, structural screws can be a clean upgrade, especially when lumber is dry and prone to splitting. Use fasteners rated for structural framing and follow the manufacturer schedule.
Tool-wise, a good framing nailer helps, but layout and consistency matter more than speed. If you are dialing in your kit, my starting point is the site’s Tools guide.
Build a clean load path
Here is the stack-up I aim for in a typical stud wall rough opening:
- King studs: full-height studs on both sides of the opening.
- Jack studs: supporting the header ends. Doubled for heavy doors when appropriate.
- Header: sized correctly, installed crown up for dimensional, seated fully on jacks.
- Cripples: above the header to carry loads to the top plate with consistent spacing.
- Bottom plate: left in place during wall build, then cut out after the wall is braced and standing (common practice).
Seat the header properly
A header that is tight on one end and gapped on the other is already preloaded to move. I dry-fit and check:
- Both jack tops are the same height.
- The header sits fully on both jacks.
- The assembly is plumb before I lock it in.
Control header roll
Built-up dimensional headers can roll slightly while the house is drying or under load, especially in 2x6 walls with a spacer. Keep it tight:
- Nail the plies together properly so they behave like one beam.
- Make sure the header is captured by framing above (cripples and sheathing help).
- Install sheathing and nail it per the plan or code edge schedule, especially at panel edges around openings. That is where the wall really gains stiffness.
Hinge-side reinforcement
When people say “heavy door sag,” they are often describing a jamb that is flexing or a hinge-side stud pack that is compressing and twisting over time. The fix is stiffness at the hinge line.
1) Add backing where the hinges land
Prehung units get anchored through the jamb at the hinges and sometimes at the strike. With a heavy slab, those screws are doing real work.
- Add solid blocking behind hinge locations if your door unit or install method calls for long screws. This can be horizontal 2x blocking between the king and jack at hinge heights, or a continuous 2x backer depending on the wall build.
- Plan for straight shimming bays at each hinge point. Shims only work if they are backed by solid framing, not a void.
2) Use long hinge screws, after the framing is right
Long hinge screws into the stud pack help, but they cannot compensate for a weak stud assembly or a header that is settling. Reinforce the framing first, then use the longer screws where the door manufacturer recommends. On some heavy entry systems, the manufacturer will also specify extra fastening points in the jamb. That is another reason to have backing planned before drywall or exterior finishes go on.
3) Treat the hinge side like a post
On very heavy units, or when the opening is near a big unbraced wall segment, it is reasonable to think in terms of a post:
- Doubled king studs, not just doubled jacks, if you have room and it matches your layout.
- Straps or hold-down solutions in engineered plans for high wind zones.
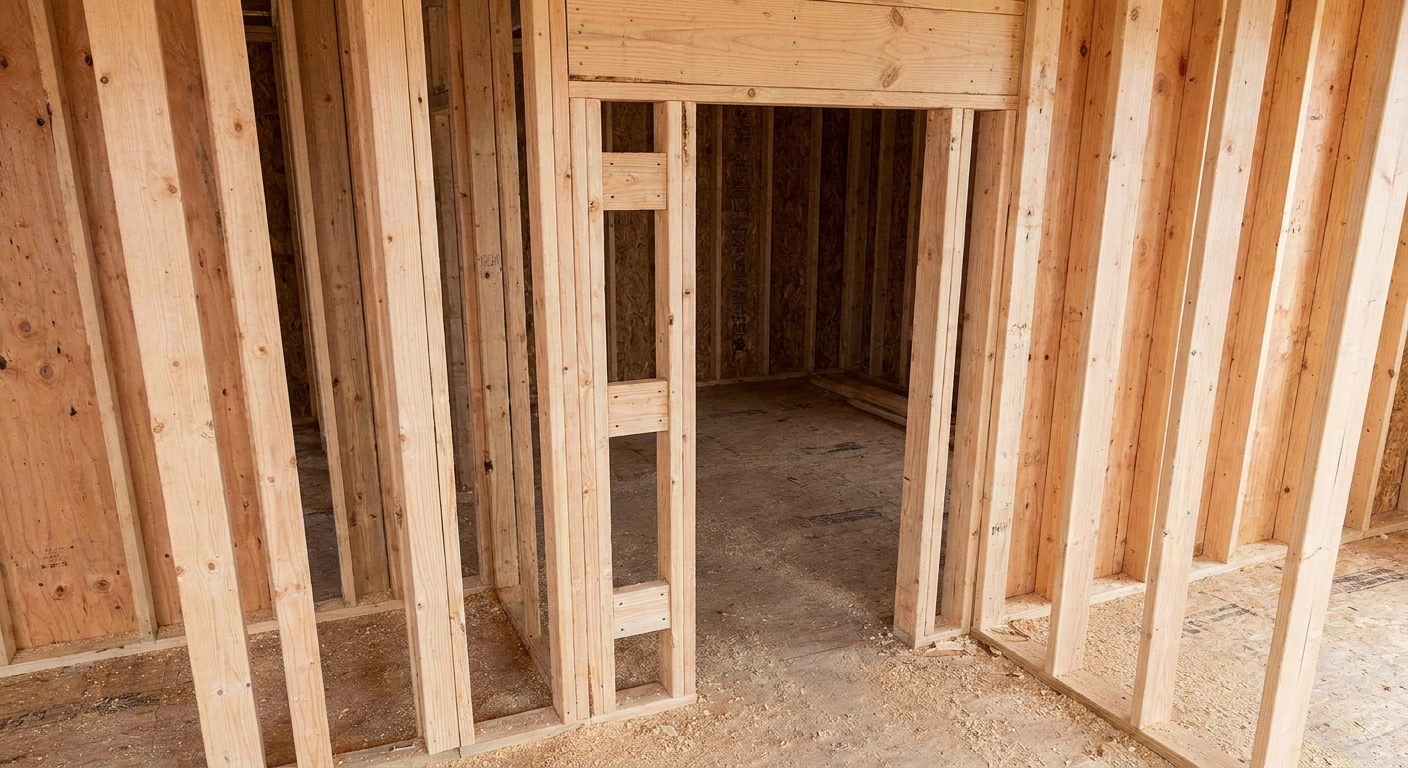
Get the RO honest
Heavy doors are less forgiving because the slab carries more momentum and the hardware tolerances are tighter. Before you set a prehung unit, the framing needs to be honest.
My four checks
- Plumb: both sides of the opening. Check the king studs, not just the jacks.
- Level: header across the opening.
- Square: compare diagonal measurements of the rough opening.
- Flat: sight down studs for twist and bow right where the jamb will land.
If your RO is out, fix it in framing. Do not rely on the door installation to “pull it into place.” You can shim a jamb plumb. You cannot shim a crooked wall into behaving long-term.
For most exterior prehung units, my shimming priority is hinge locations first, then the strike area, then the head if needed. I want shims aligned with fasteners so tightening screws does not bow the jamb.
Fasteners and connectors
I am not a fan of over-nailing just to feel busy. I am a fan of fastening that creates a single, stiff assembly.
Key connection points
- Jack to king: consistent staggered nails or structural screws to prevent slip.
- Header plies: follow a real nailing schedule so plies share load.
- Header to jacks: full bearing plus toenails or appropriate connectors as required.
- Sheathing around opening: correct edge nailing and proper panel layout tie everything together.
If your plans call for specific hangers, straps, or hold-downs, use them exactly as specified. Door openings are interruptions in shear walls, and hardware is often doing more than just holding weight.
Threshold and floor stack
Some of the ugliest “door problems” are actually floor problems. Before you lock in your rough opening height, think about what the door will sit on:
- Subfloor thickness and whether finish flooring is added later.
- Flat, solid bearing under the threshold: any dip or soft spot under the sill can show up later as latch misalignment and a door that feels like it “settled.”
- Exterior landing height and step details, which vary by jurisdiction and door type, so verify locally.
- Sill pan or flashing thickness if you are doing it right, which you should on an exterior door.
On remodels, I measure from the actual finished floor whenever possible. On new builds, I confirm the floor assembly so the threshold does not end up proud or buried.
Common failure points
Head reveal closes over time
- Cause: under-sized header, uneven jack lengths, crushed shims, or wet lumber shrinking.
- Prevention: stiffer header choice, consistent jack cuts, solid bearing, and keeping framing dry when possible. If the opening is critical, engineered lumber in the header can buy you stability.
Hinge side bows when screws tighten
- Cause: no solid backing, twisted studs, or overdriving fasteners without shims.
- Prevention: straight stud selection, blocking at hinges, shim before tightening.
Strike side drifts and latch gets tight
- Cause: opening not plumb, wall not braced well, or house movement amplified by a weak opening.
- Prevention: plumb and square the RO, sheath and nail per schedule, and avoid making the RO overly tight.
Quick checklist
- Confirm manufacturer RO requirements before layout.
- Header sized for span and loads above, favor stiffness for premium heavy units.
- Doubled jack studs where loads and door weight justify it, especially hinge side.
- Jack studs cut perfectly equal for full, even bearing.
- Hinge-side blocking or backing installed so long screws have solid wood.
- RO checked for plumb, level, square, and flat before door install.
- Sheathing and connectors installed per plan to keep the wall stiff and racking-resistant.
When to call for help
If any of these are true, I slow down and get confirmation instead of guessing:
- The opening is in a major bearing wall under a point load or girder.
- You are increasing opening width in a remodel.
- The door is unusually tall or wide, or part of a multi-panel entry system.
- You are in a high snow, high wind, or seismic region and the opening affects shear wall requirements.
A heavy door is expensive, and a call to confirm header and hold-down details is cheaper than repairs later.
Related reading on Carpentry Pro Framer
- Framing for wall layout, load paths, and opening basics
- Tools for the layout and fastening gear that keeps openings accurate
- Make a cut list before buying wood so you are not improvising stud packs and header plies mid-build