

I have a soft spot for the “messy ceiling” problem. You open up a kitchen, everything looks great, then you spot it: a duct run that drops an inch too low, a plumbing line that jogs across the room, or a bundle of wires you cannot realistically reroute. A soffit is the clean, carpentry-first fix. Done right, it is light, dead straight, and square enough that the drywall finishes like it grew there.
This is how I frame a kitchen drop soffit to hide HVAC ductwork or plumbing, without building a heavy box that cracks later or steals more headroom than it needs.
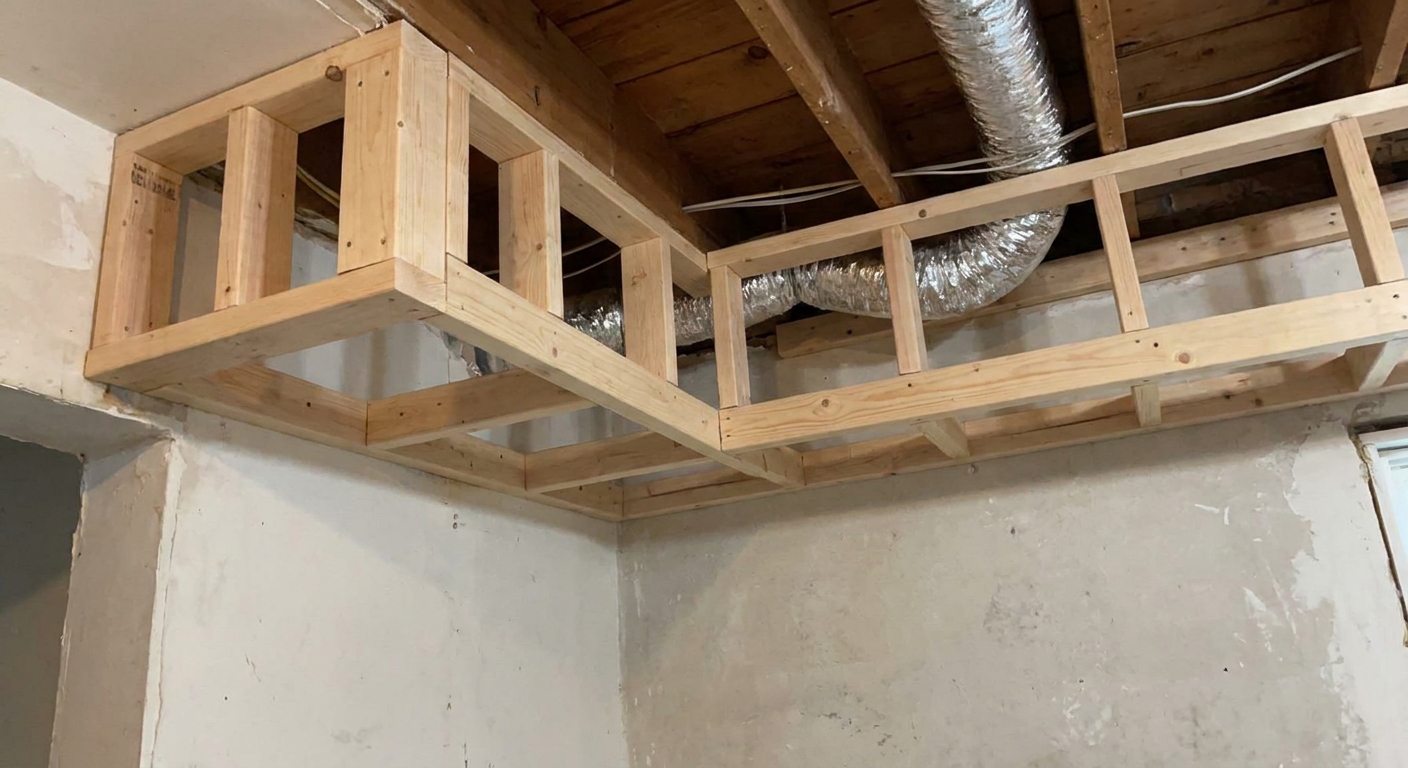
Plan first
Soffits get a bad reputation because plenty of them are framed on the fly. The fix is simple: measure the mechanicals carefully and design a soffit that clears them with intention.
1) Confirm what you are hiding
- HVAC ductwork: rectangular trunk lines, round pipe, elbows, dampers, takeoffs, and hanging straps.
- Plumbing: drain lines with slope requirements, vent lines, cleanouts, and insulation around hot lines.
- Electrical: do not bury junction boxes or splices behind drywall. In practice, anything that needs to stay serviceable should stay accessible with an approved cover or access panel.
2) Measure the lowest and widest point
Find the point that hangs lowest and the point that sticks out farthest. I use a straightedge or a laser line so I am not fooled by sagging straps or a crooked duct run.
- Depth (drop): from your intended finished ceiling plane down to the bottom of the obstruction.
- Width (projection): from the wall out to the furthest edge of the obstruction.
Add clearance: my rule of thumb is 1/2 inch minimum so drywall does not rub the metal duct or pipe. If you expect vibration, movement, or you are planning duct wrap or pipe insulation, bump that up. 3/4 inch is cheap insurance, and sometimes you will want more.
3) Choose the finished size
A soffit looks best when it is either purposefully minimal or clearly architectural. The awkward middle ground is a skinny, crooked strip that looks like it is apologizing for itself.
- Keep lines consistent: if the soffit turns a corner, keep the drop and projection the same on both legs unless you have a strong reason not to.
- Think about cabinets: many kitchens already have an upper-cabinet line that wants to be straight. A soffit can align with that visual line even if the duct only crosses part of the room.
- Confirm clearances: do not block range hood ducting paths, recessed light housings, or planned vent terminations.
If you want a quick refresher on staying organized before material runs, my workflow is the same as when I build framing cut lists: measure, sketch, then buy. I walk through that mindset here: Make a cut list before buying wood.
Materials and fasteners
You do not need structural lumber for most kitchen soffits, because most of them are non-load-bearing. That said, do a quick reality check before you commit: make sure the soffit is not acting as a beam, cabinet support, bracing, or a workaround for damaged framing. Also, do not cut or notch existing joists or framing to “make room” without a real plan.
Pick straight lumber
Dead-straight soffits start at the stack. I crown and sight every piece, and I am picky about the long rails. If I am in a humid remodel, I like to get the lumber inside so it can acclimate a bit before I lock it in.
Common framing options
- 2x2 or ripped 2x material: great for light soffits when you have solid backing at ceiling and wall. For nonstructural soffit framing, it is a practical choice.
- 2x3: my favorite compromise. Stiffer than 2x2, still compact.
- 2x4: use when the soffit is deep, spans wider distances, or needs room for blocking and solid drywall edges.
- 1x3 or 1x4 furring: works for small returns, but it is easier to twist. I use it more for backing and nailers than the main ladder.
Fasteners and adhesives
- Screws: use construction or deck screws rated for framing. A common choice is #8 or #9 in the 2 1/2 inch range for fastening into framing, but length and spacing depend on what you are fastening into and how the soffit is built. Do not use drywall screws for framing.
- Framing nails: fine if you are comfortable nailing overhead, but screws give you more control and easier adjustment.
- Construction adhesive: optional, but useful when you are laminating nailers or building up backing.
If you are deciding between nailers for this kind of overhead work, I have a full breakdown of the real-world tradeoffs here: Cordless vs pneumatic framing nailers.
Drywall support matters
The number one soffit failure I see is not framing collapse. It is cracked corners and wavy edges because the drywall had nowhere solid to land. Plan for drywall edges on every plane.
- Back every drywall seam.
- Give the outside bottom corners solid framing for corner bead.
- Add nailers at inside corners where the soffit meets the ceiling and wall.
Layout lines
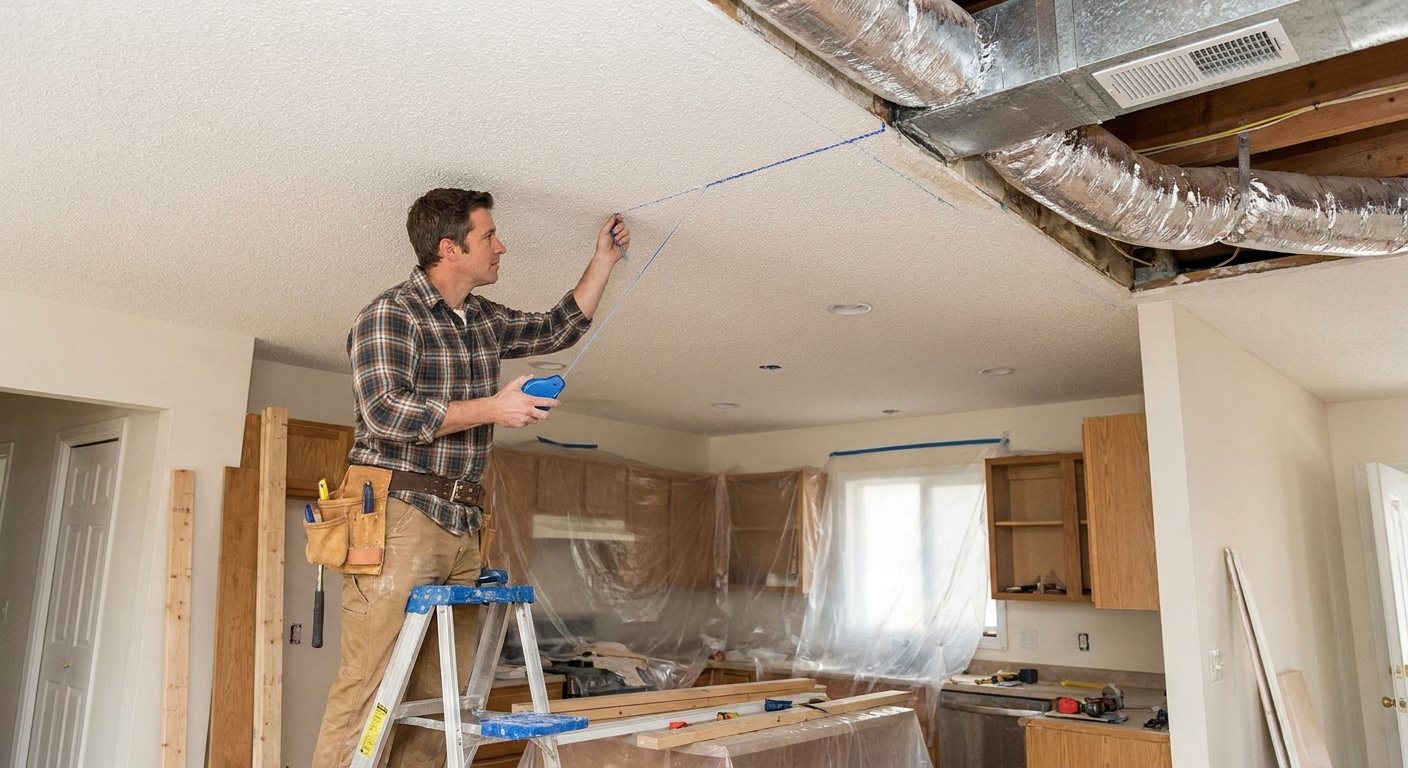
If you want a soffit to look like it belongs, it has to be straight and square. That starts with layout lines you trust.
Step 1: Mark the edges
- Mark the soffit outside face on the ceiling (projection from the wall).
- Mark the soffit drop line on the wall (height down from the ceiling).
- Snap chalk lines or use a laser to connect marks across the full run.
In older kitchens, the ceiling might be out of level and walls might be out of plumb. You have to choose what you want to look straight. In most kitchens, I prioritize a soffit that reads straight in the room, even if the ceiling plane is a little off.
Step 2: Square the corners
Any time a soffit wraps an L shape or U shape, I check squareness the same way I square wall frames: measure diagonals. If you need a deeper method, this is the exact approach I use on frames before they ever go up: How to square a wall frame before standing it.
Frame it with a ladder
The cleanest way to frame most kitchen soffits is what many framers call a ladder soffit. It is basically two long rails tied together with short blocks. Light, stiff, and easy to keep straight.
Step 1: Install the wall ledger
Fasten a straight ledger to the wall at the soffit drop height. This ledger becomes your inside support line.
- Hit studs whenever possible.
- If you are on masonry or tile, you may need appropriate anchors. In finished kitchens, I often open a small strip of drywall first so I can hit framing cleanly.
- Keep the ledger dead straight. Shim if the wall bows.
Step 2: Install the ceiling rail
Snap your ceiling line and fasten another straight member to the ceiling along that line. Ideally you are into joists or solid blocking.
- If the soffit runs perpendicular to joists, you will catch multiple joists easily.
- If it runs parallel, you may only hit a joist at a few points. In that case, add blocking between joists where you can, or use a wider rail and fasten at every available joist location.
Step 3: Cut identical ladder blocks
This is where soffits get wavy. If your blocks vary, your face varies. I set up a stop block and cut every piece the same length.
Block length is the clear distance from the wall ledger to the outside face member.
Quick example: if you want a 12 inch projection from the wall, and you are using a 1 1/2 inch wall ledger plus a 1 1/2 inch outside face member, your blocks land at 12 - 1 1/2 - 1 1/2 = 9 inches.
- Dry fit a couple blocks to confirm your math before mass cutting.
Step 4: Assemble the ladder
If the soffit is long but manageable, assemble the ladder on the floor: rail, blocks, rail. Then lift and fasten it in place. If you are working solo or in a tight remodel, you can build it in place one block at a time.
Step 5: Install the outside face
The outside face is what your eye reads, especially from across the room. I like a continuous member along the outside edge, fastened to the ladder blocks, so drywall has a straight line to follow.
Step 6: Add nailers and corner backing
Before you call the framing done, stand back and ask one question: Where do drywall edges land?
- Add a nailer along the wall-to-soffit inside corner if your ledger does not provide enough drywall fastening surface.
- Add backing where the soffit returns into a wall or cabinet line.
- At outside corners, make sure the corner bead will have solid support on both legs.
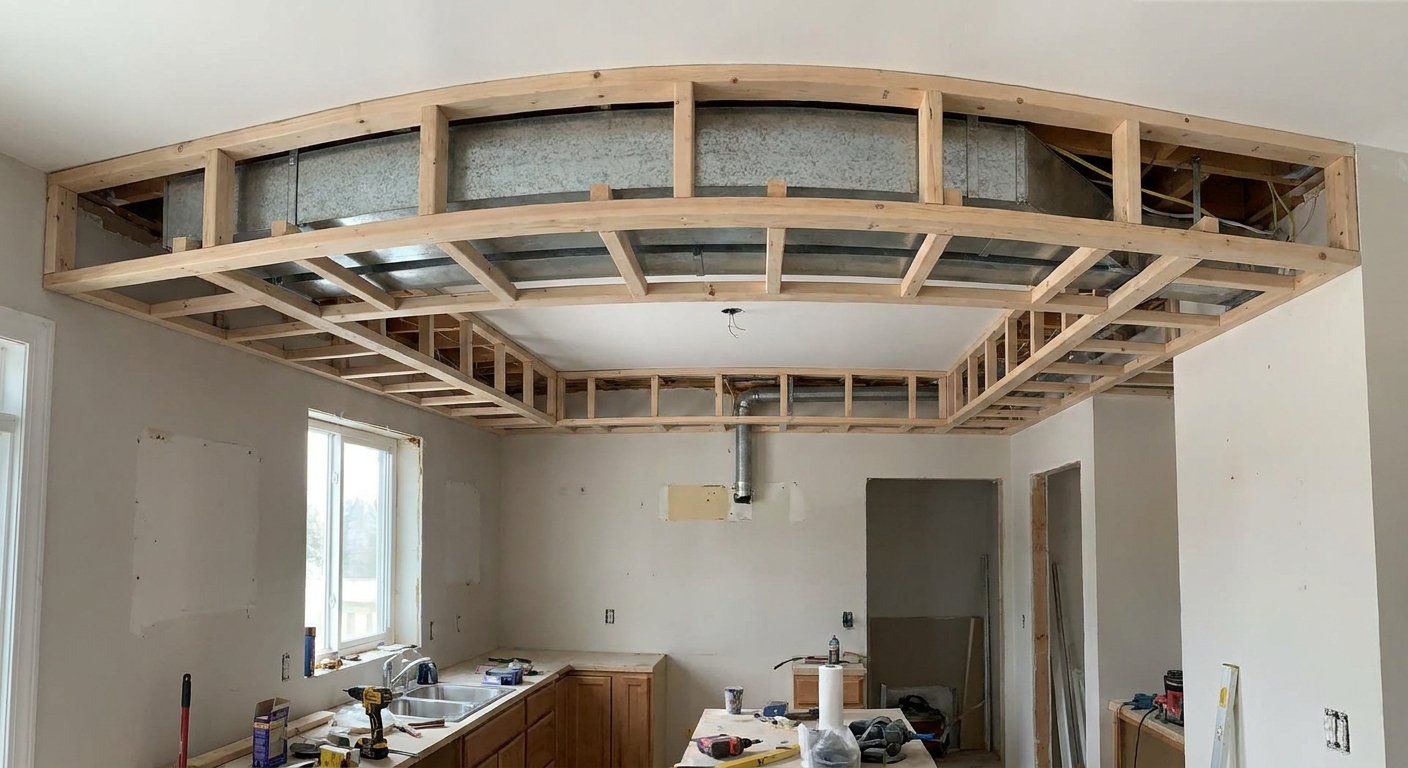
Check straight and square
I do three quick checks while the screws are still easy to back out.
- Sight the outside edge: put your eye down the length of the soffit. If it snakes, fix it now by shimming or pulling the rail straight.
- Check for twist: measure from the wall ledger to the outside face at several points. Consistency matters more than perfection.
- Confirm corner squareness: measure diagonals on any rectangular section. A soffit can be straight but still be out of square at the return, which is where drywall joints love to crack.
HVAC and plumbing details
Ducts sweat, move, and buzz
- Condensation: cold air ducts can sweat. Do not pack framing tight to ductwork, and plan room for insulation or duct wrap if needed.
- Vibration: leave real clearance so duct movement does not telegraph into drywall.
- Service access: if there is a damper, cleanout, or anything you may need later, plan an access panel location now.
Plumbing needs pitch and access
- Drain slope: never force a drain line into a soffit that makes it lose pitch. If a line is already correctly pitched, your soffit has to work around it.
- Cleanouts: keep cleanouts accessible. If your layout lands one inside the soffit, incorporate an access panel.
Fire blocking
Soffits can create concealed cavities, and concealed cavities can trigger fire blocking requirements depending on your local code and the soffit configuration. The common red flags are soffits that connect into stud bays, create long horizontal chases, or run through intersections and dropped ceilings.
I cannot tell you what your inspector will want, but I can tell you the smart move: treat the soffit like a cavity that may need to be blocked at transitions and tie-ins, especially where it meets walls and framing bays. If you want a solid primer on the concept and common locations, I wrote this to help you think like an inspector: Fire blocking in residential framing.
Lighting and vents
A kitchen soffit is prime real estate for lighting, small registers, and hood-related odds and ends. Plan it before you lock in framing.
- Recessed lights: confirm fixture type and clearance requirements, and give the housings solid support. If the soffit is tight, shallow fixtures can save you from a bulky drop.
- Registers and boots: if you are feeding a register through the soffit, plan for the boot, fastening, and any transition to flex duct. Make sure you can still insulate and seal the duct run.
- Wiring and accessibility: route wiring so it is protected and serviceable. If something needs to remain accessible, frame an opening for an access cover instead of burying it.
Drywall-ready details
I have patched enough drywall in my life to know this truth: drywall does not hide framing sins, it highlights them. A few habits make a soffit finish crisp:
- Provide continuous nailing surfaces at outside corners.
- Keep framing members in plane so drywall does not hinge at seams.
- Avoid skinny drywall strips on the bottom if you can. Wider pieces stay flatter.
- Think about cabinet crown and light valances so trim does not fight your soffit geometry.
Common problems
Straight soffit, wavy ceiling
That is normal in remodels. You can either follow the ceiling and look wavy, or keep the soffit straight and deal with a tapered gap at the ceiling. Most of the time, I keep the soffit straight and let the drywall finisher float the joint at the ceiling. If the gap is large, add a small scribe strip or adjust the soffit drop slightly to split the difference.
Cannot hit joists
Open a small exploration strip and add blocking between joists. It is extra work, but it turns a flimsy soffit into a solid one.
Corner will not stay square
Build the return like a small frame, check diagonals, then lock it with gussets or extra blocking. Small, strategic pieces beat more random screws.
Need an access panel
Frame an opening with solid backing on all four sides so the panel has something rigid to fasten to. Put it where you can actually reach it later, and where it will not fight cabinet doors. In kitchens, I also like paintable access panels because they disappear after finish.
Quick build sequence
- Measure the obstruction to your intended finished ceiling plane.
- Pick a drop and projection with clearance for insulation, movement, and service.
- Snap ceiling and wall layout lines.
- Install wall ledger and ceiling rail into framing or blocking.
- Cut identical blocks and assemble the ladder.
- Add the outside face, then nailers and corner backing.
- Do straight, twist, and square checks before you walk away.
Tools
- Tape measure and pencil
- Chalk line or laser level
- Speed square
- Miter saw or circular saw with a stop setup for repeat cuts
- Impact driver and screws
- Stud finder (helpful, not magic)
- Clamps (surprisingly useful when you are working solo)
If you are building out your kit for carpentry projects beyond this soffit, start here: Tools guide. For more projects like this that live in the sweet spot between framing and finish carpentry, browse: Carpentry projects guide.
Safety and sequencing
- Confirm what is live: before screwing into a ceiling or wall, be mindful of electrical runs. If you have doubts, open the surface and look.
- Mind duct edges: sheet metal is sharp. Gloves are not a bad idea.
- Keep serviceable items serviceable: do not drywall over junction boxes, dampers, or cleanouts that need access.
- Work clean: a soffit is a finish-adjacent feature. Keep layout tight and surfaces neat so the next trade does not have to fight your work.