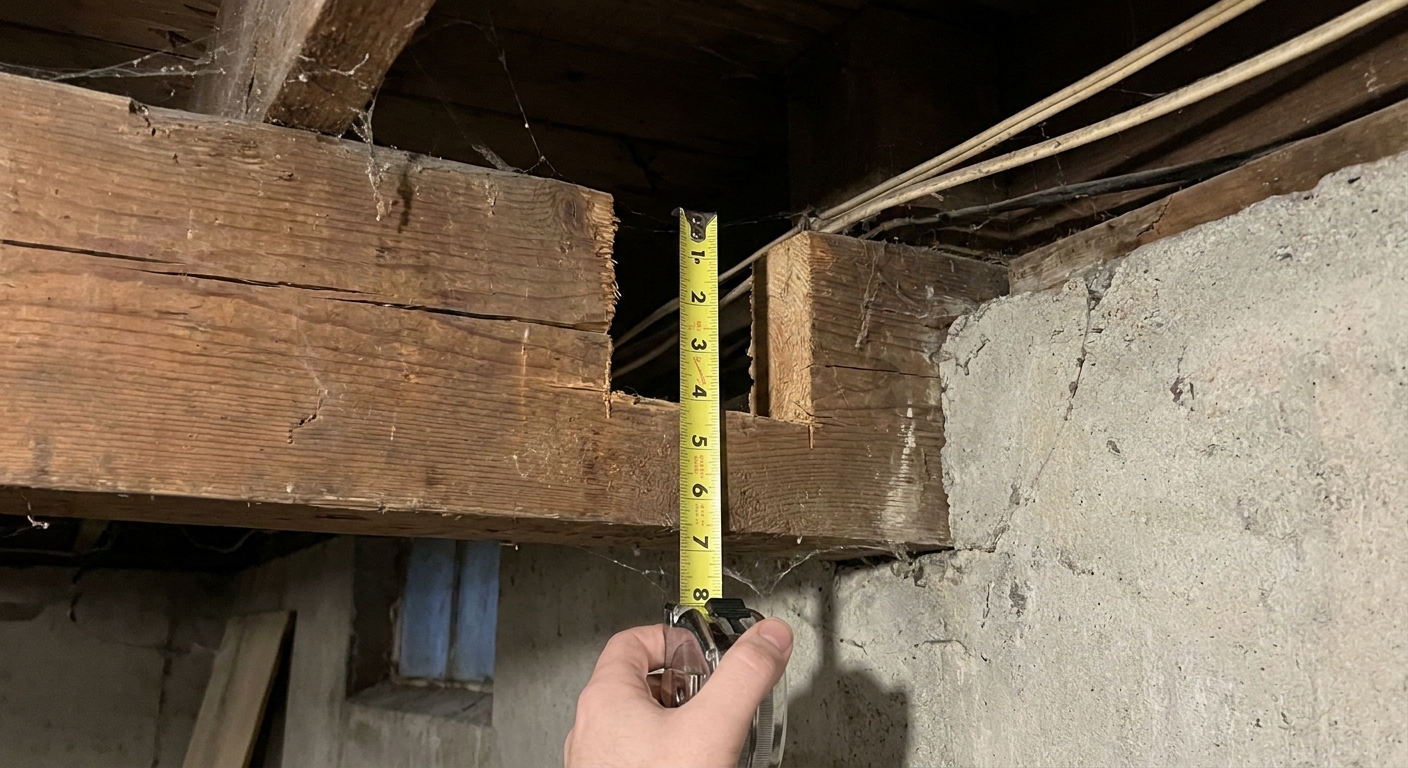
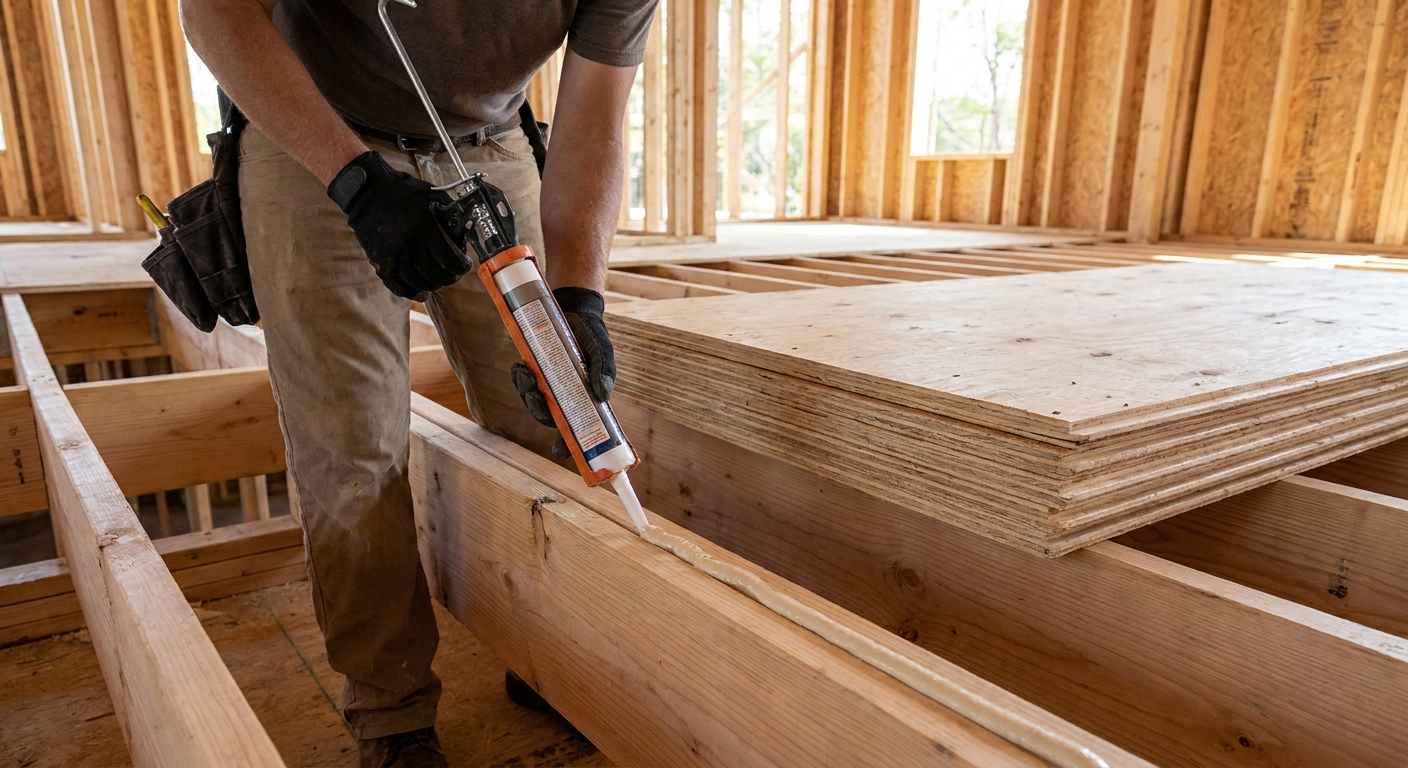
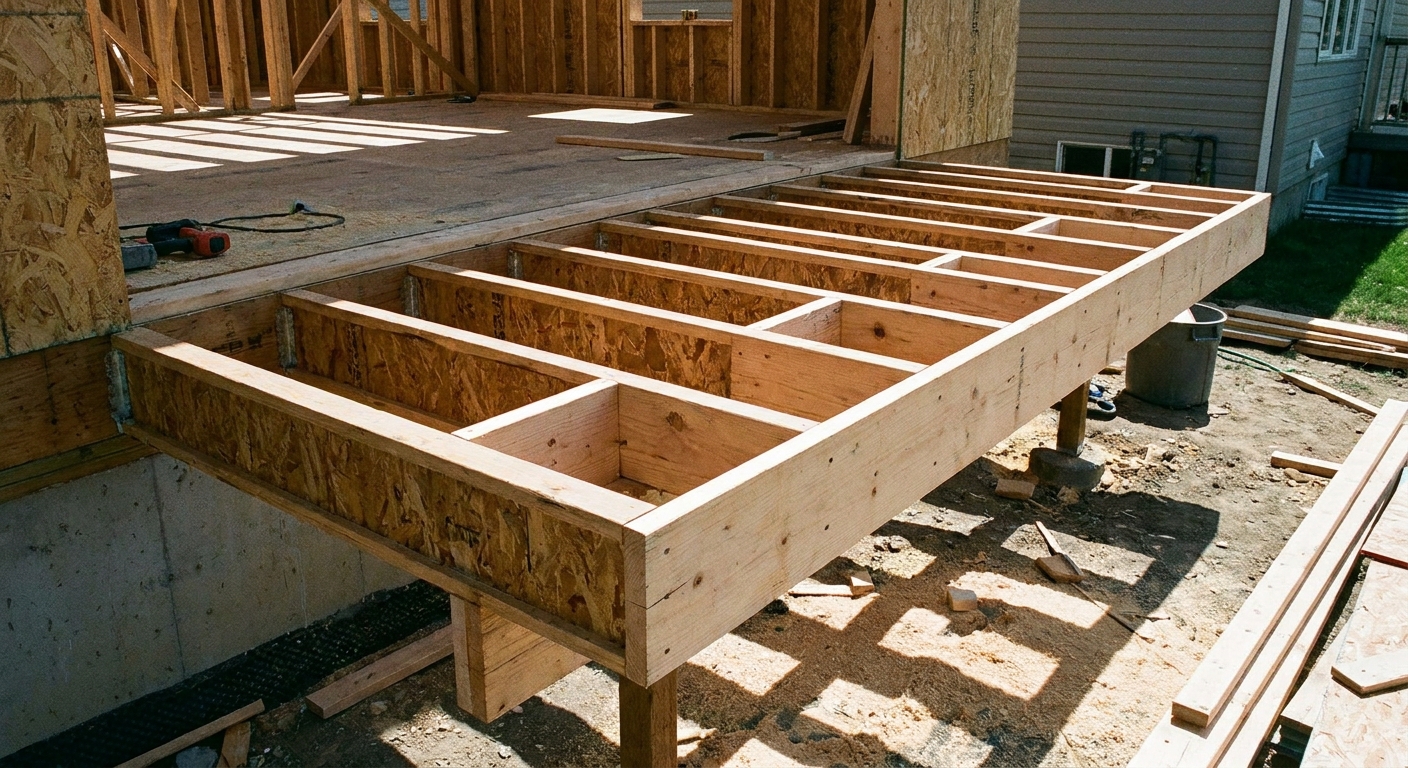
I grew up hearing “measure twice, cut once,” but the older I get, the more I lean on the quieter rule underneath it: support twice, bounce never. A sagging floor usually is not a finish problem. It is the joists telling you they are overstressed, damaged, or simply undersized for the span and load. Sistering joists, fastening a new member tight to the old one, is one of the most reliable ways to stiffen a floor and bring it back where it belongs.
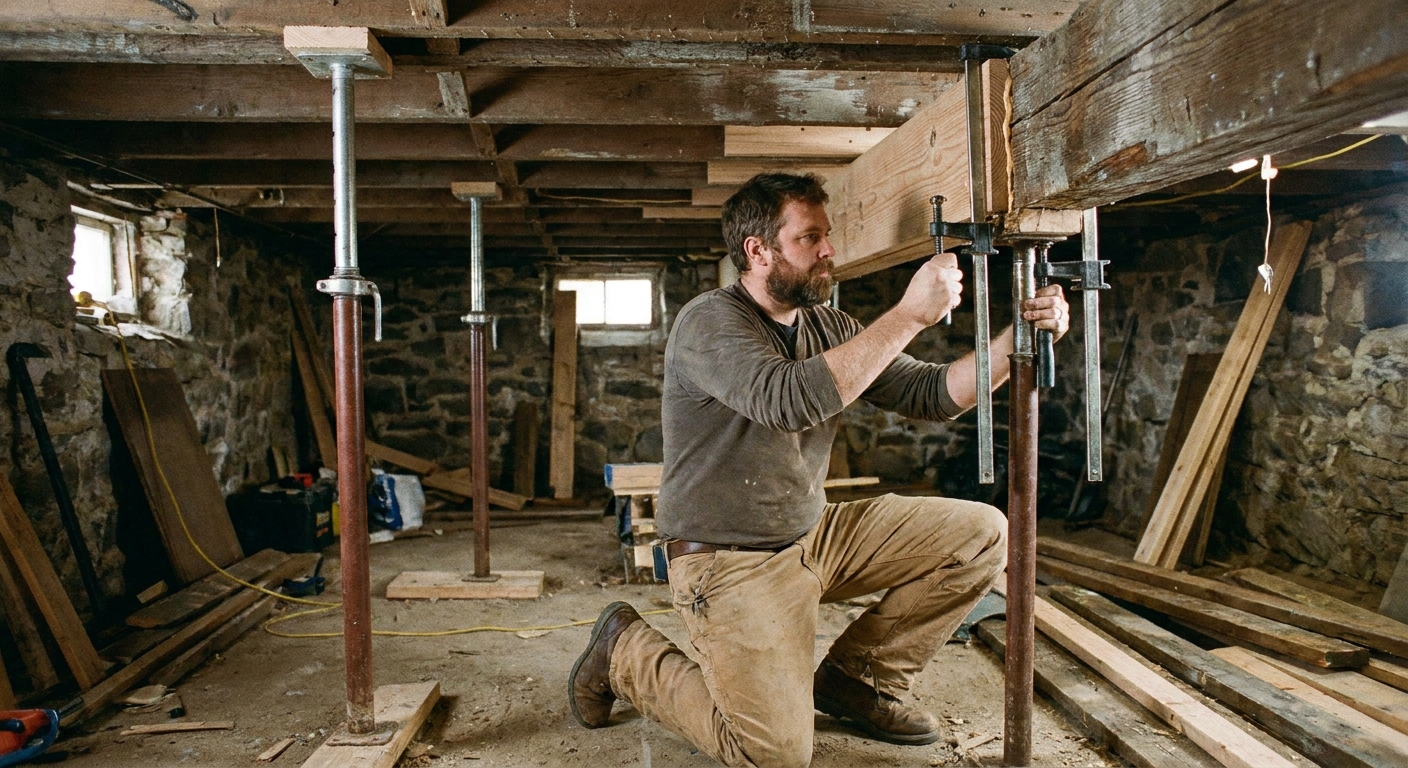
This walk-through covers how I evaluate the situation, how I jack and support the floor safely, and how to attach sisters so they actually share load long-term.
What sistering does
Sistering means installing a new joist member alongside an existing one and fastening them together so the pair acts together and gets stiffer. Done right, it can:
- Reduce bounce and floor vibration
- Flatten a sag (immediately if you jack carefully, with a little spring-back or settling afterward)
- Improve performance of undersized joists, and when the sister has proper bearing or a designed load path, it can also increase capacity
- Reinforce localized damage like notches, holes, or splits
It works best when the existing joist is still mostly intact and you can get a sister installed for a meaningful length. If a joist is rotted through, crushed at the bearing, or the support conditions are failing (settled beam, sinking post, compromised rim), sistering alone is not the fix.
If your main goal is squeak control while you are under there, sistering can help, but you will get a lot of value from tightening the whole floor system. I cover squeak prevention tactics here: /prevent-floor-squeaks-before-the-subfloor-goes-down/.
Safety flags
Floors carry people, furniture, appliances, and sometimes point loads you cannot see from below. Before you start jacking and fastening, take a breath and look for conditions that deserve a structural engineer or experienced contractor.
Stop and get help
- Active rot, mushrooms, spongy wood, or moisture sources you cannot control
- Termite or carpenter ant damage
- Joists cut or drilled incorrectly near midspan or in clusters
- Cracked or shifting foundation near the sagging area
- Multiple joists sagging over a beam line (could be a failing girder or post)
- Tile or plaster above that could crack if you lift too aggressively
- Engineered joists (I-joists, LVL, trusses) with damage or modifications. These often require manufacturer-specific repair details, not the same sistering approach as sawn lumber.
If you do proceed, wear eye protection, a respirator for dusty crawlspaces, and gloves. Keep your hands clear of pinch points when you are jacking or clamping.
Tools and materials
You do not need exotic hardware, but you do need the right mix of support, clamping, and fastening.
Tools
- Tape measure, pencil, straightedge
- 4 to 6 foot level or a tight stringline
- Hydraulic bottle jack or floor jack
- Temporary support: 4x4 posts and a 4x6 or doubled 2x beam (depends on access)
- Bar clamps or pipe clamps long enough to pinch joists tight
- Circular saw or miter saw
- Drill and bits for pilot holes if using structural screws or bolts
- Impact driver (optional but helpful)
Materials
- Sister lumber matching depth of existing joists whenever possible (same nominal size and species grade if you can)
- Construction adhesive rated for subfloor or framing (polyurethane or advanced polymer)
- Fasteners (choose one system and do it well): structural screws, through-bolts with washers, or nails in a proper pattern
- Blocking material if you plan to add solid blocking or bridging
If you are deciding between nails and screws for the fastening portion, I have a deeper nailer breakdown here: /cordless-vs-pneumatic-framing-nailers/.
Step 1: Find the cause
I like to confirm the problem from both sides: above (floor surface) and below (framing).
From above
- Find the low spot with a long level or straightedge.
- Mark the sag zone with painter’s tape so you can line it up with framing below.
- Note what sits there: bathtub, kitchen island, piano, packed bookcases.
From below
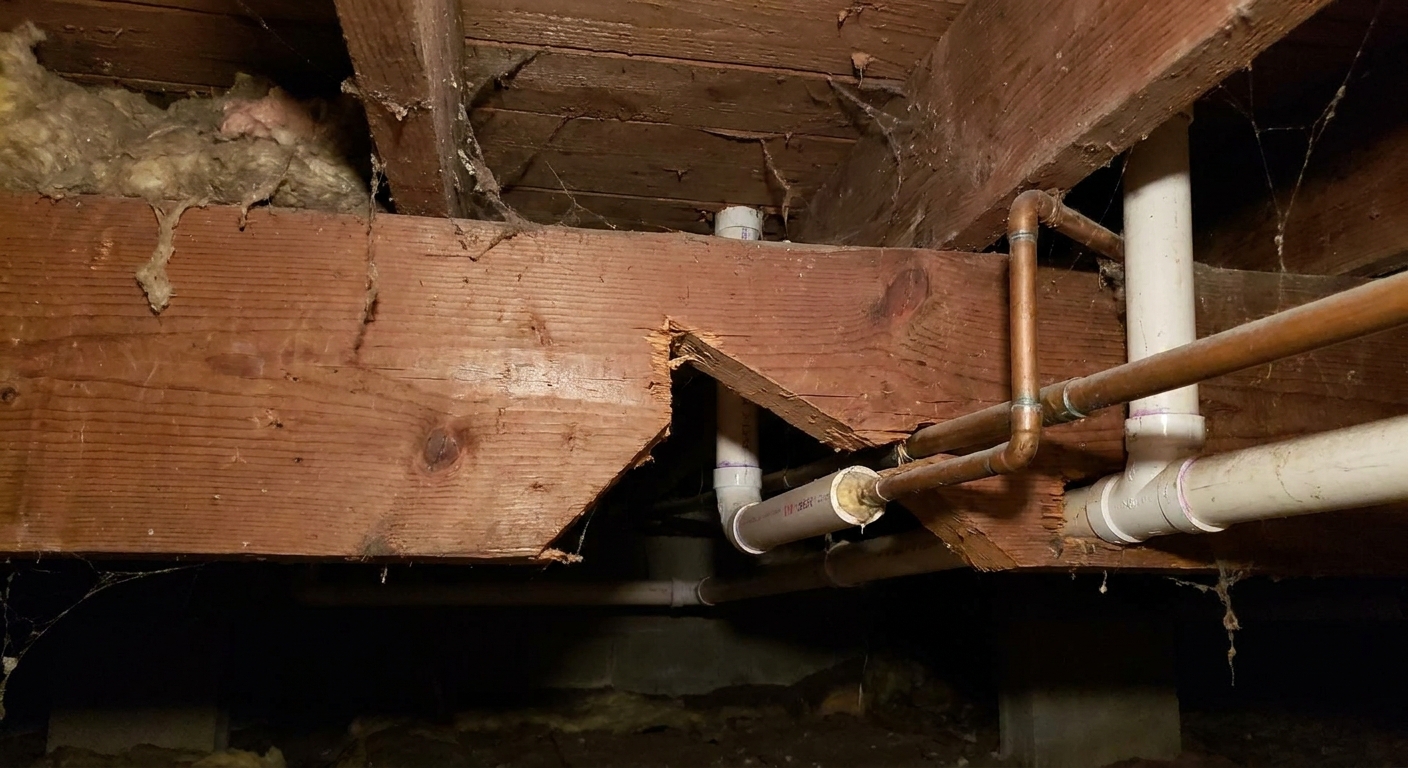
- Check for crowned down joists, splits, big knots, water staining, or insect channels.
- Look for bad notches or oversized holes. A single bad cut can weaken a joist fast.
- Confirm joist size, spacing (often 16 inches on center), and span between supports.
- Inspect bearings: are the joists fully seated on the beam or ledger, or are they hanging by a sliver?
If the sag lines up with a beam or post location rather than midspan, you may be looking at a support settlement issue, not a joist-only issue.
For rules-of-thumb on floor framing members and why engineered options behave differently than dimensional lumber, see: /dimensional-lumber-vs-engineered-i-joists-for-floor-framing/.
Step 2: Pick a sister plan
There is more than one way to sister a joist. The best choice depends on access, wiring and plumbing, and how much improvement you need.
Full-length sister
A sister that runs bearing to bearing, sitting on the same supports as the original joist, is the gold standard. It maximizes stiffness and load sharing, and it is also the best path to improving capacity because the new member can actually participate at the supports.
Midspan sister
If you cannot get full bearing at each end, aim for as much length as you can, centered on the sag. As a practical field heuristic, I try to cover most of the middle of the span (often around two-thirds to three-quarters if access allows). This is very effective for reducing bounce and deflection where the joist works hardest. Just understand that a midspan-only sister is primarily a stiffness fix unless the load path at the ends is addressed.
Patch sister
If you are reinforcing around a notch, hole, or split, you can sister a shorter piece that extends well past the damaged zone. In practice, I still try for several feet beyond the issue on each side. The goal is to move stress away from the weak area.
Double sistering
Sometimes one sister is not enough, especially under concentrated loads. If you have room, sistering both sides or adding a new joist between existing ones can make a dramatic difference, but it also starts to overlap with “redesigning the floor system,” which may deserve engineering input.
Step 3: Support and lift
You cannot make two joists act together if the old joist is still hanging in a sag while you fasten the new one. Get the floor supported and as close to true as you can, safely.
Set temporary supports
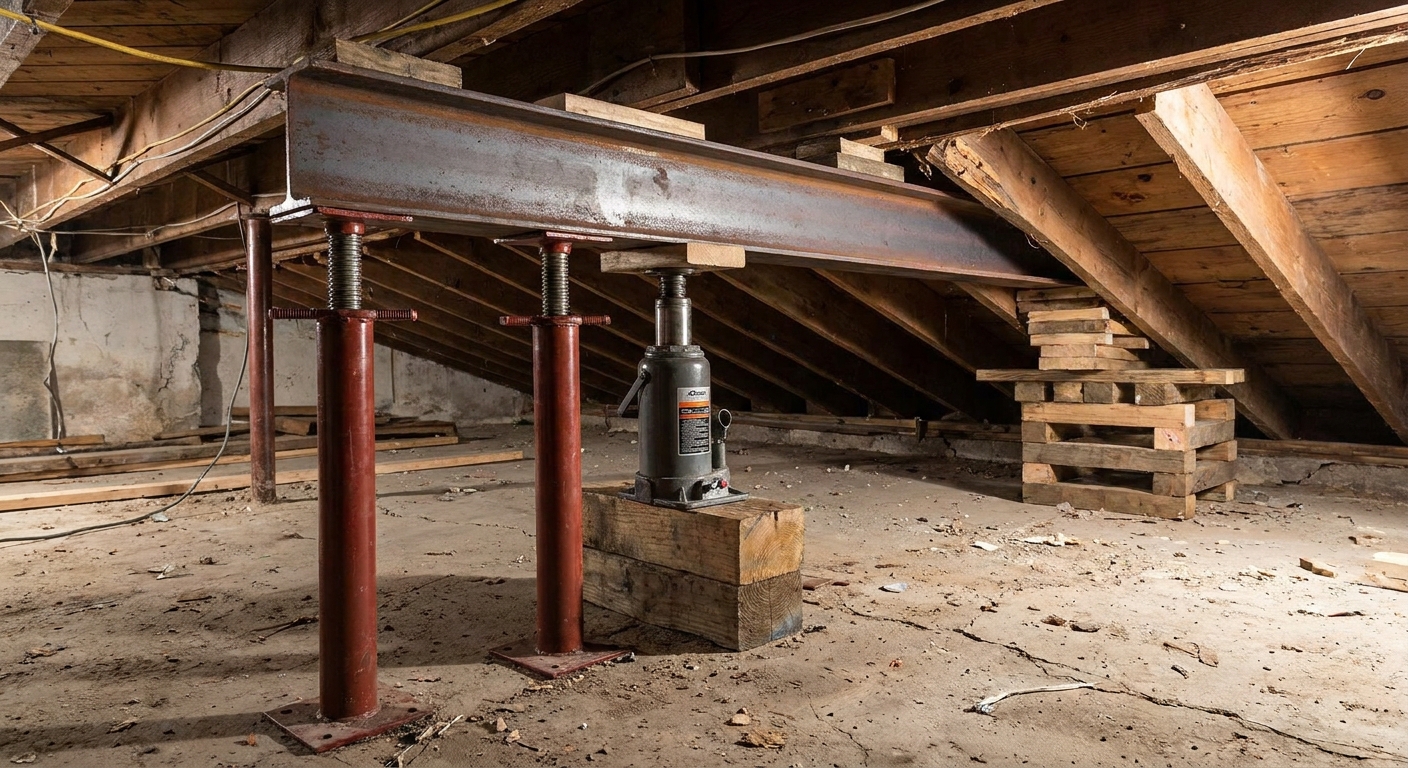
- Clear the area below the sag.
- Set a temporary beam perpendicular to the joists, spanning across multiple joists.
- Use a jack and solid posts on a stable footing. Do not jack on dirt without a proper pad.
- Keep your cribbing stack straight, plumb, and stable. If anything wants to kick out, stop and reset it.
Lift slowly
Here is my rule: lift in small increments and give the building time to respond. If you are trying to remove a long-standing sag, especially under brittle finishes like tile or plaster, take it slow over hours or days. A little lift, a pause, another little lift. For many floors, even getting half the sag out plus adding stiffness is a win.
One more safety note: adjustable steel posts can be fine for temporary shoring, but do not treat a jack or a light-duty post as a permanent fix unless it is properly rated and installed on a real footing. If you need a new permanent support, that is a different scope than sistering.
Once the joist line is close to where you want it, lock your temporary supports in place. You want the joist stable while you apply adhesive and fasteners.
Step 4: Fit the sister
A sister that does not fit tight will not share load well. I want contact along the top edge, tight to the subfloor, and I want the ends to land clean.
Pick your lumber
- Choose the straightest boards you can find. Sight down them in the store or yard.
- Match depth to the existing joist. If the existing joist is a true 2x10, do not bring in a 2x8 and hope fasteners make up the difference.
- Pay attention to crown. Install the sister with crown up, same as the joist layout should be.
Work around obstructions
Wires and pipes are usually what turns a full-length sister into a partial sister. If you can safely temporarily move wiring or remove blocking, do that instead of cutting big notches in your new sister. Avoid cutting the sister unless you know the rules and you have no other option.
Test-fit first
Dry fit the sister into place. Check:
- It sits tight to the subfloor along the top edge.
- It does not rock on a hump or debris.
- It clears plumbing and ductwork without forcing contact that could squeak or rub.
Step 5: Glue and clamp
This is where sistering stops being “two boards near each other” and starts behaving like one stiffer unit.
Before you open the adhesive, plan your sequence. Dry-fit, mark your sister position, stage your clamps, and pre-drill where you think you might split the ends. Then commit: adhesive, clamp, fasten.
Apply adhesive
Run a continuous bead of construction adhesive along the face of the existing joist where the sister will contact. I also like a bead near the top edge to encourage tight contact with the subfloor when clamped. Adhesive is not magic, but it helps limit slip and helps the pair act together.
Clamp for contact
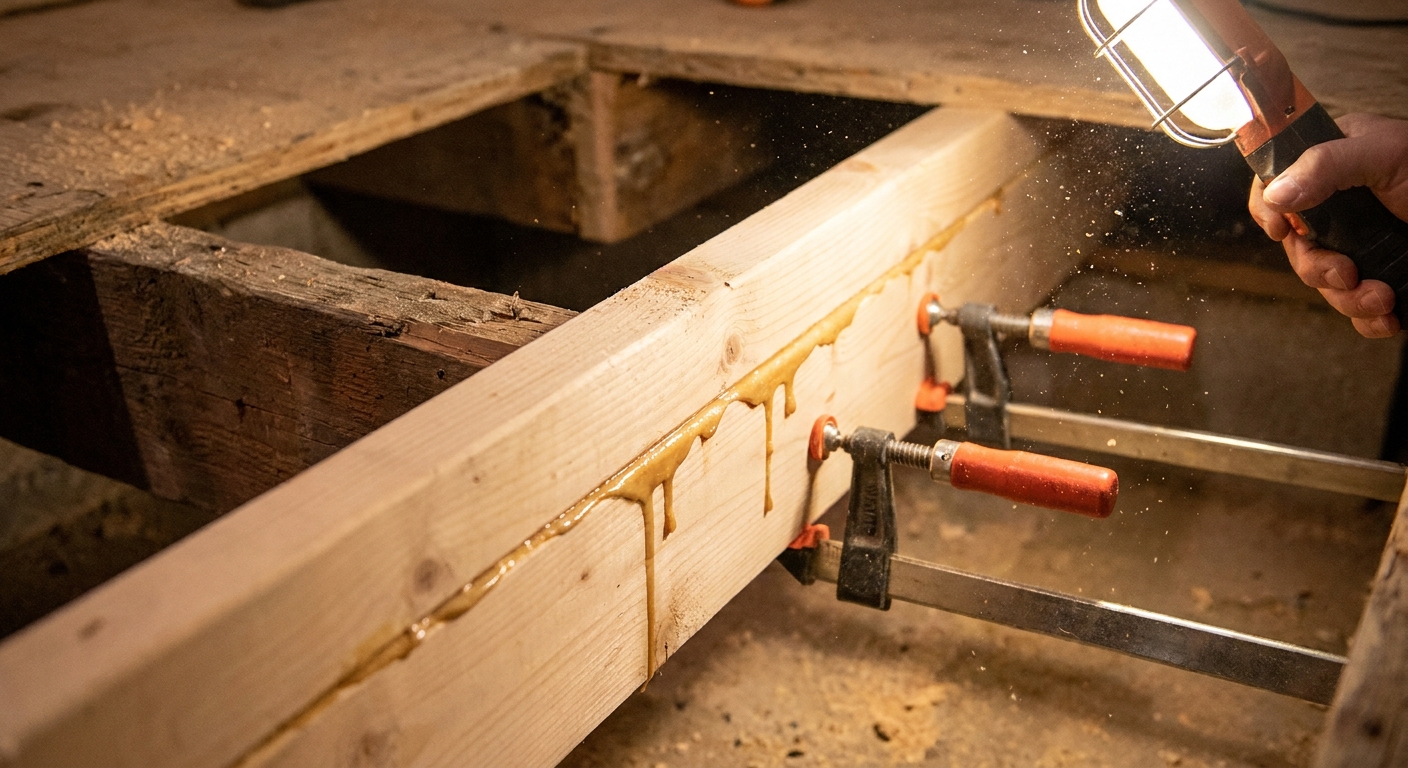
Use clamps to pull the sister tight. Start at midspan and work outward. Watch for gaps. If you see a gap, fix the fit now, because no screw pattern will pull a badly warped board into perfect contact without consequences.
Step 6: Fasten it right
You will see a lot of opinions on nails versus screws versus bolts. My practical take is this: use a fastening schedule you can execute consistently, and prioritize tight contact and adequate length of sistering. Fasteners are the clamps that stay behind.
Good options
- Structural screws (commonly 3 to 4 inches depending on member thickness). Strong, controlled, great for tight spaces.
- Through-bolts with washers and nuts. Excellent clamping force, slower install, needs access to both sides.
- Nails (framing nails) in a dense, staggered pattern. Fast and traditional, best with a nailer and good access.
A practical pattern
For a lot of residential sister jobs, I use a staggered pattern up and down the joist face, roughly every 8 to 12 inches along the length, keeping fasteners away from the very top and bottom edges to reduce splitting. Add a few extra near each end of the sister.
That said, fasteners vary a lot by brand and size. When you are using structural screws or specialty fasteners, follow the manufacturer schedule or engineered details when available. Think of the pattern above as a common field approach, not a substitute for specs.
Pre-drill near ends of dimensional lumber if you are seeing splits starting, especially with structural screws.
Avoid end-only fastening
Fastening only at the ends does not create load sharing through the span. The floor may still bounce because the members are not really working together. Spread fasteners along the length.
Step 7: Check and stiffen
After fastening, recheck the floor line with your level or string. If you lifted the sag with a jack, keep the temporary support in place until adhesive cures per the product instructions.
Blocking and bridging
Depending on your floor system, adding solid blocking or proper bridging can help distribute loads and reduce twist. Blocking is also a great time to add intentional backing for future loads.
If you are already opening ceilings or walls and want to plan for future grab bars, cabinets, or heavy mounts, I’m a big believer in proactive blocking: /strategic-in-wall-blocking-for-cabinets-grab-bars-and-tvs/.
Holes and notches
Most of the “mystery sag” jobs I see have one thing in common: somebody cut the joists like they were fence boards.
Codes and engineered joists can change the details, but here are safe, general rules-of-thumb for typical sawn lumber joists:
- Avoid notches in the middle third of the span. Midspan is where bending stress is highest.
- Keep holes out of the top and bottom edges. The outer fibers do the heavy lifting in bending.
- Do not stack problems. Multiple holes, clustered holes, or a hole plus a notch in the same area is where joists get in trouble.
- Near bearings is sensitive. Notches or damage close to where the joist sits on a beam or wall can be a serious strength hit.
If you are dealing with I-joists or other engineered members, do not apply these rules blindly. Those products have manufacturer hole charts and repair details for a reason.
Special cases
Plumbing in the way
If the pipe prevents a full-length sister, a longer midspan sister is often the best compromise. Avoid hacking a big U-notch out of the sister to “make it fit.” That defeats the purpose.
Electrical on the joist
Shut off power at the breaker, free the wire carefully if you need to reposition it, and protect it from sharp fasteners. If you are not comfortable working around wiring, call an electrician. It is cheaper than a fire.
Bad notch or hole
Place the sister so it spans well beyond the damaged area. The sister should become the primary path for bending stresses through that zone. If the notch is severe or near a bearing point, consider professional guidance. Bearing damage is not forgiving.
How much it helps
In plain language, sistering increases stiffness because you are effectively thickening the joist. If your sister is full-depth, well-bonded, and well-fastened, you can feel the difference underfoot. The biggest gains come from:
- Length (long sister, especially through midspan)
- Fit (tight to the subfloor and tight to the existing joist)
- Load sharing (good fastening, and adhesive when appropriate)
If your goal is increasing load capacity for a remodel, it is smart to confirm what loads you are adding. A new tile shower, a large tub, or a kitchen island can change the game. Capacity work is where bearing, connections, and the bigger load path matter.
Mistakes I see
- Jacking too fast and cracking finishes above.
- Sistering a sag without lifting it, locking the bend into the new work.
- Using a warped sister that never makes full contact.
- Skipping adhesive and relying on a few screws or nails.
- Over-notching the sister to work around pipes or ducts.
- Fastening only at the ends instead of along the length.
FAQ
Do I need to sister every joist?
Not always. If the sag is localized to a few joists, sister those first. If the whole floor is bouncy across a wide area, you may need to sister multiple joists or look at adding a beam or reducing span. The framing is a system.
Can I sister with plywood?
Plywood flitch plates can work in some designs, but it is easy to do poorly. For most homeowners and DIY remodelers, dimensional lumber sisters are more straightforward and more forgiving. If you are considering engineered solutions, verify compatibility with your existing system.
Should the sister sit on the same supports?
When possible, yes. Full bearing at each end is ideal. When it is not possible, a long sister centered on midspan can still add significant stiffness.
How long should I keep the jack in place?
At minimum, until the adhesive has cured enough to hold the members together per the product instructions. If you are lifting a long-standing sag slowly, you may keep temporary supports longer while you bring the floor back in stages.
Keep it honest
A sistered joist should not feel like a trick. It should feel like a quiet correction. The floor gets flatter, the bounce calms down, and the structure stops complaining. Take your time on support and fit, fasten with intention, and you will get a repair that holds up for the long haul.
If you want more project walk-throughs in this same nuts-and-bolts style, start here: /guide-carpentry-projects/.