

I have hung plenty of interior doors that felt cursed until you pull the casing and discover the real problem: the rough opening is racked. Not a little. Enough that you can make the hinge-side jamb plumb or the head level, but never both at the same time. If your door won’t latch, swings open on its own, or shows a wedge-shaped reveal at the head, this is where you stop fiddling with shims and fix the framing.
This is a home repair that feels intimidating because it is “framing,” but the goal is simple: get two studs dead plumb, get the header level, and make the opening the right size for the prehung door you are installing. Once the rough opening is honest, the door install becomes boring, which is exactly what you want.
This walkthrough is for typical interior prehung doors in wood-stud walls. Masonry, steel-stud, and commercial frames are a different animal and need different tactics.
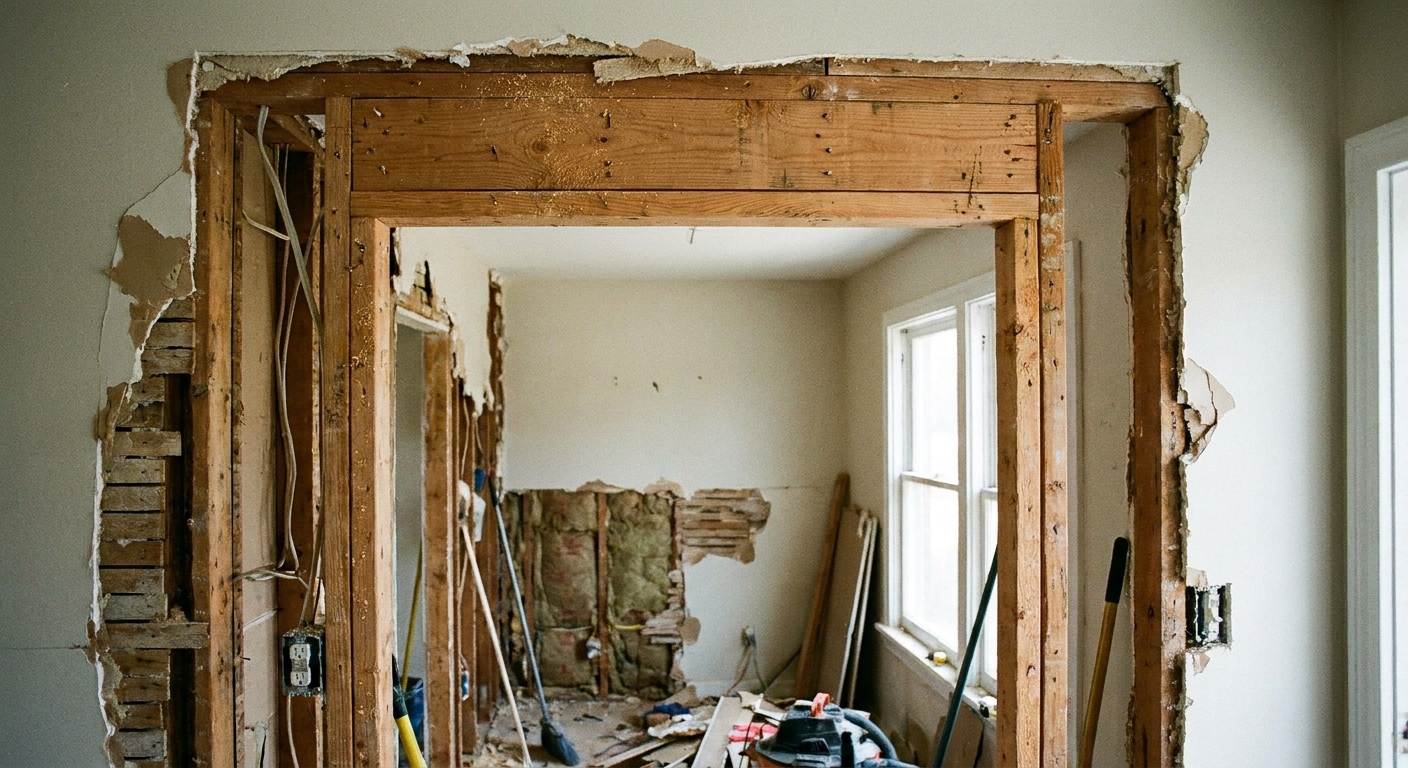
Know when the rough opening is the problem
Before you start tearing trim, confirm you are not chasing a door slab issue (warped slab, loose hinges, swollen edge from moisture). A rough opening that is out of square usually shows up like this:
- Uneven reveal between door and jamb, especially at the head.
- Door swings open or closed on its own because the hinge-side jamb cannot be set plumb.
- Latch misses the strike even after hinge tweaks and strike plate adjustments.
- Casing gaps at one corner, or casing that had to be “forced” tight during install.
- Diagonal measurements differ across the opening.
If the wall itself is out of plumb (common in older homes), you can still hang a good door. What you cannot do is hang a good door in a rough opening that is racked and undersized, or where the jack studs are not supporting a level header.
Tools and materials I actually use
- Flat bar and a thin pry bar (or a stiff putty knife) for trim removal
- Utility knife for scoring paint caulk lines
- 4-foot level (6-foot is even better) and a torpedo level
- Tape measure
- Framing square or speed square
- Clamps (optional but handy)
- Shims
- Reciprocating saw or oscillating tool (for nails and drywall edges)
- Hammer and cat’s paw
- Framing nails or structural screws (I like screws for controlled pulling)
- Wood for sistering or replacement jacks if needed
If you want a refresher on laying out stud spacing cleanly once you start moving wood around, I cover common pitfalls here: Avoid Mistakes Laying Out 16 Inch OC Studs.
Step 1: Strip the doorway down to what matters
Remove the door unit and casing
- Pull the door slab by popping hinge pins, then remove the jamb if it is a prehung unit already in place.
- Score paint and caulk at casing and baseboard joints so you do not tear drywall paper.
- Pry casing carefully. I start with a thin tool to break it free, then switch to a flat bar. Work toward studs, not into open drywall.
Open the drywall only as far as needed
Before you cut drywall, think about what is in the wall. Switches and receptacles love to live near doors, and wires can run vertically in the stud bay. If you are not sure, kill the circuit and cut shallow until you can see what you are dealing with.
You need to see the king studs, jack studs, and header connections. Typically that means exposing at least 6 to 12 inches around the opening on both sides, up to the underside of the header. Make your cuts clean and straight so patching is painless.
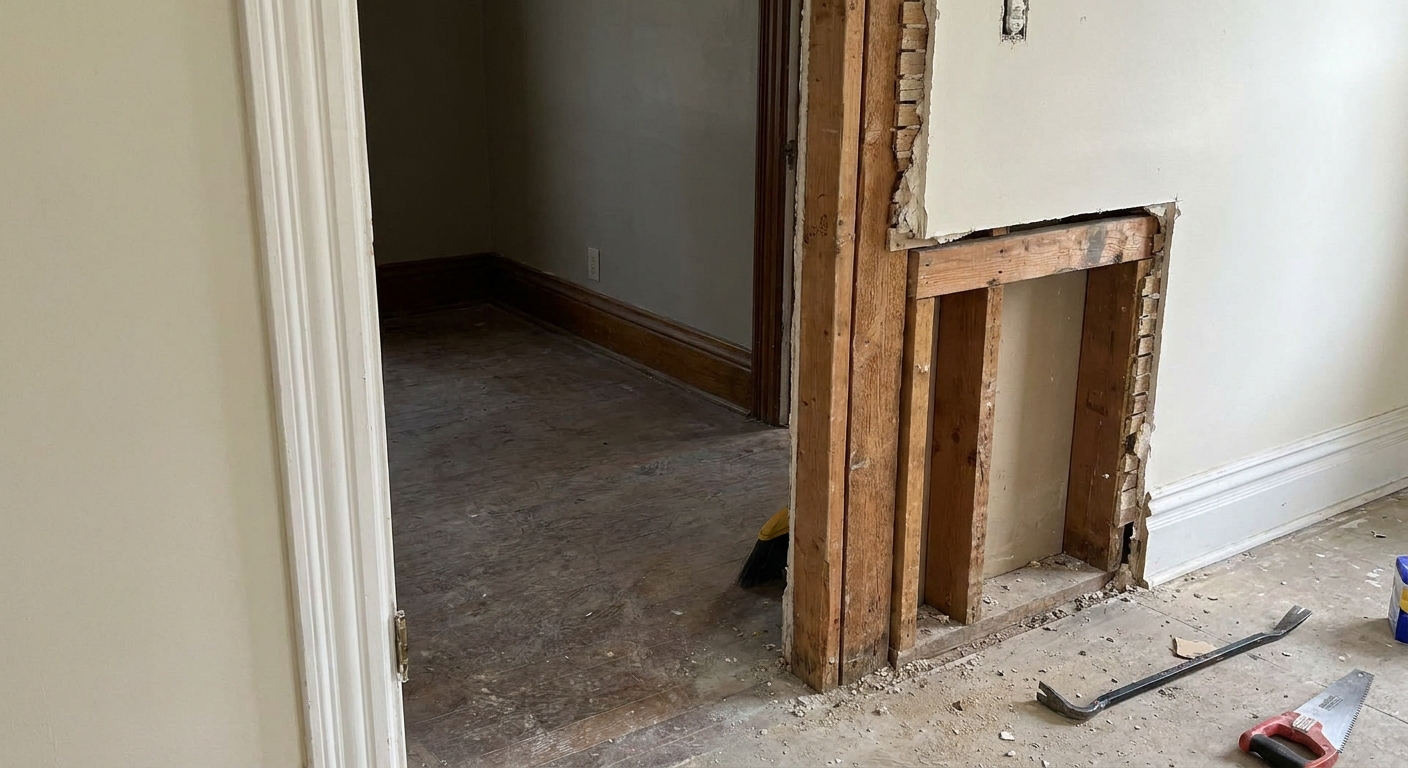
Step 2: Measure the opening like a framer, not like a trim carpenter
With the opening exposed, take five measurements and write them down:
- Width at the bottom between jacks
- Width at mid-height
- Width at the top just under the header
- Height left (floor surface to underside of header)
- Height right
Then measure diagonals corner to corner. If the diagonals are different, the opening is racked.
A quick flooring reality check: in new work you are often measuring from subfloor. In remodels, you might be measuring from finished floor, or from subfloor with new flooring planned. That changes the effective rough opening height. Decide what the final floor height is going to be before you lock in the header height.
Target rough opening sizes (typical interior)
For many prehung interior doors, a common rule of thumb is:
- Rough opening width = door size + 2 inches (sometimes +1 1/2 inches depending on the unit)
- Rough opening height = door height + 2 to 2 1/2 inches (sometimes tighter if flooring is already installed)
Example: a 30 x 80 door often wants roughly a 32-inch wide by 82 to 82 1/2-inch tall rough opening. Manufacturers vary, so look for the spec tag on the jamb or the paperwork for your specific unit and build to that.
If your rough opening is too tight, you end up crushing shims, twisting jambs, and fighting the slab forever. If it is too loose, you can still shim it properly, but you need a stable framing edge to shim against.
Step 3: Identify what is actually wrong
There are a few repeat offenders that create a wonky opening:
- One jack stud is crowned or bowed, pushing the jamb.
- Header is not level because one jack is shorter, not bearing tight, or the framing has settled.
- One side is not plumb because the king or jack was nailed in racked.
- Uneven bearing above (settlement, poor contact, or sloppy cuts) telegraphs into a sagging or tilted header.
- Previous “fixes” like drywall shims, random blocks, or wedge stacks behind the jamb.
Quick check: put your 4-foot level on each jack stud face. If the hinge side jack is not plumb, that alone can ruin a door install.
Step 4: Re-frame the opening so it is plumb, level, and the right size
Loosen the structure first
If the studs are nailed hard to the plates and header, you cannot “persuade” them much without splitting something or tearing drywall farther out.
- Remove nails or cut them with a recip saw where the jack meets the header and where the jack is nailed to the king.
- Check for fasteners through the drywall edge into the stud pack and remove them.
Interior openings vary a lot. Some non-load-bearing partitions have a simple flat 2x as a “header,” some have a doubled member, and some are framed in a way that makes you scratch your head. Do not assume it is non-structural just because it is inside the house.
Make the hinge side your control side
I like to establish the hinge side as the “truth” and build everything else to it:
- Select the straighter stud pack to be the hinge side if you have a choice.
- Set the hinge-side jack plumb. Use your level and a couple of temporary screws into the king to hold it where you want it.
- Verify the face plane. The jack and king faces should be in the same plane so your jamb sits flat without rocking. I use a straightedge or a level across both faces. If one stud is proud, plane it. If one is back or bowed, sister a straighter stud or adjust the pack so the jamb has a flat landing.
If the hinge side king is bowed, do not be afraid to sister a straighter stud alongside it, especially if you need a dead-flat nailing surface for casing later.
Level the header by adjusting jack height
With the hinge side plumbed, check the header for level. If the header is out of level, you fix it at the jacks:
- If one jack is too tall, you can trim it (best done by removing and cutting it cleanly) or replace it.
- If one jack is too short or not bearing tight, replace it or sister a full-height jack next to it that bears tight to the header.
A jack stud that is not bearing tight under the header is a long-term problem. Shims under a jack can be acceptable in a pinch for an interior non-load-bearing opening, but they are not a structural fix for a load-bearing condition. If there is any chance the opening is carrying load, make the wood fit, full contact, no shortcuts.
Square the opening by moving the latch-side jack
Once the hinge side is plumb and the header is level, bring the latch side into position:
- Set the latch-side jack plumb.
- Set the width to the rough opening target for your door.
- Check diagonals. Push or pull the latch-side jack at the top until diagonals match, then fasten.
If the opening wants to spring back out of square, it usually means something else is holding tension: nails you missed, drywall still bonded to the stud, or a bowed king that is fighting you.
Fasten like you mean it
When you are happy with plumb, level, and width:
- Fasten jack to king with a consistent, staggered pattern. As a practical example, I will run pairs of nails or screws every 12 to 16 inches, staying back from edges to avoid splitting.
- Fasten jack to header so it stays bearing tight.
- Add solid blocking if you need more nailing for drywall edges or if the stud pack feels flimsy.
If you are using screws, use structural screws rated for framing and follow the manufacturer schedule. The goal is simple: keep the opening where you set it.
If you want more on clean, strong blocking strategies that also make trim and future upgrades easier, see: Strategic In-Wall Blocking for Cabinets, Grab Bars, and TVs.
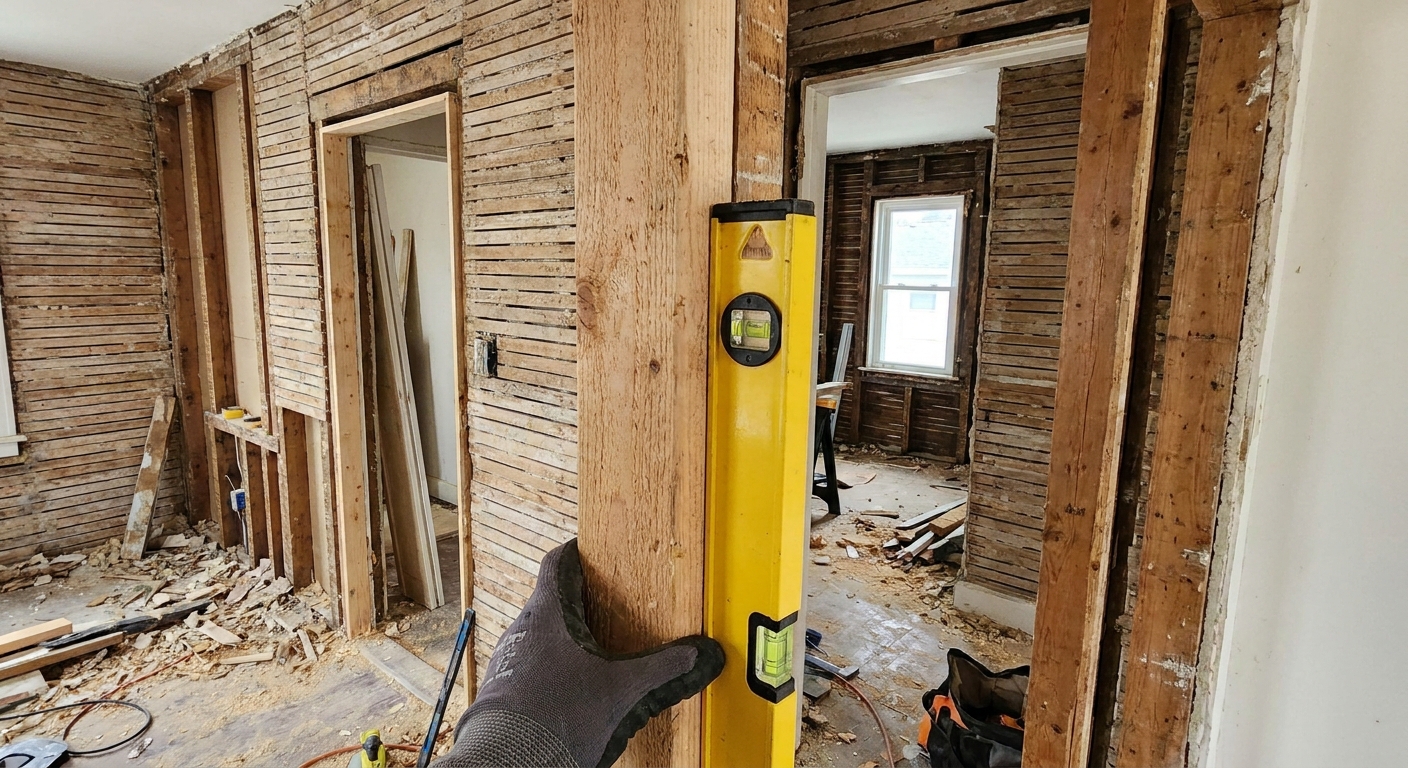
Step 5: Dry-fit the prehung door before you close the wall
This is the moment that separates “patched twice” from “patched once.” Before you put drywall back, test the door unit in the rough opening.
- Set the prehung unit in place with a couple of shims under the jamb legs to get the head at the right height.
- Shim the hinge side first and get it plumb.
- Check the reveal at the head and along the latch side.
- Swing the door. It should move smoothly and stay where you leave it.
If you are fighting the shims, stop and re-check the framing. You are still in the cheap-fix stage. Once drywall and casing go back on, every correction gets slower.
For a related framing skill that pays off anytime you are correcting racked openings and crooked walls, this walkthrough is worth a read: How to Square a Wall Frame Before Standing It.
Common problems and clean fixes
The floor is out of level
An out-of-level floor can make the door look wrong even when the jamb is plumb. In that case, keep the hinge jamb plumb and let casing and baseboard hide small sins. Do not sacrifice plumb to chase a floor that is already baked in.
The wall is out of plumb
Same idea. A door should be installed plumb. If the surrounding wall leans, your casing reveal may vary slightly. That is trim work, not a reason to twist the frame.
The opening is too narrow
If you are short by less than about 1/4 inch, you can sometimes plane the jack face or remove drywall build-up. If you are short by more, the real fix is moving a jack or replacing the stud pack. Forcing a prehung into a tight opening is how jambs get bowed and doors end up rubbing.
Header or studs show damage
If you find rot, insect damage, or a stud that is badly split, replace it. I have a deeper repair mindset for compromised framing here: Structural First Aid for Over-Notched Studs and Joists. Different cause, same principle: restore a straight, solid load path.
Patch and prep for trim without reintroducing the problem
After the rough opening is corrected and the door dry-fit checks out:
- Patch drywall with clean backing strips and keep the drywall edge from bulging into the opening.
- Do not pack joint compound onto the framing edge where it will interfere with the jamb.
- Reinstall casing after the door is shimmed, fastened, and operating correctly.
When I am working in older homes, I like to leave myself a little extra casing “forgiveness” by keeping trim consistent and avoiding proud drywall edges. The door deserves a flat landing.
Safety and when to call in help
If you suspect the opening is load-bearing, or you see cracking, sagging, or crushed wood around the header area, treat it as structural until proven otherwise. Do not start cutting nails and pulling jacks without supporting what might be above. Interior openings can be load-bearing depending on the layout above.
If you are unsure, this is the right rabbit hole to go down before you touch the framing: How to Frame a Load-Bearing Wall in a Remodel.
If you are dealing with a larger, heavier unit or anything exterior, the framing requirements step up quickly. For that scenario, I keep a separate set of best practices here: Framing Rough Openings for Heavy Exterior Doors.
Quick checklist: a rough opening that will hang a perfect door
- Hinge-side jack is plumb
- Latch-side jack is plumb
- Header is level
- Rough opening width matches the door’s requirement
- Diagonals match (opening is square)
- Stud faces are in plane so jamb sits flat
- Dry-fit confirms smooth swing and even reveal
When all of that is true, the install turns into basic shimming and fastening. No guessing, no heroic hinge bending, no living with a door that never quite feels right.