

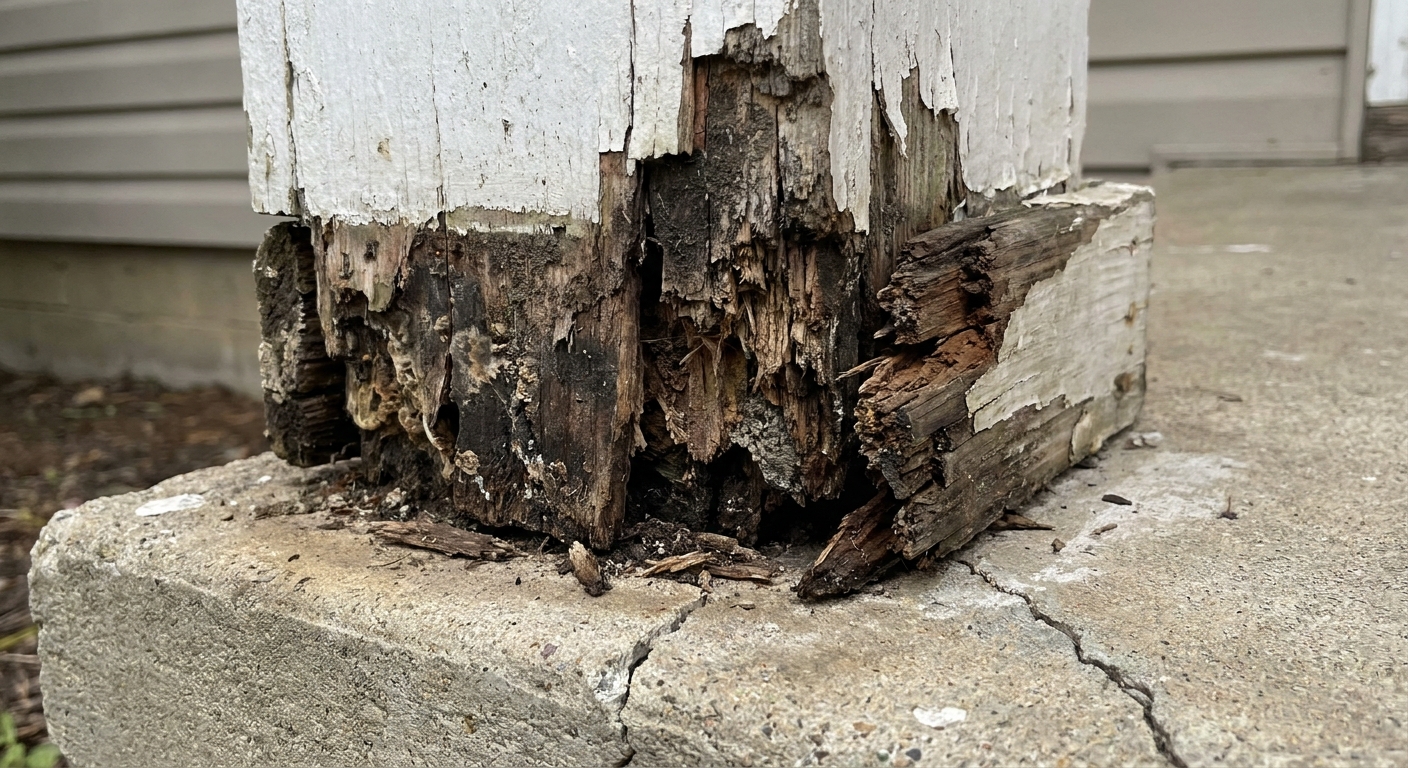
The first time I found a porch column turning to compost at the bottom, it looked like a simple trim repair. Poke it with an awl and your tool sinks in, the paint blisters, and the post sounds hollow. That is when you stop thinking “cosmetic” and start thinking “load path.” If that column is carrying a beam or roof, you do not get a second chance.
This walkthrough is how I swap a decayed, load-bearing porch post without the porch roof sagging, cracking, or worse. The heart of the job is temporary shoring built like you mean it, then a new column installed on a standoff base so the next repair is a long way off.
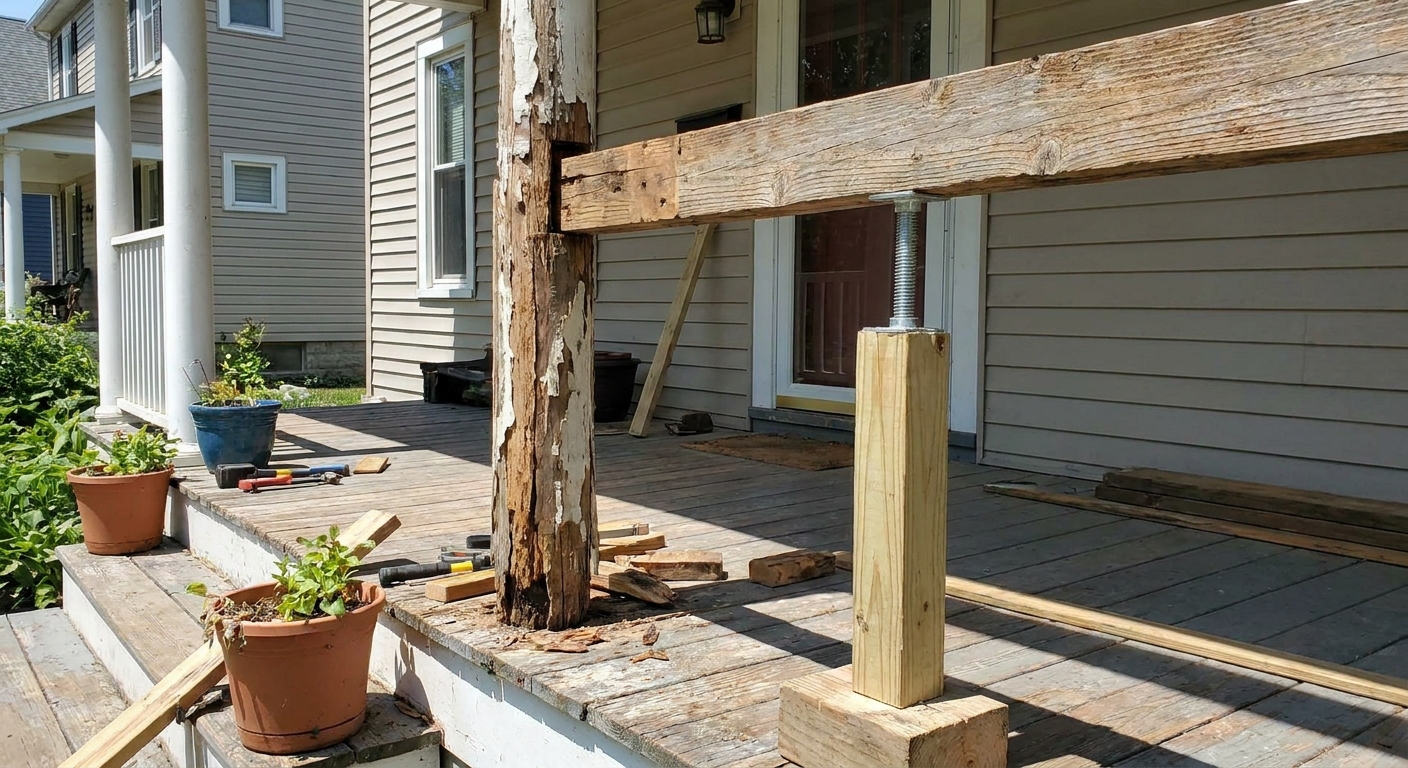
Know what you are supporting
Before you cut anything, identify what the column is actually holding up.
- Typical porch setup: column supports a porch beam, which supports roof rafters or truss tails.
- Sometimes: the post is mostly decorative, and the real support is a framed wall or a hidden steel post.
- Red flag: if you see a beam sitting directly on the column, assume it is structural until proven otherwise.
If you are not sure, treat it as load-bearing and shore it. Over-shoring is cheap. Under-shoring is expensive.
Also pay attention to what else is tied into that corner. A porch beam may be connected to the house ledger, knee braces, railings, or a rim board. When you take the load even a little, those connections can creak and protest.
Safety rules I follow every time
- Work dry and calm: no rain-slick steps, no wind rocking ladders.
- Keep lifts tiny: you are supporting, not jacking a truck. Think “take the load,” not “raise the roof.”
- Shore to structure: your temporary post needs a solid footing and a solid header against the beam.
- Do not trust rotten wood: if the beam end is punky too, shoring needs to land on sound material or span past the rot.
- Watch the footing reality: some porch slabs were never meant to be a structural footing. If the post resists uplift, lateral wind, or guard loads, you may need a proper pier or footing below frost depth, not just an anchor in a thin slab.
- Permits happen: replacing a structural porch post or changing the base connection can trigger permit and inspection requirements in a lot of areas.
- When in doubt: call an engineer or qualified contractor. If the porch roof is tied into the main roof in a complex way, professional eyes are worth it.
Tools and materials
Tools
- Tape measure, pencil, and a straightedge
- Level (2 ft and 4 ft are ideal)
- Circular saw and recip saw
- Drill or impact driver
- Hammer and a small pry bar
- Adjustable wrench or socket set (for post base hardware)
- Shims (cedar or composite)
Materials
- Temporary shoring: 4x4 or 6x6 posts for shores, plus 2x lumber for a header plate and blocking
- Fasteners: structural screws or 16d nails for the shoring assembly
- New column: pressure-treated 4x4 or 6x6, or a wrap system over a treated structural post
- Standoff post base: a metal post base that holds the wood up off the concrete (wet-set or retrofit style depending on your situation)
- Anchor hardware: expansion anchor, epoxy anchor, or another approved fastener for your concrete, plus manufacturer-specified bolts or screws for the base
- Connector compatibility: hot-dip galvanized or stainless hardware as required by the connector maker and your lumber treatment level
- Exterior-rated sealant and primer/paint as needed
When I am planning a repair like this, I treat it like a small framing job. A quick cut list prevents the mid-project hardware run. The mindset is the same one I use in make a cut list before buying wood.
Step 1: Inspect the damage and the footing
Rot is often a symptom, not the disease. Figure out why the base stayed wet.
- No standoff: post buried in concrete or sitting flat on a porch slab.
- Failed paint and end grain exposure: water wicks up like a straw.
- Gutter drip line: constant splashback.
- Capillary water from slab: especially common in the Pacific Northwest where everything stays damp longer.
Check the concrete where the post lands. If the slab is cracked or spalling, plan on fixing that too. A standoff base needs solid concrete to bite into.
Also verify what is actually doing the supporting. Some porches have a real footing below the slab at each post location. If yours does, do not accidentally bypass that load path by shifting the post location or anchoring to a random thin section of slab.
Step 2: Build temporary shoring
The goal is simple: transfer the load from the bad post to a temporary support, then keep that support stable while you work.
Where to place the shore
Place your temporary support close to the existing column, but far enough away to work. I often end up roughly 8 to 16 inches off the face of the post, but I treat that as a starting point, not a rule.
- Bear on real structure: if the porch has a boxed beam or decorative wrap, confirm you are directly under the actual structural beam member, not soffit, trim, or a hollow wrap.
- Confirm the beam can take the load where you set the shore: use a short header plate to spread the load, and avoid shoring at a rotten, checked, or weak spot.
- Land on a real footing: do not set a shore on loose pavers, a wobbly stair tread, or rotted decking. If the porch floor is decking, you may need to open it up and land your shore on a joist stack or solid blocking that transfers load down properly.
How I like to shore a porch beam
I use a short header across the underside of the beam, then a vertical shore post under that header. This spreads load and keeps the shore from denting the beam.
- Cut a header plate from 2x6 or 2x8 to fit tight under the beam (length usually 16 to 24 inches).
- Add a cleat or side blocks so the header cannot slide sideways.
- Cut the shore post slightly long so it can be tapped into place snug, or use a screw jack post for fine adjustment. Tap only enough to snug and take load. Do not pound it like you are trying to lift the porch.
- Use a base pad if you need one to spread load and prevent slip. A chunk of 2x10, 2x12, or thick plywood under the shore on concrete is usually enough to keep things planted.
My rule: if you can bump the shore with your hip and it feels sketchy, rebuild it. The shoring should feel like it belongs there permanently.
Taking the load
With the shore in place, tighten the jack or tap the post until you feel the load transfer. You are looking for a subtle change, not daylight under the beam. If you lift too much, you can crack finishes or bind doors.
Step 3: Remove the rotted column
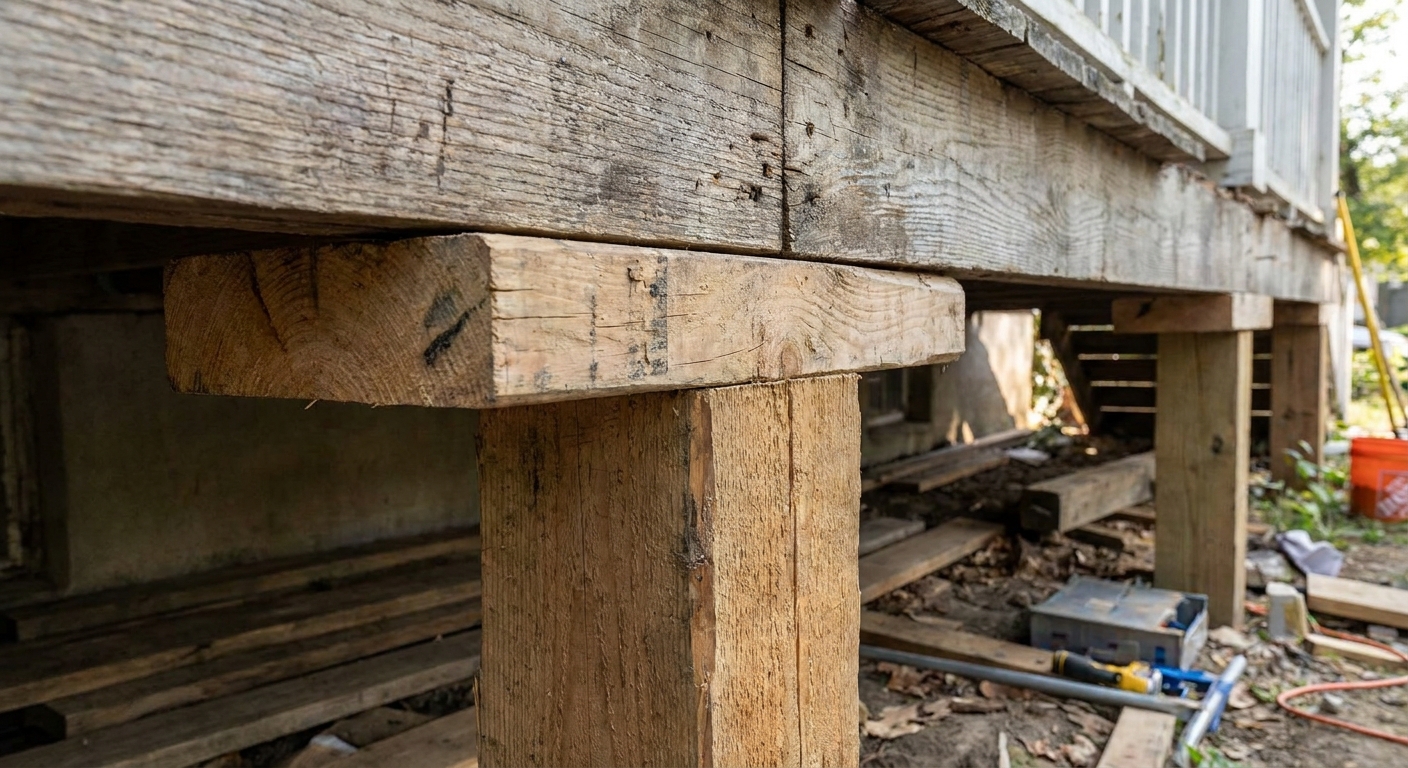
Once the load is safely carried by the shore, you can remove the bad post.
If it is a wrapped column
Many porch columns are hollow wraps around a structural post.
- Remove trim rings, base moldings, and fasteners carefully.
- Split the wrap if needed to expose what is inside.
- Confirm what the structural core actually is before cutting anything.
If it is a solid wood post
- Disconnect hardware at the top and bottom if possible.
- Make a controlled cut near the bottom with a recip saw.
- Work in small bites if the post is pinched. The beam may still be carrying some load, and wood can bind the blade.
If the post is embedded in concrete, do not go hacking at the slab. It is usually faster to cut the post off flush, then deal with what remains using a drill and chisel, or by removing enough wood to seat your new base properly.
However you get there, the new base must sit flat on sound concrete. It also needs proper edge distance and embedment for the anchor you are using, per the base manufacturer instructions. If you cannot meet that, change the plan before you drill holes you cannot un-drill.
Step 4: Pick a standoff base
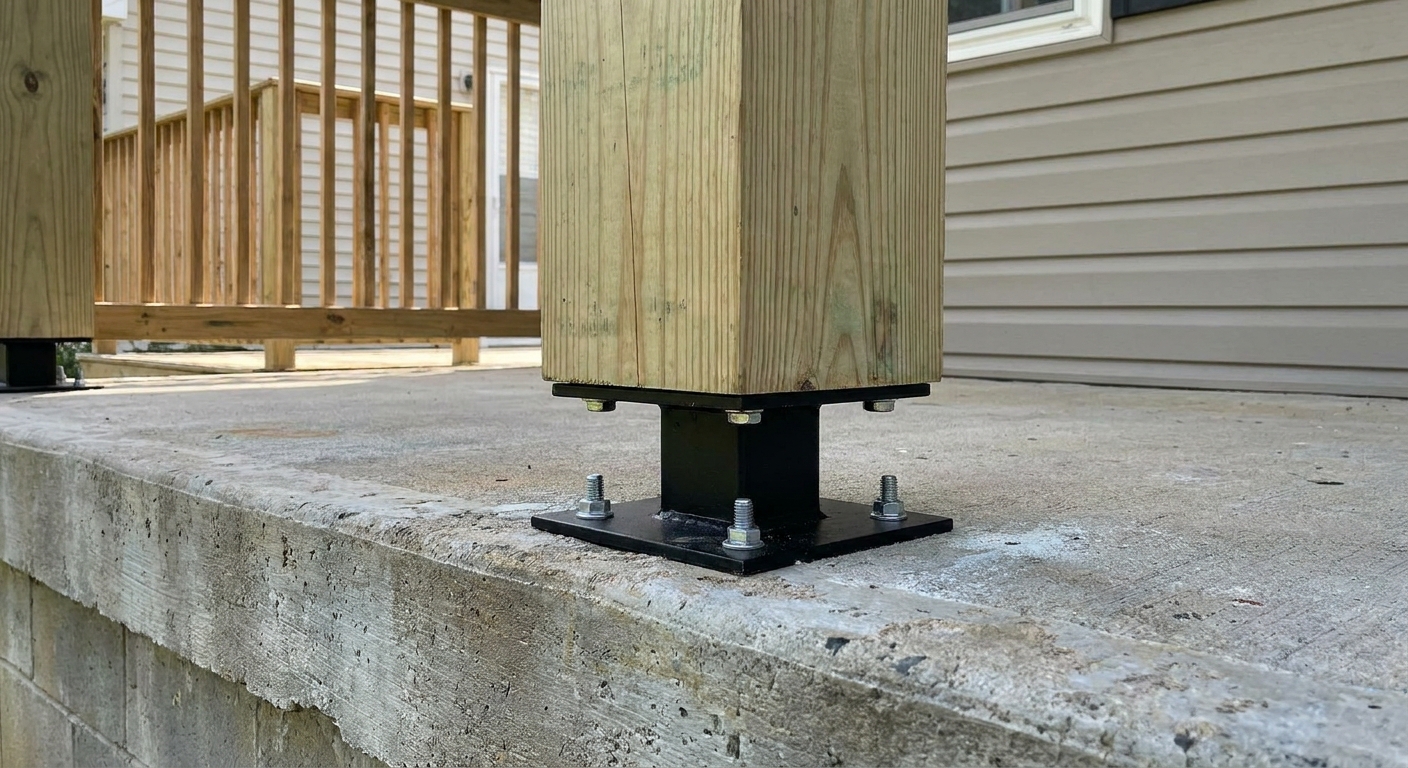
A standoff base is what keeps your new column from turning into your next repair. It does two things: it anchors the post, and it lifts the end grain up off wet concrete so it can dry.
Two common situations
- You can set an anchor in fresh concrete: ideal for new work or when you are replacing a small section of slab. A wet-set bracket gives excellent alignment and strength.
- You are anchoring to an existing slab or porch: you will typically use a retrofit post base with an expansion or epoxy anchor.
What I look for
- Stand off height: enough clearance that leaves and splash water do not sit against the end grain.
- Correct size: bases are sized for nominal posts (4x4, 6x6).
- Exterior corrosion resistance: hot-dip galvanized or stainless as required, especially with pressure-treated wood and coastal exposure.
- Uplift and lateral ratings: porches catch wind. Follow manufacturer requirements and local code expectations.
Do not mix and match fasteners casually. Use the fasteners specified for the base you buy.
Step 5: Install the base
Layout
Mark the post centerline based on the beam above, not the old rotten footprint. Sometimes the old post drifted over time, or the trim was hiding a slightly off-center install.
Anchoring to existing concrete
Follow the base manufacturer instructions for hole size and depth. The basics:
- Drill the anchor hole plumb.
- Vacuum dust thoroughly. Dust is the enemy of anchors.
- Set the anchor and snug the base down.
- Confirm the base is aligned with the beam and the porch edge.
Deal with water while you are here
- Make sure the slab slopes away from the post, not toward it.
- Keep the base area clear of mulch and leaf litter.
- If gutters dump water at the column, fix the drainage. A perfect base cannot beat a constant waterfall.
Step 6: Install the new column
This is where “measure twice, cut once” earns its keep. A post that is 1/8 inch short can turn into a shim stack that never feels right.
How I measure post length
- Measure from the bottom of the beam bearing point to the top of the installed base seat.
- Account for any top cap or bracket if your beam connection uses one.
- Dry fit if possible, especially if the beam is not perfectly level.
Pick straight stock and cut it square
Start with the straightest post you can find. Cut both ends square so you get full bearing. If the post has a slight crown or bow, orient it intentionally so it looks right and stays plumb when you fasten it.
Setting the post
- Place the post into the base and fasten per manufacturer requirements.
- Plumb the post in both directions with a level.
- Fasten the top connection to the beam or cap.
Do not ignore uplift at the top
Gravity bearing is only half the story. In wind, that roof can try to lift. Where required by your code or the connector schedule, use an approved post-to-beam connector. Toenails alone are not my idea of a real uplift connection.
Shimming the right way
If you need shims, use durable shims, keep them tight, and do not rely on a soft wedge that will compress over time. The goal is full, firm bearing. If you find yourself needing a lot of shimming, stop and re-check your measurements and your base alignment.
If you are fighting a beam that is slightly out of level, a quick refresher on getting assemblies square and true helps. The same habits apply whether it is a wall frame or a porch post. I cover those fundamentals in how to square a wall frame before standing it.
Step 7: Transfer the load back
Back off the jack slowly, or gently loosen the shore so the beam load returns to the new post. Watch and listen.
- If you hear cracking or see the beam shift sideways, stop and reassess.
- Check plumb again once the post is carrying weight.
- Confirm the post is fully seated and all connectors are tight.
Once everything is stable, remove the temporary shoring.
Finish work that prevents rot
- Seal end grain: prime and paint, or use a preservative system compatible with your column material.
- Keep a gap: do not bury the base in trim that traps water. Trim should allow airflow and drying.
- Maintain drainage: gutters, splash blocks, and slope do more than any paint can.
If your porch has other framing issues nearby, like a soft rim area or suspicious wall framing, it is often worth looking beyond the column itself. Rot likes company.
Troubleshooting
The beam sags when I remove the post
That means the shore did not actually take the load, or it is set on something that is flexing. Rebuild the shoring on a more solid landing, add a wider header plate, and try again with smaller adjustments.
The concrete is too damaged to anchor into
Do not force anchors into crumbling concrete. You may need to cut out and repour a small pad, or consult a pro for a proper repair. A post base is only as good as what it is attached to.
The top connection does not line up anymore
Old posts can be out of plumb for years. When you put in a straight post, the beam and trim may reveal how crooked things were. Prioritize structure and plumb. Trim can be adjusted.
When I call a pro
- The porch roof framing is complex, tied into the main roof, or you see signs of broader movement.
- The beam above the post is also rotted, split, or undersized.
- You need to lift more than a hair to re-seat things.
- You are working over tall stairs or an elevated porch where shoring becomes a fall hazard.
- You suspect the existing slab is not a real footing, or you are in a high-wind or heavy-snow region where the connection details matter more than you can eyeball.
More repair guides
If you are already in repair mode, these related how-tos can save you time on the next problem you uncover: