

I have torn out enough droopy window openings to know this much: a wide window will find every weak link in your framing. If the header is undersized, the load path is broken, or the jacks are an afterthought, you will get a slow sag that shows up as cracked drywall, sticky sashes, and trim joints that never quite stay tight.
This is a deep dive into picking the right header material, understanding what it is actually carrying, and building it so the opening stays straight for the long haul.
What a header does
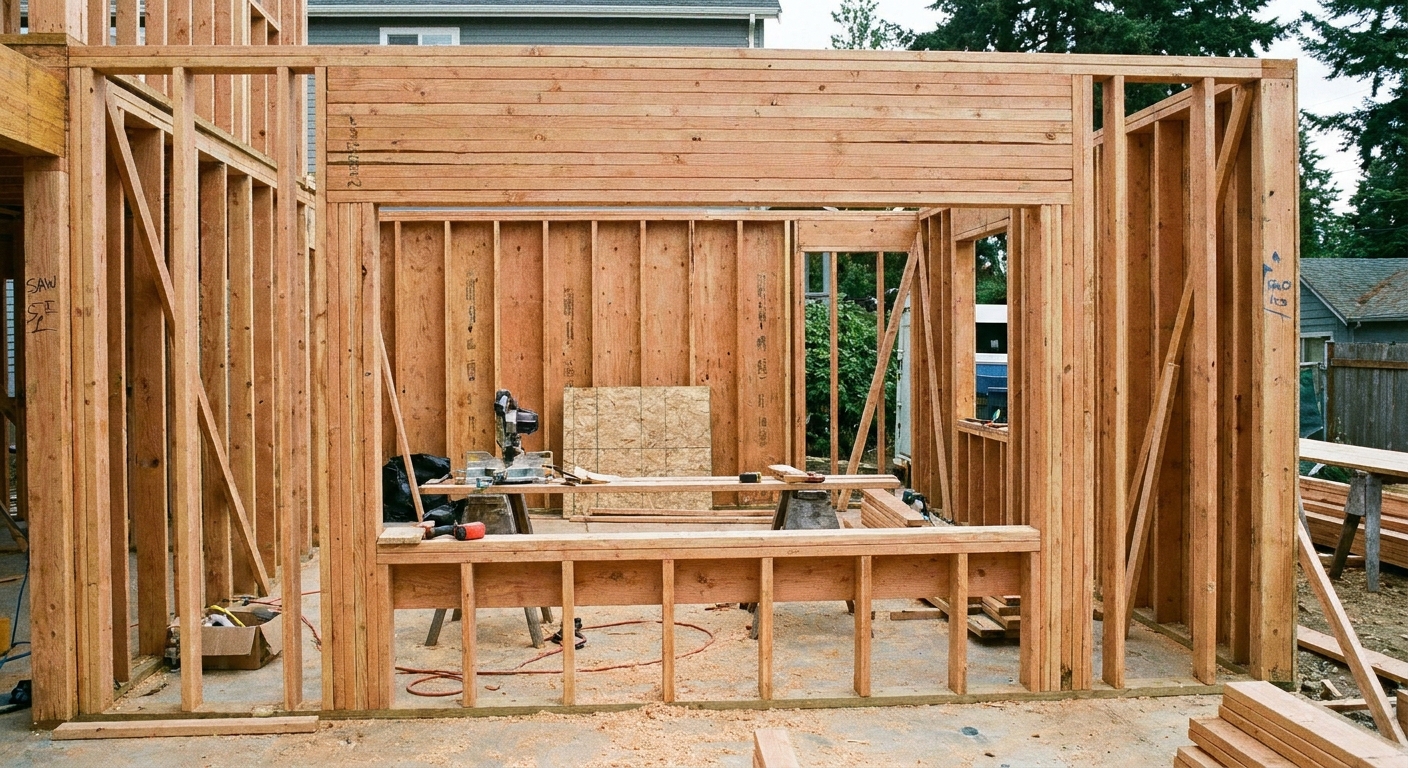
A header is not just a chunk of wood above a window. It is a beam that collects load from above and delivers it to the studs on each side of the opening, then down to whatever is supporting that wall.
The load path in plain terms
- Roof and/or floor loads come down through rafters, trusses, joists, and studs.
- The top plate(s) collect those loads and transfer them into studs, and around openings through cripples and headers.
- At an opening, the header becomes the bridge that carries load across the gap.
- That load must land on jack studs (trimmers), then continue down through framing below to the floor system, beams, posts, and foundation.
If you size a header like a beam but forget that your jacks are split, crushed, short, or not fully bearing, you still get sag. The header is only as good as its landing points.
First question: is it bearing?
Before you size anything, you need to know whether the wall is carrying load or simply separating space.
Clues you can check quickly
- Direction of framing above: If ceiling joists or floor joists run perpendicular to the wall, that wall is more likely to be load-bearing.
- Stacking: A wall lined up over a beam, foundation wall, or a wall below is a strong hint it is carrying load.
- Roof structure: Ridge beams, hips, valleys, and girder trusses can concentrate loads onto specific walls.
If you are remodeling and unsure, slow down. I walk through the thinking and safe approach in How to Frame a Load-Bearing Wall in a Remodel. When in doubt, a local engineer or your building department can confirm the header size for your exact span and loads.
What controls header size
Header sizing is governed by a few variables, and wide windows magnify all of them.
- Span between bearing points: The structural span is measured jack-to-jack, because the jacks are the bearing members in typical framing.
- Tributary width: How much floor or roof area is dumping load into that wall above the opening.
- Loads above: One story above, two stories, roof only, roof plus storage, snow load, and so on.
- Species and grade: A #2 SPF built-up header does not perform like a dense DF-L #1 or an engineered LVL.
- Bearing length: The header needs adequate bearing on each side. Short bearing can crush fibers and lead to settlement.
- Deflection tolerance: A header can be strong enough not to fail, but still deflect enough to make a big window bind.
Wide windows are where deflection gets people. You are not just protecting against collapse. You are protecting the window unit and finishes from slow movement.
One more distinction that helps in planning: the window manufacturer controls the rough opening, but the structure controls the header size. A deeper header can change where your head height lands, so think about that before you commit to window placement.
Material: lumber vs engineered
For wide openings, you generally have three common choices: built-up dimensional lumber, LVL, or glulam. In typical residential window work, it is usually built-up lumber or LVL.
Built-up dimensional headers
Common examples are double 2x10, triple 2x12, and similar. They can work well when spans are moderate and loads are not extreme.
- Pros: Easy to source, easy to cut, easy to nail, and straightforward for DIY.
- Cons: More variability (crown, knots, moisture), more thickness buildup, and more deflection risk on long spans.
LVL headers
LVL shines on wider windows because it is straight, consistent, and often stiffer for a given depth. It is also commonly specified when point loads are involved.
- Pros: Predictable performance, long lengths, usually less bounce and sag.
- Cons: Heavier, more expensive, and it needs to be fastened per the engineered schedule or manufacturer guidance. Most of the time that still means nails, but you do not wing the pattern or substitute random screws where a plan calls for nails.
Quick rule from the jobsite
If the opening is wide enough that you are thinking, “This feels like a lot of window,” LVL is often money well spent. Even when dimensional lumber pencils out for strength, LVL can save you from deflection headaches.
If your wide window sits under concentrated roof geometry, a deck ledger, or a second story, I lean engineered unless a local header table explicitly says otherwise.
Depth beats extra plies
For wood beams, stiffness rises dramatically with depth. That means a deeper header often reduces deflection far more effectively than adding another ply of the same depth.
Example conceptually: going from a 2x10 header to a 2x12 header can be a noticeable improvement in staying straight, even if both are technically strong enough. Wide windows do not just ask for strength. They ask for stiffness.
Size it without guessing
On professional crews, we are either following engineered plans or using code span tables that account for snow load, building width, number of floors carried, and species.
Use local code tables or engineered sizing
The International Residential Code (IRC) provides prescriptive header span tables for many typical situations, but your jurisdiction can amend them. Snow load in particular changes the game.
If you want to read the official source, the IRC is published by the International Code Council: https://codes.iccsafe.org/. Always verify the edition and amendments your area enforces.
When to bring in an engineer
- Openings that are very wide, especially in exterior walls.
- Loads from multiple stories bearing above.
- Point loads landing near the opening (posts, beams, girder trusses).
- Walls in high snow or high wind regions where prescriptive assumptions may not apply.
- Any time your design deviates from typical stud and jack layouts.
Engineering is not just bigger wood. It is making sure the load path is continuous all the way down, including where the load lands and how it gets to the foundation.
Plies and thickness
A common built-up header is two plies of 2x material with a spacer to match wall thickness.
Typical thickness examples
- 2x4 wall: Two 2x plies measure about 3 inches total, so you typically add a 1/2-inch plywood or OSB rip between plies (or on one side, depending on your detail) to hit the 3-1/2 inch wall thickness.
- 2x6 wall: Two 2x plies still measure about 3 inches, so you build out the remaining thickness with rips (often plywood or OSB) to land flush with the 5-1/2 inch wall thickness.
Best practices for built-up headers
- Pick straight stock: Sight down each piece. Reject twist and severe crown.
- Crown the same way: Put crowns up so the header has a fighting chance against sag.
- Use solid, consistent spacers: A uniform 1/2-inch plywood or OSB rip is common, but match the wall thickness and any plan details.
- Glue is optional but helpful: Construction adhesive between plies can reduce squeaks and movement. It does not replace proper nailing.
- Nail schedule: Follow code or engineered requirements. In the field, consistent, staggered nailing helps plies act together.
With LVL, you usually stack multiple plies as specified and fasten them per manufacturer and plan requirements. Do not freelancing a nail pattern on an engineered beam.
Bearing and jacks
Most header problems I see are not because someone used the wrong 2x depth. They are because the header is not properly supported at the ends.
Jack studs (trimmers)
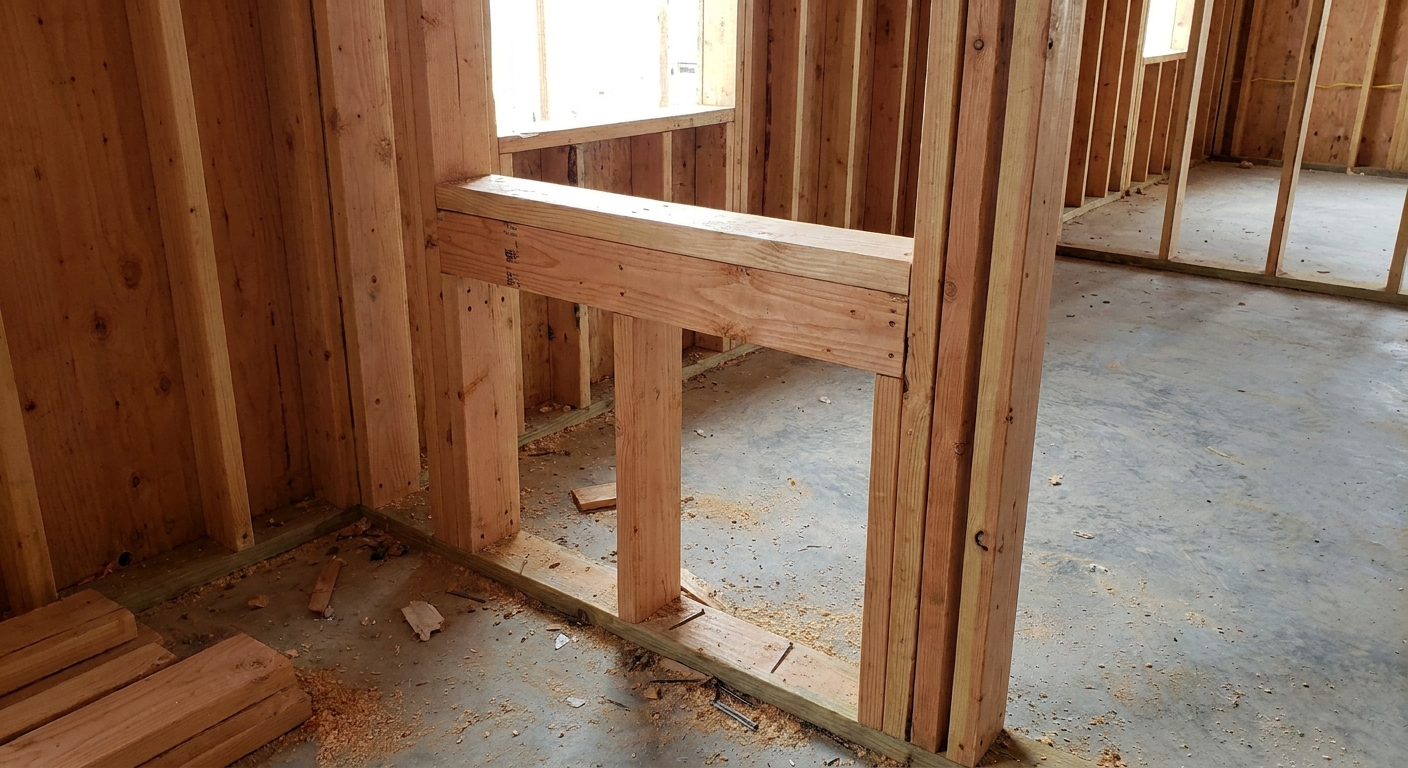
Jack studs carry the header load down. For wide openings and heavier loads, you may need double jacks each side, sometimes more depending on the plan.
- Full bearing: The header must sit fully on the jacks, not half on a jack and half on air because a stud is out of plane.
- Continuous load path: Jacks should land on a plate that lands on a joist, beam, or blocking that transfers load properly.
- No crushed plates: If the bottom plate is punky, wet, or sitting on a soft subfloor edge, settlement can happen.
King studs
King studs run full height and stiffen the sides of the opening. They also provide nailing for sheathing and interior finishes. On wide windows, I want kings straight and tight because they help keep the opening from racking.
Build sequence
1) Lay out the rough opening
Start with the manufacturer rough opening size for the window unit, then confirm your framing layout will accommodate it. I like to mark kings and jacks clearly on the plates before anything is nailed.
If you are building walls flat, squareness matters because a wide window magnifies a parallelogram error. My process for getting frames true is in How to Square a Wall Frame Before Standing It.
2) Cut and assemble the header
- Cut plies to length.
- Cut spacers so the total thickness matches the wall.
- Orient crowns up on dimensional lumber.
- Assemble on a flat surface so the header stays straight.
3) Install jacks and kings
Plumb and align the studs so the header bears evenly. On remodels, I take extra time to shim and straighten because old framing is rarely perfect.
4) Set the header with solid bearing
Dry-fit if needed. A wide header that is forced into a twisted pocket can preload the opening and telegraph movement later.
5) Add cripples and tie-ins
When the wall is carrying load, cripple studs above the header help transfer load from the top plate down into the header. Keep them aligned with studs above when possible so loads track cleanly.
Point loads and big glass
Two conditions make header sizing and detailing more critical.
Point loads
If a beam, post, or girder truss drops load near the opening, a standard prescriptive header might not cut it. This is where engineered LVL sizing comes in, and where you may need a true post or built-up support at the side of the opening with verified bearing all the way down to a beam, girder, or foundation.
Long runs of glass
Multi-panel windows and big sliders often come with tighter deflection tolerances than a basic vinyl window. Even small header deflection can cause rollers to bind or reveal uneven gaps.
Support below matters
A header can only do its job if the structure below carries the load.
- Floor framing: If a header lands above a rim board or a joist bay, you may need blocking, squash blocks, or a beam below to keep the load path continuous.
- Squeak prevention mindset: Tight, well-supported framing moves less. My approach to stiffening floors before they are buried is in Prevent Floor Squeaks Before the Subfloor Goes Down.
- Engineered floor systems: If you are framing over I-joists, concentrated loads need proper detailing. See Dimensional Lumber vs Engineered I-Joists for Floor Framing for practical considerations.
Fasteners and connections
Headers do not fail dramatically very often. They fail quietly through compression, slip, and deflection. Fasteners and connections are what keep everything acting as one system.
General good habits
- Use the right fastener type: Nails for ply-to-ply assembly, structural screws or specified nails where plans call for it.
- Stagger fasteners: Avoid splitting and distribute clamping across the header.
- Follow hangers and straps specs: If a connector is part of the detail, fill it with the specified nails, not whatever is in your pouch.
If you are choosing between tools for this work, I break down the real-world tradeoffs in Cordless vs Pneumatic Framing Nailers.
Wide-opening shear
A huge opening in an exterior wall is not just a header question. It is also a bracing and shear question.
If the window takes up most of the wall length, you may need engineered details such as portal frames, hold-downs, straps, or specific sheathing nailing to keep that wall from racking in wind or seismic. If your plans call for it, build it exactly. If you do not have a plan and you are carving up a major exterior wall, that is another good moment to get the detail verified.
Common mistakes
- Undersized header depth: Strong enough on paper, too flexible in reality.
- Inadequate bearing: Header ends sitting on short jacks, or not enough jack studs for the load.
- Missing load path below: No blocking or support under jacks in a floor system.
- Wet or crowned lumber installed wrong: Crowns down, or lumber that shrinks and settles after the fact.
- Over-cut rough openings: Too wide means more shimming, less solid bearing for window fastening, and a harder time keeping things square.
- Ignoring shear needs: A very wide exterior opening can require braced-wall or engineered shear detailing.
Check your work
Before you wrap it up, take five minutes to verify the basics. It saves hours later.
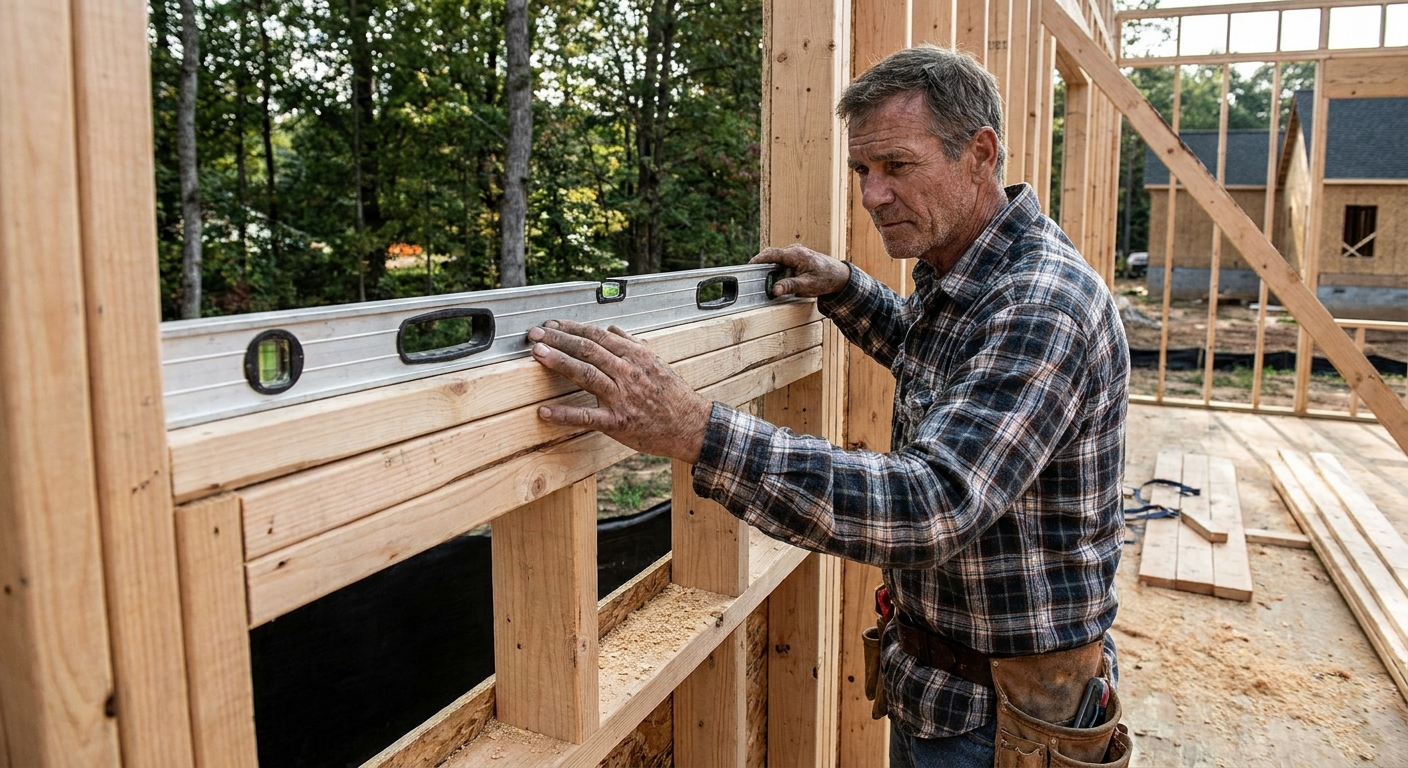
- Check level across the header seat: A wide window will tell on you immediately if it is out.
- Check plumb on both sides: Kings and jacks should be plumb and in plane.
- Measure corner-to-corner: Confirm the rough opening is square.
- Confirm bearing: Look for full contact between header and jacks.
FAQ
Do I always need a header over a window?
In most exterior walls and in any load-bearing wall, yes, you need a properly sized header. In some interior nonbearing partitions, the framing above the opening may be detailed with flat blocking or a non-structural lintel mainly for drywall support and stiffness. Plenty of builders still install a small header there for straightness and easy trim nailing. Either way, follow local code and the wall’s actual job, especially if the wall provides bracing, has a big opening, or has anything heavy bearing near it.
Is bigger always better?
Bigger can create its own issues, like fitting conflicts, insulation compromises, and unnecessary cost. What you want is correct, with enough stiffness to protect the window. Use tables or engineering rather than vibes.
Can I use a steel header?
Yes, but steel sizing and attachment details are typically engineered, and you must address corrosion protection and thermal bridging in exterior walls. In residential work, LVL is often the simpler path unless the design demands steel.
Should I glue built-up headers?
I do when it is convenient and clean. Adhesive helps reduce slip and squeaks, but it does not replace adequate fasteners or correct bearing.
Think load path
When a wide window sags, the header takes the blame, but the real culprit is usually the system. Size the beam correctly, support it with proper jacks and bearing, and make sure the load can travel down through the house without crushing something soft or skipping over a gap.
If you want more framing fundamentals that support this kind of work, start with the Framing and Carpentry Projects guides, and build your way outward from clean layout and solid geometry.