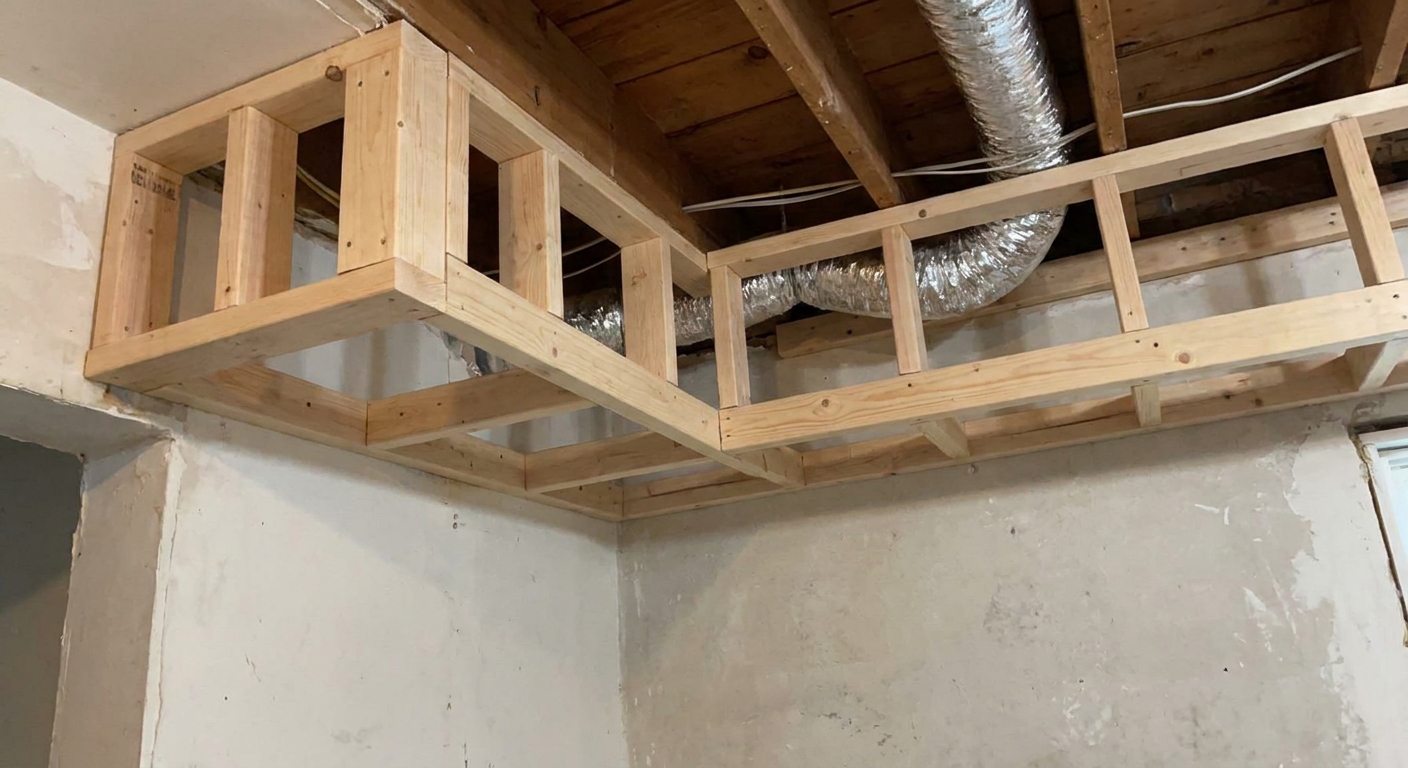
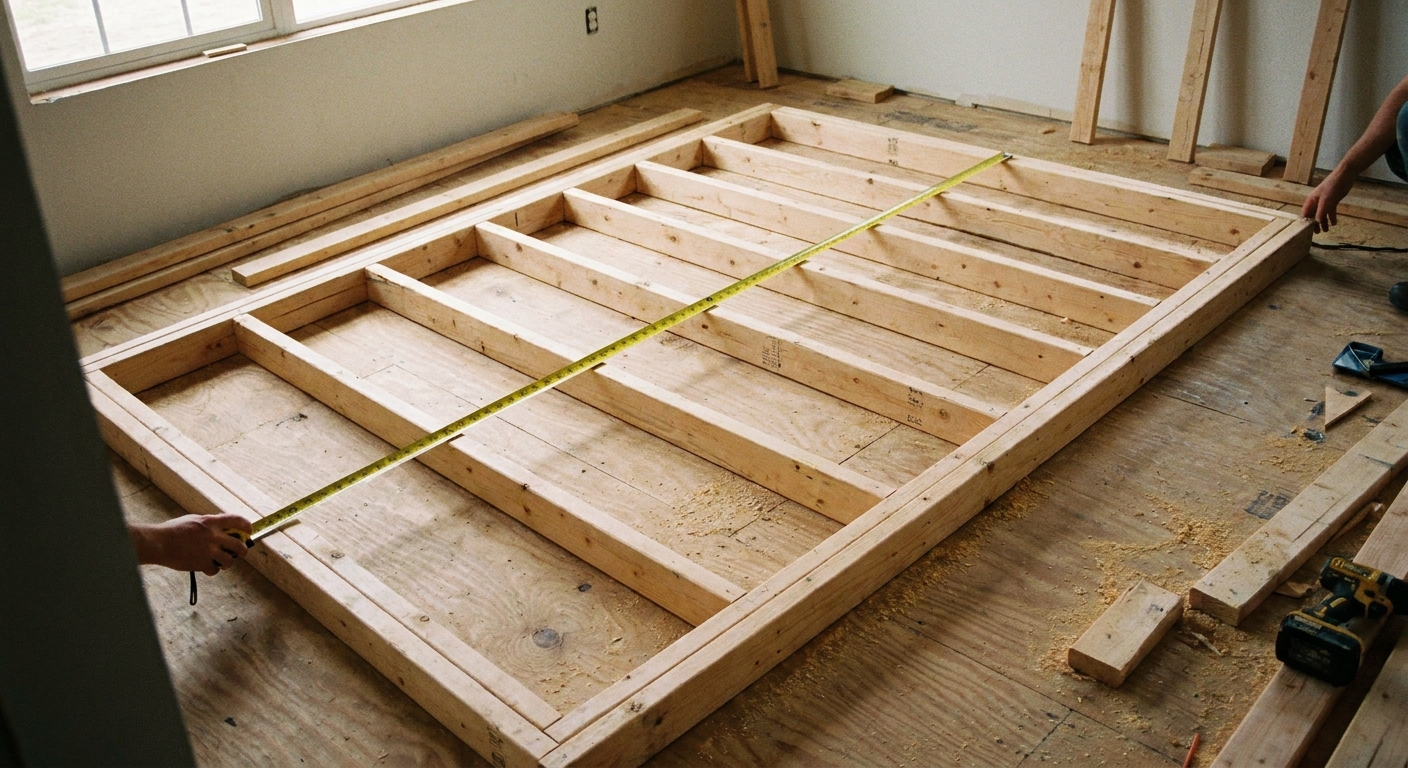
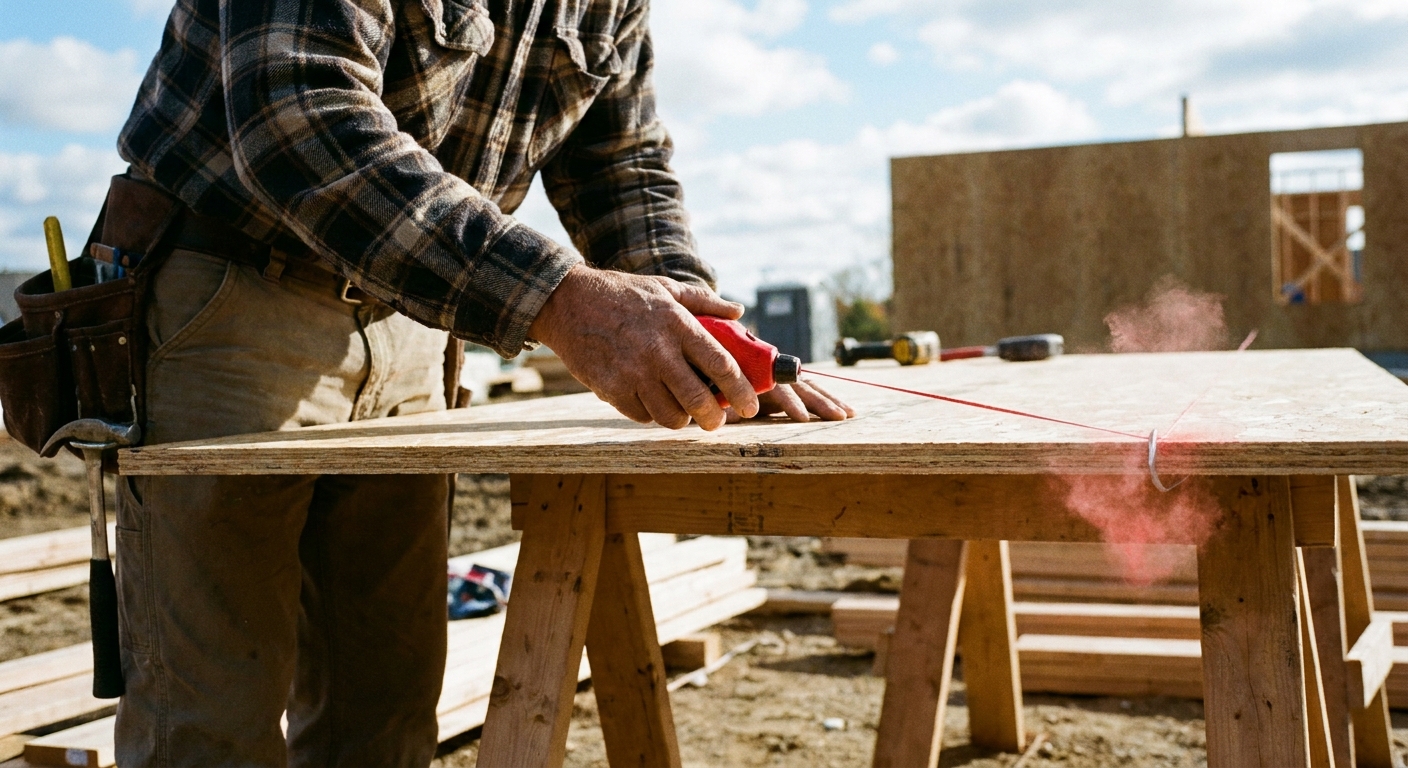
I still remember the first tray ceiling I framed in a friend’s dining room. On paper it looked simple: build a box inside a box and call it good. In real life, the whole job came down to one thing I learned sweeping sawdust as a kid: measure twice, cut once. A tray ceiling is unforgiving. If your layout is off by even a little, the reveals will shout it from every corner.
This guide walks you through the planning, the math for your drop, and the step-by-step framing so you end up with a clean recessed tray that trims out like it was always part of the house.
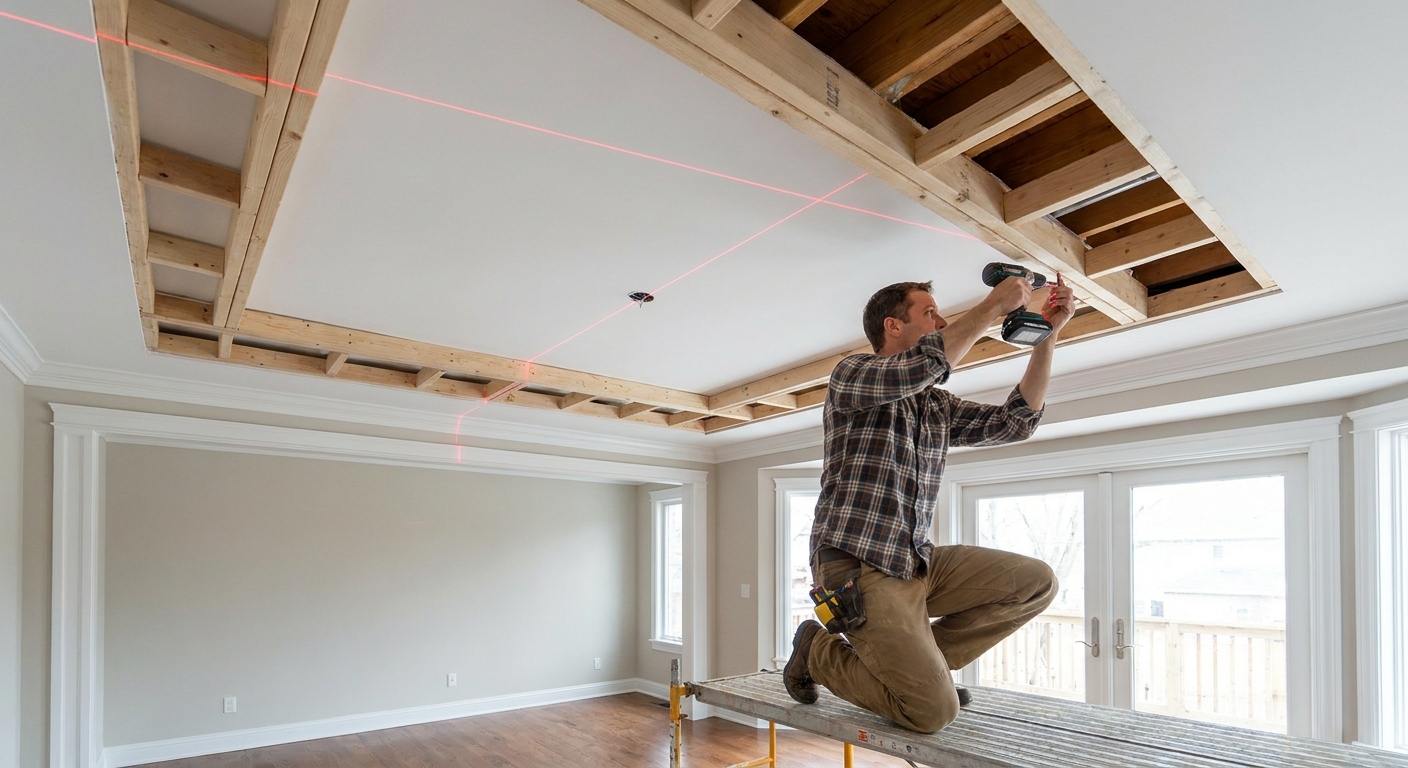
What a tray ceiling is
A tray ceiling is a framed recess inside the main ceiling plane. You build a perimeter soffit that drops down, then you frame an inner opening so the center stays higher, like an upside-down serving tray.
Structurally, most tray ceilings in existing rooms are decorative soffit framing, not changes to the roof or floor system. You are usually fastening to existing ceiling joists or trusses and building a stable, straight framework for drywall and trim.
- Perimeter soffit: the lowered band around the room.
- Inner opening: the raised center section.
- Return: the horizontal “step” surface between the outer ceiling and the inner opening.
- Drop: how far the soffit bottom plane hangs below the original ceiling plane.
Before you start
Confirm what is above the ceiling
If you have trusses, do not cut, notch, or drill them beyond what the truss manufacturer allows. For most decorative tray ceilings, you do not need to touch trusses at all. You are attaching to them.
Also keep the tray framing in its lane. It is meant to carry drywall and trim, not heavy loads. If you are hanging a ceiling fan, a heavy chandelier, or anything that actually matters if it falls, it needs proper support and blocking tied to the framing above per the fixture manufacturer and local code.
Pick a drop that fits the room
In an 8 foot room, a huge drop can feel like a helmet. In a 9 or 10 foot room, you can get more dramatic without shrinking the space.
Common decorative drops are 4 in to 10 in. I like 6 in to 8 in for many standard rooms because it gives you a strong shadow line without crowding the headroom.
Plan lighting, vents, and wiring now
If you plan rope lighting, cans, a chandelier, speakers, a bath fan, or HVAC supply runs, decide where those will land before you build the tray. Moving a can light after you frame a soffit is the kind of “simple change” that eats a Saturday.
If you are adding new circuits, moving HVAC, or opening walls for reroutes, this is the point where permits or a licensed pro may come into the conversation. It depends on your local rules, but it is a lot easier to do it right now than to patch regrets later.
Tools and materials
Tools
- Tape measure, pencil, chalk line
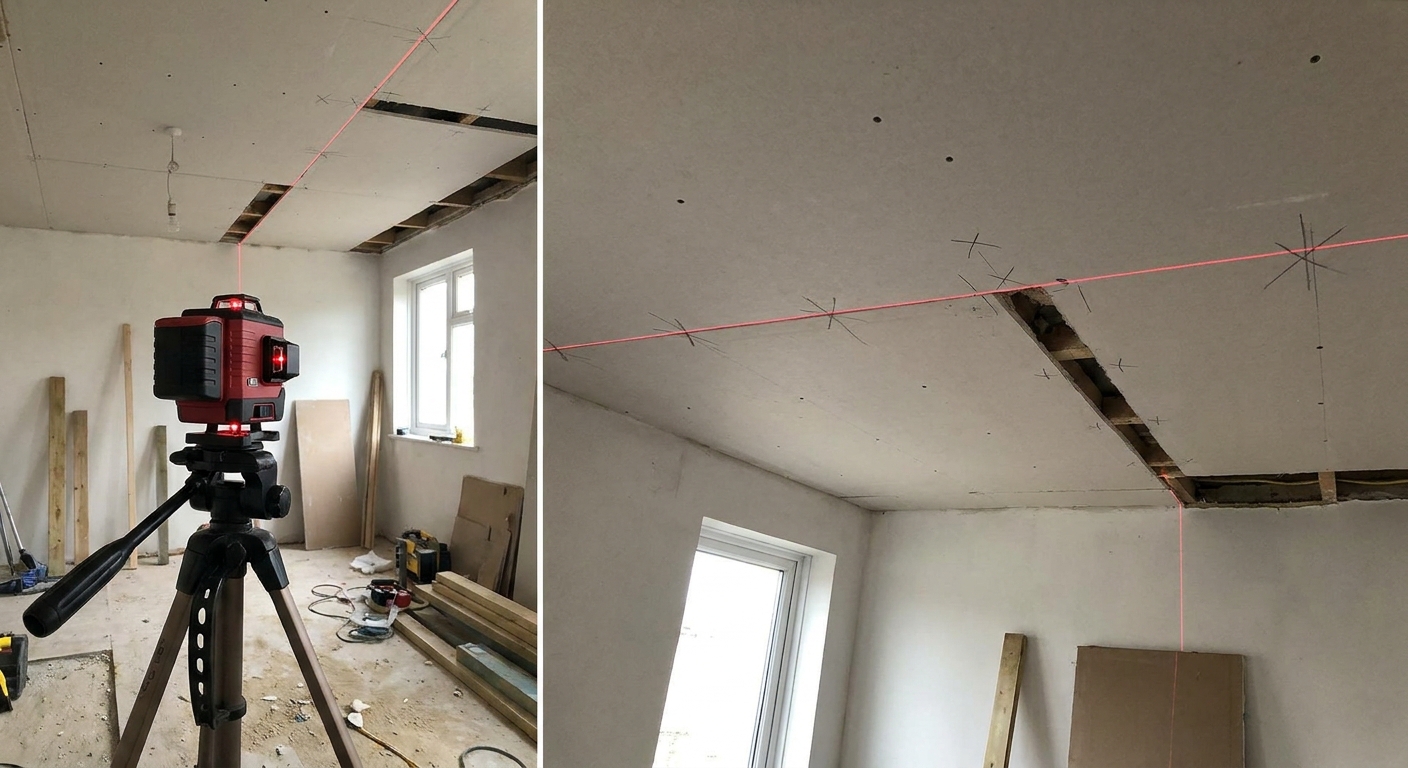
- Laser level (very helpful) or a long level
- Stud finder
- Speed square
- Miter saw
- Drill and impact driver
- Framing nailer or screws
If you are deciding between nailers for this kind of work, I break it down here: Cordless vs Pneumatic Framing Nailers.
Materials
- 2x4 lumber (typical for soffit frames), plus a few extra straight pieces for long runs
- 1x material for backing where needed (optional)
- Construction adhesive (optional but helps reduce squeaks and flex)
- Framing nails or structural or construction screws suitable for fastening into joists
- Drywall corner bead and drywall (later phases)
Fastener warning: do not use drywall screws to hang framing. Drywall screws are brittle and they snap. If you are screwing, reach for structural or construction screws in a size and length that gives you real bite into joists or truss bottom chords (for example, #9 or #10, length depending on what you are fastening through).
Material planning matters on tray ceilings because you will cut lots of repeated parts. If you want a simple way to keep from overbuying or underbuying, see: Make a Cut List Before Buying Wood.
Step 1: Set tray size
There is no single correct tray size, but there are two rules that keep it looking intentional:
- Keep the perimeter band consistent on all sides unless the room is intentionally asymmetrical.
- Do not make the center too small, especially if you plan a light fixture. The eye wants a calm center.
Two layout approaches
- Equal border: same soffit width on all sides, like a picture frame. Great for square-ish rooms.
- Scaled border: border is a percentage of the room width, often around 12 to 20 percent per side depending on ceiling height.
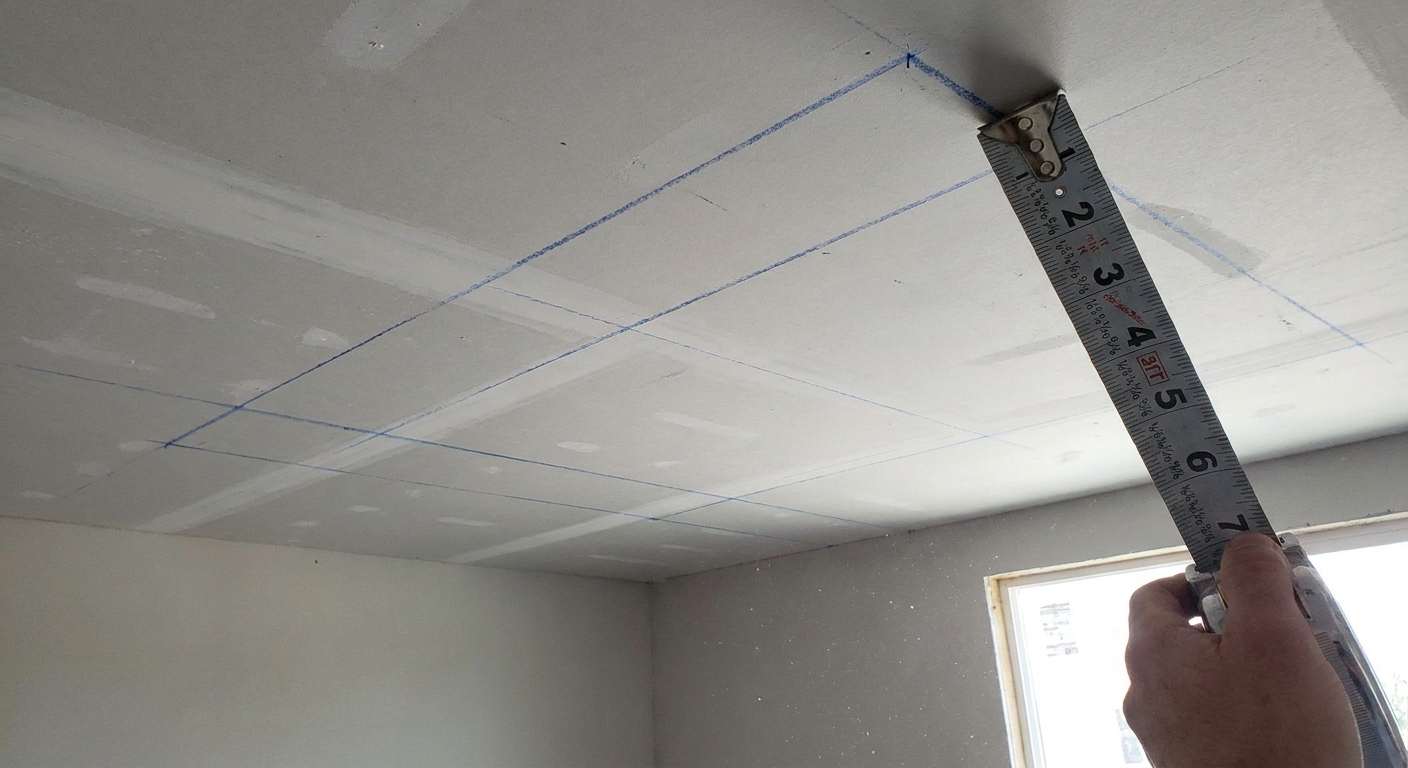
Example: A room that is 12 ft by 14 ft (144 in by 168 in). If you choose a 16 in soffit border all the way around, your inner opening becomes:
- Inner width: 144 - 16 - 16 = 112 in
- Inner length: 168 - 16 - 16 = 136 in
Step 2: Figure the drop
The drop is not just a design number. It determines whether lights fit, whether crown looks right, and whether your drywall and trim have enough backing.
Two numbers to keep straight
Tray ceilings get confusing because people use “drop” to mean two different things. Here is how I think about it:
- Bottom-plane drop: how far the underside of the soffit is below the original ceiling plane. This is what your headroom feels like.
- Step or visual drop: what your eye reads at the vertical face of the tray. This is mostly set by the height of the vertical face plus finish thicknesses.
Bottom-plane drop (simple way)
Bottom-plane drop = framing depth below the ceiling + bottom drywall thickness.
- If you build a small soffit using a 2x4 laid flat as the drop member, the framing depth is 3-1/2 in.
- Add 1/2 in drywall on the underside and you land around 4 in of bottom-plane drop.
That number describes the underside plane only. The vertical face will also get drywall, and if you use 5/8 in drywall or double layers for sound, your finished dimensions change. Decide what dimension matters most to you, then build to that.
If you want a 6 in or 8 in finished look
For most trays, what people care about is the step or visual drop at the vertical face. That is set by the height of your vertical face framing.
A good rule of thumb is:
Vertical face framing height ≈ desired finished step drop minus drywall on the bottom and drywall on the face.
- For about a 6 in finished step drop with 1/2 in drywall on the bottom and 1/2 in on the face: frame the vertical face around 5 in.
- For about an 8 in finished step drop with 1/2 in drywall on the bottom and 1/2 in on the face: frame the vertical face around 7 in.
If you switch to 5/8 in drywall, adjust your framing height accordingly. And if you are wrapping trim or crown in a way that changes where the eye measures from, mock it up with a scrap before you commit.
Keep it square
The cleaner your rectangle, the cleaner your tray. If you need a refresher on keeping framing square before it gets locked in, see: How to Square a Wall Frame Before Standing It. The same habits apply overhead.
Step 3: Find joists
Your tray ceiling framing needs consistent attachment to the structure above. Do not rely on drywall anchors or random fastening into old lath and plaster.
- Use a stud finder to locate ceiling joists or truss bottom chords.
- Verify by driving a small finish nail or drilling a tiny pilot in an inconspicuous spot.
- Mark joist locations lightly on the ceiling so you can hit them during install.
If the ceiling is not level, that is normal in older houses. Your job is to pick a reference plane and stay consistent so the tray looks straight to the eye.
Step 4: Snap lines
This step is where tray ceilings are won or lost.
Layout steps
- Measure your chosen soffit border in from each wall and mark points at several locations.
- Snap chalk lines to create the inner opening rectangle.
- Measure diagonals of the rectangle corner to corner.
- Adjust lines until the diagonals match. That means the rectangle is square.
How to center it in an out-of-square room
If the room itself is out of square, do not blindly follow the walls. Here is a centering method that works in real houses:
- Pick your tray size first (your inner opening rectangle).
- On the ceiling, mark the midpoint of each wall (measure wall length, divide by two).
- Snap a line between the midpoints of opposite walls in both directions. Those two lines cross at the room center.
- Build your inner rectangle centered on that intersection, then square it by matching diagonals.
A square tray that is centered reads intentional. A tray that follows a crooked room reads like a mistake.
Step 5: Install wall ledger
Most tray ceilings use a ledger or cleat around the perimeter that establishes the soffit height. There are a few ways to do it, but this is the method I keep coming back to for remodel work.
Method: wall ledger at the soffit height
- Decide your soffit drop and mark a level line around the room at that height below the existing ceiling.
- Fasten a straight 2x4 ledger to the wall along that level line, hitting studs.
- At inside corners, keep your ledgers tight and true. Gaps here will show later.
If you are working in a room with crown molding you plan to remove, do that first so your ledger has solid contact to framing, not trim.
Step 6: Frame the soffit
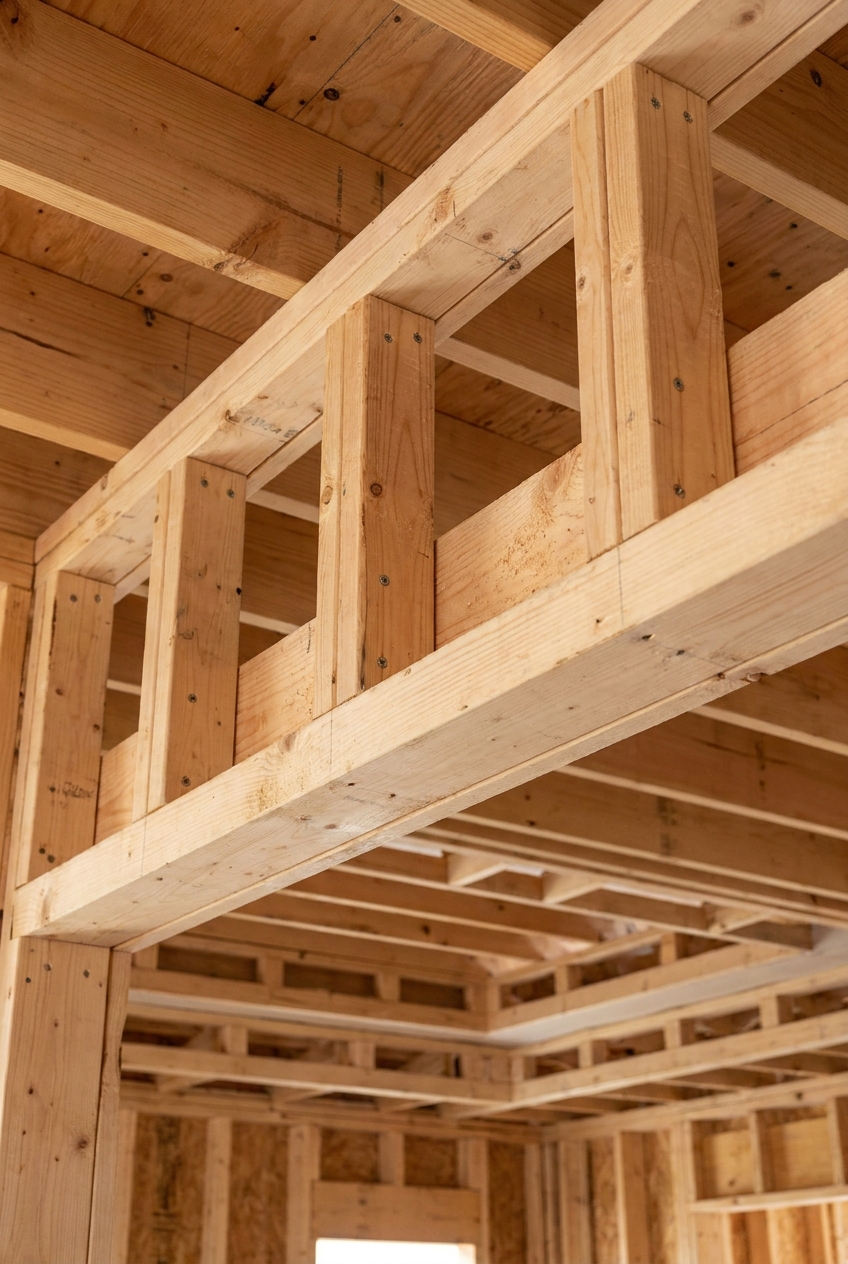
Now you are building the tray’s perimeter drop. Think of it like framing a short wall that hangs from the ceiling and ties back to the room walls.
One reliable sequence
- Ceiling nailer: Fasten a 2x4 along the chalk lines on the ceiling. This is the inside edge of your soffit.
- Drop pieces: Cut vertical blocks to your planned face height or drop dimension (depending on your design). Space them 16 in to 24 in on center. Use tighter spacing if you will have heavy trim.
- Bottom perimeter member: Attach a straight 2x (often a 2x4) to the bottom ends of the drop pieces to create the soffit bottom perimeter.
- Tie to wall ledger: Add horizontal ties or blocking from the soffit frame back to the wall ledger so the assembly is stiff and does not twist.
For long runs, I pick my straightest lumber for the bottom edge. Drywall and trim will follow whatever you build. If the bottom edge waves, the finished tray will wave.
Step 7: Frame the return
The return is the horizontal step surface that transitions from the soffit bottom up to the inner ceiling plane. In framing terms, you need backing so drywall has something solid to land on along that inner edge.
Return framing basics
- Add blocking that runs from the drop pieces back toward the inner opening edge, so the return drywall has continuous support. In practice, that often means short 2x blocks installed perpendicular to the joists, tying the inside soffit edge back into the frame.
- Make sure you have continuous backing at inside corners and at any joints where drywall pieces will meet.
- If your inner opening will get crown or a trim build-up, add extra backing now. Trim installers will thank you, even if that installer is future-you.
Pro habit: I like to stand back and sight the inside opening from multiple angles. If something looks off, fix it now. Once drywall is up, framing corrections get expensive.
Step 8: Add drywall backing
Tray ceilings create lots of inside corners and changes in plane. That means lots of drywall edges that want to crack if they are floating.
- Add backing at every inside corner where two drywall pieces will meet.
- Plan where drywall seams will land and add blocking if a seam would otherwise miss framing.
- At the inner opening edge, ensure there is solid nailing surface for corner bead and drywall returns.
One drywall tip that helps the framing
If you can, frame so the long edges of drywall land on framing and you are not forced into a bunch of skinny rips on the return. Skinny pieces move more and they are harder to finish clean. A quick sketch of your drywall layout before you finalize blocking pays off.
Step 9: Check it
This is your last clean chance to tune the geometry.
- Level: Shoot the soffit bottom plane with a laser. Shim or adjust if needed.
- Straight: Snap a string line along long runs. Plane or replace crowned pieces that push the line.
- Square: Re-check inner opening diagonals. If they drifted during install, correct the frame.
When I frame anything that is going to get a hard reveal or a shadow line, I slow down here. Five extra minutes checking saves hours of mud work later.
Common sizes
These are not rules, just common combinations that tend to look right.
| Ceiling height | Common soffit border | Common finished drop | Notes |
|---|---|---|---|
| 8 ft | 10 in to 16 in | 4 in to 6 in | Keep it lighter so the room does not feel compressed. |
| 9 ft | 12 in to 20 in | 6 in to 8 in | Good range for rope lighting and stronger shadow lines. |
| 10 ft+ | 16 in to 24 in | 8 in to 12 in | Allows a dramatic step and more layered trim. |
Mistakes to avoid
Following crooked walls without a plan
If the room is out of square, decide whether the tray should follow the walls or be square to itself. Most of the time, I keep the tray square and center it visually using midpoint lines, then I let trim cover the small differences at the perimeter.
Weak fastening
A tray ceiling is basically a suspended frame. Hit joists or truss chords consistently. If you are unsure, add more attachment points, not fewer. And again, keep drywall screws out of your framing bucket.
Wavy lumber on the bottom edge
Pick straight stock for the bottom perimeter. Sight down every piece at the lumber stack. Your eye will notice a wave in a tray ceiling faster than it notices it in a stud wall.
Not defining what “drop” means
A tray that was supposed to be a 6 inch drop can turn into something else fast if you are not clear on whether you mean the bottom-plane drop or the visual step drop. Call it out on your notes, then build to that number.
FAQ
Can I frame a tray ceiling without removing the existing drywall ceiling?
Yes, most decorative tray ceilings are framed right over the existing drywall, as long as you are fastening into joists and not relying on the drywall for strength. You will still need to open areas for new electrical if you are adding lighting.
Do I need 2x4s, or can I use 1x material?
You can use lighter material for some decorative builds, but 2x framing is forgiving, stiff, and gives you real fastening for drywall and trim. If you go lighter, you need to be extra careful about straightness and fastening.
How do I plan lumber so I do not waste a pile of 2x4s?
Make a cut list based on your perimeter lengths and your drop block spacing. I walk through the mindset here: Make a Cut List Before Buying Wood.
What if my ceiling is out of level?
Pick a level reference line for the soffit and stay true to it. Your eye reads the tray edges, not the old ceiling plane. A level tray in an old house usually looks better than a tray that follows a sag.
Next steps
Once the framing is solid, you are ready for electrical rough-in (if needed), then drywall, corner bead, and finish trim. The better your layout and blocking are now, the easier every step after this gets.
If you want more framing fundamentals that apply directly to tray ceilings, browse the main framing hub: Framing Guide.