I grew up sweeping sawdust in a little woodshop where the old guys treated stairs like furniture. Tight joints, clean lines, no shortcuts. Then I started framing houses and got introduced to the other reality: a set of stairs that looks fine from above can feel spongy, creak like a ship’s hull, or start cracking at the nosing because the support underneath is marginal.
The good news is you can often stiffen weak stair treads from underneath without tearing the staircase apart. The two most reliable fixes are structural glue blocks (small wood cleats bonded tight to the tread and stringer or riser) and secondary bracing (simple stiffeners that shorten the span and stop bounce). This is the same basic idea as adding blocking under a subfloor to kill squeaks, just adapted to the geometry of stairs. If you want that mindset for floors, see Prevent Floor Squeaks Before the Subfloor Goes Down.
What you can expect: This approach is great for squeaks, minor cracks, and bouncy treads where the structure is basically sound. It is not a magic fix for rot, insect damage, or broken stringers.
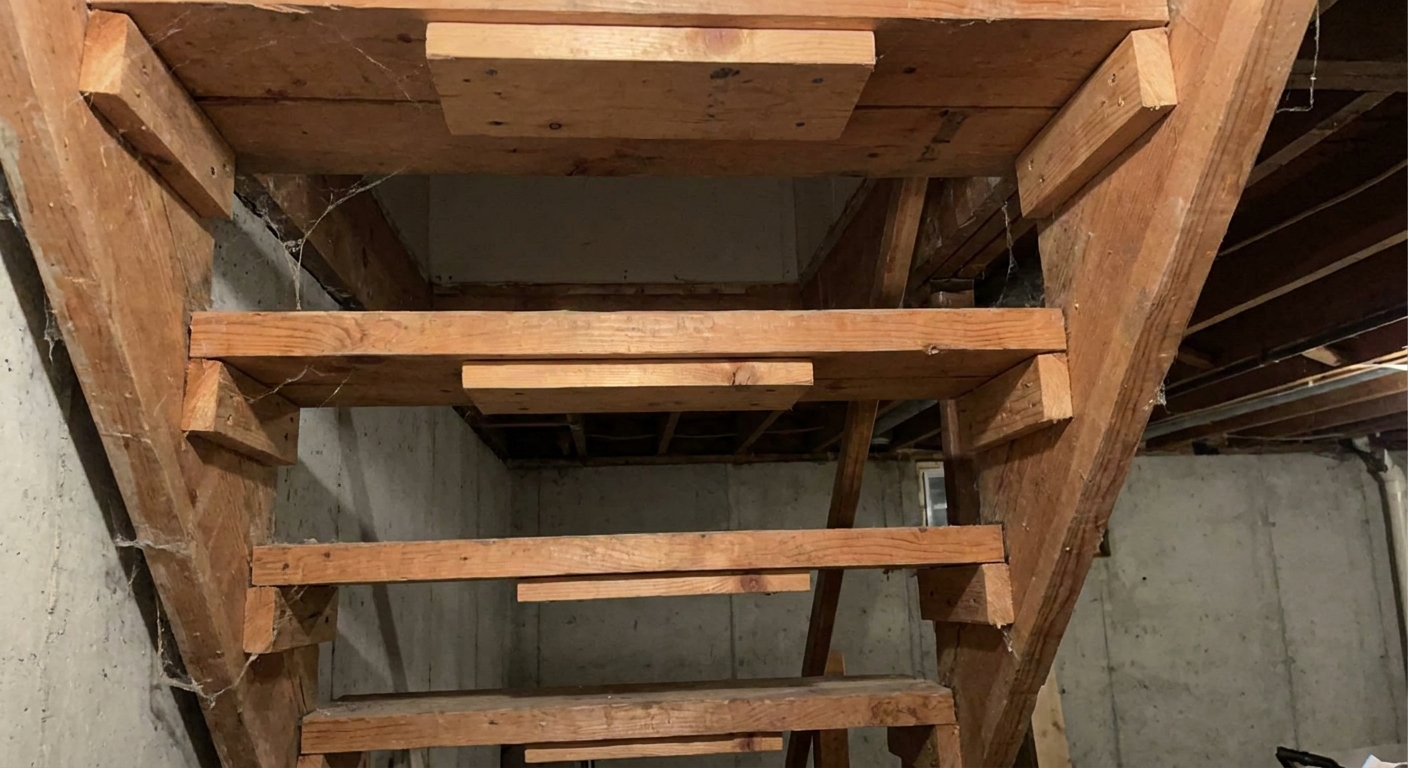
First, find what is moving
Before you add anything, figure out what is moving. Different problems call for different reinforcement.
- Squeak with solid feel: usually tread-to-stringer movement or tread-to-riser rubbing.
- Bounce or spring: the tread is spanning too far between supports, or the stringer is flexing.
- Crack at the nosing: tread is cantilevering too much past the riser, or it is splitting along grain from repeated flex.
- Visible gaps: failed glue line, shrunken wood, or fasteners backing out.
How I test: With someone walking the stairs slowly, I watch from below and keep a hand on the underside of the tread near each stringer. You can feel exactly where the slip is happening. Mark the problem spots with painter’s tape so you are not guessing later.
Know your stair build
Not all stairs are built the same, and where you reinforce depends on what you have.
- Housed (dadoed) stringers: the treads and risers sit in routed pockets. These usually respond well to glue blocks at the tread-to-stringer corners and to tread-to-riser reinforcement.
- Open or cleated stringers: the tread sits on a rough notch or on cleats. These often need better bearing, meaning cleats and ledgers bonded and screwed to the stringer, not just extra fasteners into the tread.
If you are not sure which one you have, look at the side stringer. If you see a routed pocket, it is housed. If you see a notch or a nailed-on cleat, it is open or cleated.
When an underneath retrofit makes sense
Retrofitting works best on typical interior wood stairs where you can access the underside from a basement, crawlspace, or open stairwell.
Good candidates
- Cracked or squeaky solid wood treads that are still mostly intact.
- Bowing or bouncy treads where the stringers are sound.
- Stairs where the finished surfaces on top are worth saving.
Stop and rethink if you see this
- Rot, long-term moisture staining, or punky wood.
- Termite or carpenter ant damage.
- Split or broken stringer, especially near notches.
- Severe tread cracks that open and close noticeably under load.
If the structure is compromised, you may be in repair territory more like framing first aid. The same logic I use for over-notched framing members applies here: reinforce only after you are sure the base material can hold. This article is a good mindset match: Structural First Aid for Over-Notched Studs and Joists.
Tools and materials
Tools
- Headlamp or work light
- Drill and driver with bits
- Clamps (small F-style or quick clamps), if you can fit them
- Putty knife or small chisel (for cleaning old glue and debris)
- Caulk gun (for adhesive)
- Speed square and tape
- Safety glasses and hearing protection
Materials
- Adhesive: a high-quality polyurethane or MS polymer construction adhesive meant for structural wood bonding. These handle small gaps and tend to hold up better than bargain all-purpose tubes.
- Wood for glue blocks: dry 2x stock or ripped pieces, typically 1x2, 1x3, or triangles cut from 2x4
- Screws: #8 or #9 wood screws are a solid default; length depends on tread thickness (details below)
- Optional: plywood gussets, metal angles, or additional 2x cleats for stiffeners
Fastener note: I prefer screws over nails for retrofit stair work because you can cinch joints tight without pounding on a finished staircase. If you are deciding between nailers for other framing tasks, here is my take: Cordless vs Pneumatic Framing Nailers.
Glue blocks under a tread
Glue blocks work because they add bonding surface area and create a shoulder between parts that want to slide. The goal is full contact and pressure, not a blob of adhesive.
1) Get access and locate the noise
Clear the under-stair area and set a light so you can see the tread-to-stringer and tread-to-riser joints. Have a helper walk up and down slowly so you can identify which joints move.
2) Prep the surfaces
Adhesive does not bond well to dust, old crumbly glue, or glossy paint. Scrape off loose debris. If the underside is painted, scuff the area where the block will land. Wipe the dust off so you are bonding to wood or solid paint, not powder.
3) Cut blocks that fit tight
The most useful glue block is a right triangle that nests into the inside corner. Cut triangles from straight, dry 2x4 or 2x6. Aim for something in the neighborhood of:
- Legs: 3 in to 5 in long
- Thickness: 1-1/2 in (standard 2x thickness)
Make a handful. You will almost always find more than one weak tread once you start listening closely.
4) Dry fit, then glue
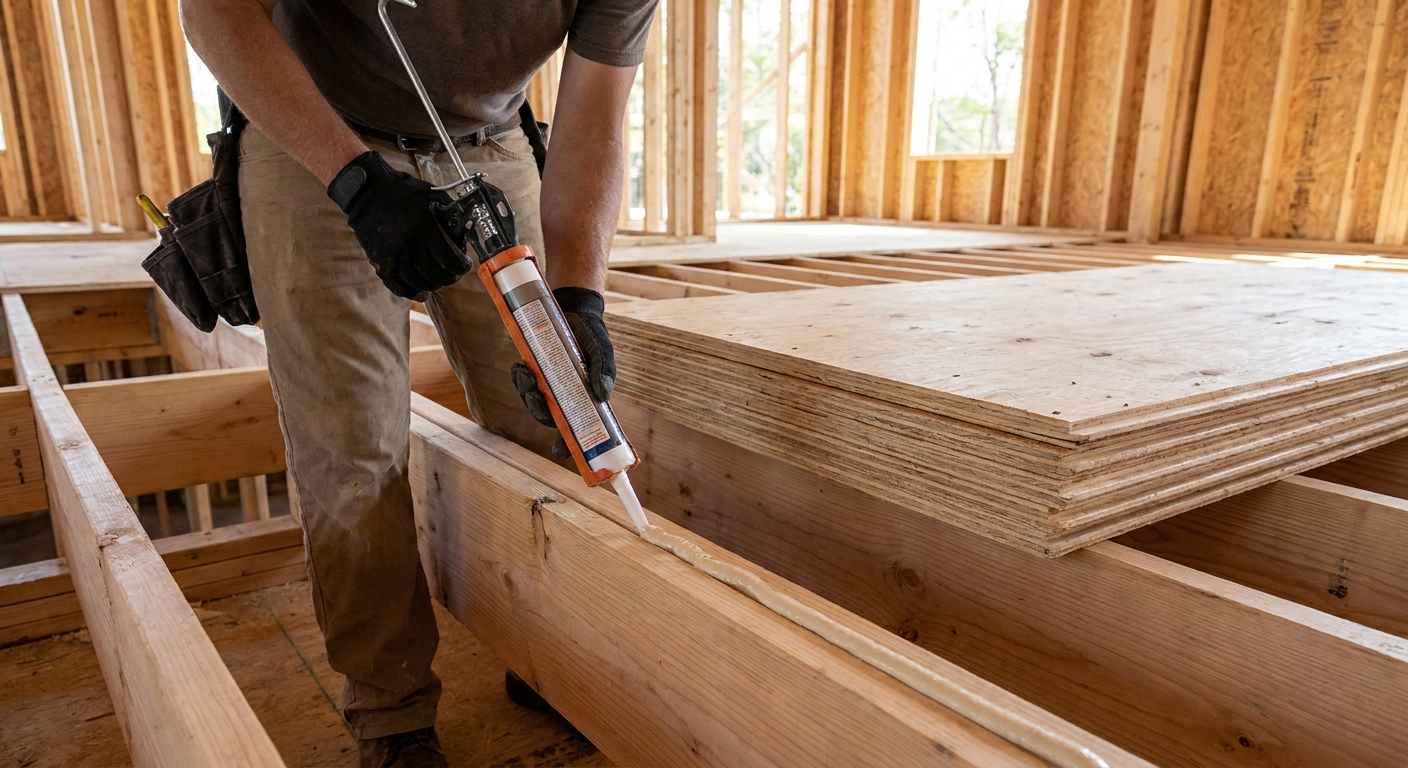
Dry fit each block so it sits flush against the underside of the tread and the face of the stringer or riser. Then run a generous bead of adhesive on both faces of the block. You want squeeze-out along both edges, not dry spots.
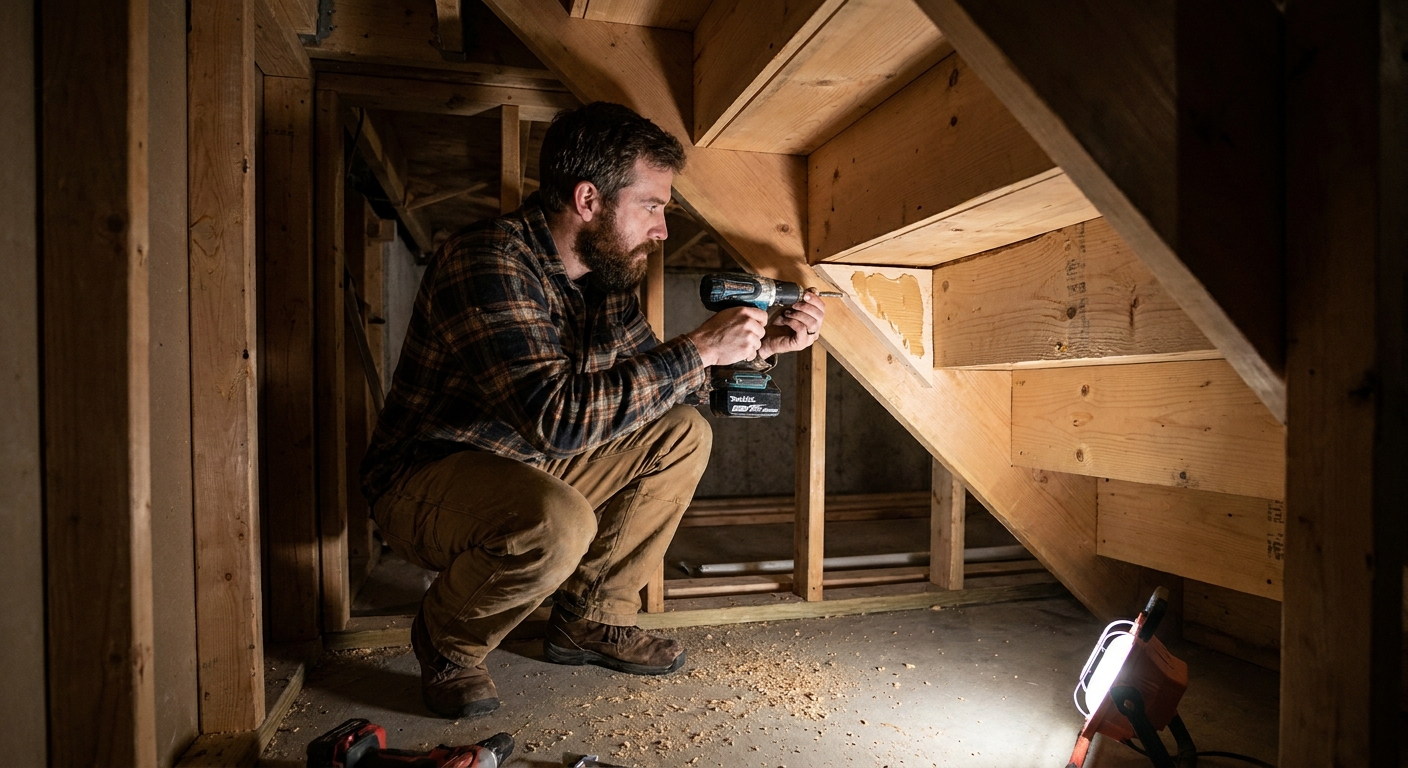
5) Clamp or press, then screw
If you can clamp, clamp. If you cannot, push the block hard into place and drive screws to hold pressure while the adhesive cures.
- Measure first: Measure tread thickness if you can. Old pine treads, hardwood treads, and tread caps can all be different.
- Screw length rule I use: pick a length that stops at least 3/8 in to 1/2 in shy of the finished walking surface. Remember, angled screws travel farther through the tread than you think, and the glue block thickness can tempt you to run longer screws than you should.
- Pre-drill: Glue blocks split easily. Pilot holes and a light countersink help.
- Screw count: For small blocks, one screw per face is usually plenty. For larger blocks, two per face is fine. Keep screws back from edges so you do not wedge the block apart.
- Do not over-tighten: You want the joint snug, not stripped. If a screw starts spinning, stop and move to fresh wood.
Tip from the job site: If you are worried about screw tips telegraphing through a hardwood tread, angle the screws slightly so they travel more along the tread’s thickness, not straight up toward the finished face.
6) Hit both sides when possible
On a typical stair, each tread bears on two outer stringers and sometimes a middle stringer. Reinforcing only one side helps, but reinforcing both sides is what kills twist and bounce.
7) Let it cure
Most construction adhesives grab quickly but reach full strength later. Follow the tube instructions. If the stairs are the only way to the bedrooms, you can usually still use them carefully, but avoid heavy loads until cure time is up.
Secondary bracing for bounce
Glue blocks are for joint movement. If the tread itself is flexing, you need to shorten the span or stiffen the tread.
Option A: Cleat ledger on the stringers
This is one of my favorite retrofits because it is simple, strong, and forgiving.
- Rip or use straight 1x2 or 2x2 cleats.
- Run them along the underside edge where the tread meets the stringer, one cleat per side.
- Bed the cleat in adhesive, then screw it primarily into the stringer with solid bite.
- Only fasten into the tread if you can confirm tread thickness and pick a screw length that stays safely shy of the finished face.
Think of it like adding an extra bearing lip so the tread is not relying on a thin glue line or a couple of old nails.
Option B: Stiffener rib under the tread
If a tread is bowing at mid-span, a stiffener rib underneath can make a dramatic difference.
- Cut a straight piece of 3/4 in plywood or a 1x3 to run across the underside of the tread, perpendicular to travel.
- Glue it and screw it tight to the tread underside.
- If possible, land the rib ends near the stringers for the best load path.
Option C: Mid-span support (only with a real load path)
On stairs with a long unsupported run, you can sometimes add a support under the treads, but be careful. Support has to transfer load into something solid, not just into drywall or a flimsy under-stair partition.
If you are building a small support wall or post under a stair run, treat it like real structure: plumb, tight, and anchored. My mindset for stiff, non-wobbly short walls is here: Build a Pony Wall That Never Wobbles.
Repair a cracked tread from below
A crack does not automatically mean replacement, especially if it is a split that has not displaced much.
1) Close the crack
Have a helper stand on the tread to bring the crack edges into alignment. From below, you can often see the crack close as the tread is loaded.
2) Use the right adhesive, then stitch it
- For hairline cracks: a thinner adhesive does a better job than thick construction adhesive. If you can get wood glue into the crack, great. If you cannot, a two-part epoxy that can bridge small gaps is often the next best move.
- Add a plywood strap (like a 3 in to 4 in wide strip of 3/4 in plywood) across the crack on the underside.
- Bed it in adhesive and screw it into the tread with screws short enough to avoid the finished surface.
3) Reinforce the corners too
Cracks often start because the tread is flexing at the stringer corners. Add glue blocks at the tread-to-stringer corners as well, not just a strap across the crack.
Stubborn squeaks
If you stiffen everything and still get a squeak, it usually comes from wood rubbing wood at one of these locations:
- tread-to-riser joint
- tread-to-stringer joint
- riser-to-stringer joint
For stubborn squeaks, I add a small glue block right at the noisy joint, then drive a screw to draw the members tight while the adhesive cures. The screw is acting like a clamp you leave behind.
Practical cautions
Interior stairs are life safety components. If anything feels structurally questionable, do not treat this like a cosmetic fix.
- Do not remove or notch stringers to make your bracing fit.
- Do not rely on drywall screws for structural reinforcement. Use proper wood screws.
- Watch future finishes: Do not add bracing where it will interfere with skirt boards, finish nails, or where someone will later try to staple a runner or carpet pad.
- Keep headroom and clearance in mind if you are adding supports in an under-stair storage area.
If you are working on stair layout, replacement, or anything involving stringer geometry, you will want this companion piece: How to Calculate and Cut Stair Stringers.
Troubleshooting
Block will not sit tight
- The corner is out of square or has a gap. Make a slightly larger block and scribe it, or use two smaller blocks instead of one big one.
- Old adhesive ridge is holding it off. Scrape more aggressively and re-test the fit.
Screws strip or wood is soft
- Move the screw location to fresh wood.
- Step up one screw gauge or use a longer screw where safe.
- If the wood is genuinely soft or crumbly, stop and evaluate for moisture damage or insects.
Tread still bounces
- You likely need secondary bracing. Add cleat ledgers or a stiffener rib, not more blocks.
- Check if a stringer is flexing. A flexing stringer can make every tread feel weak.
My rule for stair retrofits
If I can make the tread act like it has a tight corner joint and a shorter, better-supported span, the problem usually goes away for good. Glue blocks handle the corner. Bracing handles the span. Take your time on fit, surface prep, and screw length, and you can get a long second life out of a staircase without rebuilding it.