
Choosing the Right Reclaimed Wood
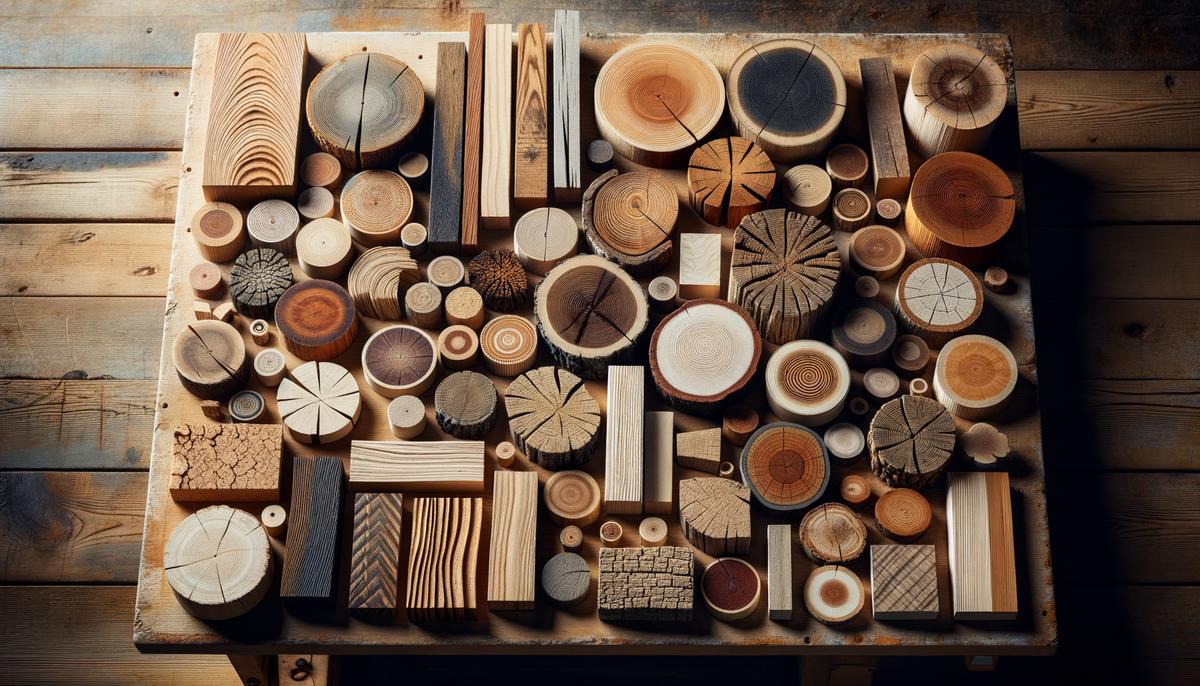
Picking the right reclaimed wood for your project requires know-how and effort. Start by understanding the available wood types:
- Oak: Strong with a distinct grain, perfect for sturdy furniture.
- Pine: Offers rustic charm, ideal for cozy home setups.
- Douglas fir: Often found in old buildings, provides strength and character.
Assess the condition. Wood with deep cracks or warping might not be suitable unless you want an extremely rustic look. Check for rot. Reclaimed wood often endured decades in poor conditions, and while scars can add character, rot doesn't.
Be cautious of nails and metal. A rusty nail can damage your saw blade quickly. Inspect the wood carefully. Some tools make nail extraction easier, but a basic nail puller can work well. Remember, one overlooked nail can lead to costly mistakes.
Historical significance can be a selling point. Boards from old barns or vintage warehouses carry stories, adding value to your project. However, it's not always about age. Sometimes it's about the species. Old-growth wood, with tight grain patterns, offers durability not found in newer lumber.
Consider aesthetics and structural needs:
- For a table, you might want a hardy species for daily use.
- Wall paneling might require something lighter.
- Match the wood to your project. An unsuitable wood choice can result in a project that falls short.
Search for wood smartly. Social media and sites like Reddit can be valuable resources. Warehouses, pallet companies, and demolition sites are worth exploring. Sometimes the best finds come from unexpected places.
Size consistency is crucial. Check the lengths and widths of your reclaimed stock. Uneven boards can lead to wobbly furniture. Don't hesitate to cut and sand pieces for uniformity. Your final piece will benefit.
Don't forget preparation work. Clean your wood to avoid hidden pests or dirt that might affect your final product. Sanding will bring out its best qualities. Be careful not to overdo it; you don't want to remove the character that makes reclaimed wood special.
Preparing Reclaimed Wood
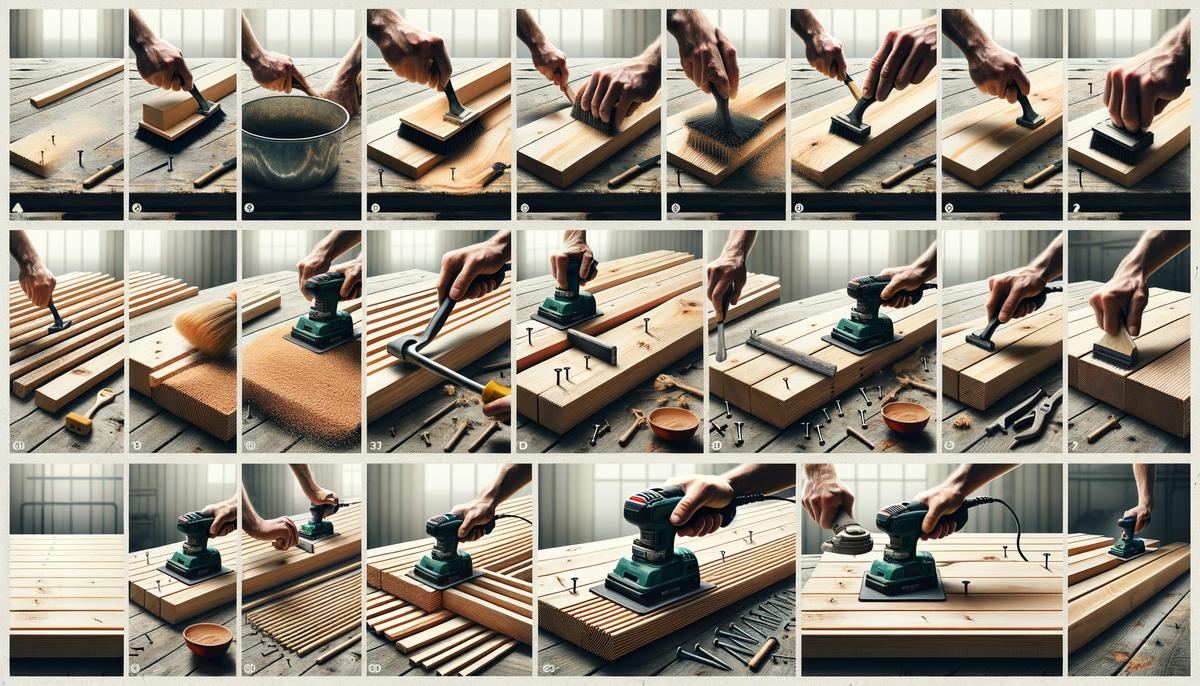
Preparing reclaimed wood involves several key steps to ensure it's ready for your project:
- Cleaning: Begin with a thorough cleaning. Use a stiff brush and mild detergent. For stubborn grime, consider a pressure washer, but be careful—excessive pressure can harm the wood.
- Metal Removal: Remove any nails, screws, or metal objects. Use a nail puller or pry bar for stubborn nails. They're often well hidden, so be thorough. Pro tip: Run a magnet over the wood to detect buried metal your eyes might miss.
- Pest Inspection: Look for tiny holes or sawdust trails, which might indicate wood-boring insects. Treat questionable areas with a wood preservative or insecticide to prevent future problems.
- Planing and Sanding: Depending on the condition and your project's needs, you might need to run the wood through a planer. This helps level out warps and removes remaining rough surfaces.
Sanding is where improvement begins. Start with coarse grit sandpaper, like 40 or 60 grit, to smooth major rough spots. Gradually progress to finer grits, like 120 or even 220, depending on your desired finish. Sanding reveals beautiful grain patterns hidden beneath years of wear.
If your project requires a specific finish, you may need to treat the wood. This could involve staining, sealing, or applying protective polyurethane. Different finishes can highlight various aspects of the wood's character. Always test your finish on a small, hidden area first to see how the wood reacts.
For outdoor projects, additional weatherproofing is wise. Apply an exterior-grade sealer or paint to protect the wood from moisture and UV damage.
"It's also important to acclimate your wood. Let the wood sit in your workshop for at least a few days, preferably weeks, before using it. This prevents future warping and cracking."
The key to working with reclaimed wood is patience and attention to detail. Each step ensures the wood not only looks great but also performs well in your project.
Techniques for Joining Reclaimed Wood
Joining reclaimed wood requires careful consideration of its irregularities and character. It's about working with the imperfections to create a piece that's both sturdy and unique.
Popular Joining Techniques:
- Dovetail joints: Popular for their strong interlocking design. Use a dovetail jig for accuracy, and take time when fitting the pieces.
- Mortise and tenon joints: Ideal for framing and structural work. Reinforce with wood glue for added durability.
- Dowels: Offer a straightforward way to join wood while retaining rustic charm. Choose dowel locations wisely to avoid hidden knots or weaker sections.
Consider reinforcing your joints. While reclaimed wood has its own strength, its age and wear can make it unpredictable. Reinforcement can include using wood glue in addition to mechanical fasteners or adding metal brackets.
For added stability in furniture pieces like tables and chairs, consider using corner blocks. These small triangles of wood are attached to the inside corners of your joints, distributing stress and adding significant strength.
Another aspect to consider is the presence of old nail holes or cracks. These can be filled with wooden plugs or epoxy resin. If you prefer to keep the rustic look, leave them as they are; they tell a story and add to the aesthetic.
Remember, reclaimed wood often means dealing with non-standard dimensions. Using a band saw or table saw can help you achieve more uniform edges and surfaces, making your joinery more precise.
When working on large frameworks or pieces that need significant structural integrity, consider using biscuits. These are oval-shaped pieces of compressed wood that fit into slots cut into the adjoining pieces. When glued, they expand, creating a tight bond.
"Always dry-fit your pieces before committing to any glue or fasteners. This step helps ensure that everything aligns correctly and reveals any adjustments you may need to make."
Joining reclaimed wood combines technical skill with an appreciation for the material's history. Use these joinery techniques to celebrate the wood's character while ensuring your project remains strong and functional.

Incorporating Reclaimed Wood in Design
Using reclaimed wood in your design adds authenticity and character. Whether it's accent walls, furniture pieces, or decorative elements, reclaimed wood brings a unique story to your space.
Popular Design Applications:
- Accent walls: Create a focal point with varied tones and textures.
- Furniture: Dining tables, coffee tables, or bookshelves can spark conversations.
- Decorative elements: Picture frames, mirrors with reclaimed wood borders, or custom headboards.
Creating a cohesive look involves balancing reclaimed wood's rugged appearance with your space's existing design elements. Pairing reclaimed wood with modern furniture can create an appealing contrast. For a more rustic feel, combine reclaimed wood with vintage finds or other natural materials, such as stone or metal.
Lighting plays a crucial role in showcasing reclaimed wood. Warm, ambient lighting can highlight the wood's textures and colors, making its beauty stand out. Consider using Edison bulbs or lamps with a soft glow to complement the wood's warm tones.
Don't be afraid to get creative. Mix it with other materials like glass or metal for an industrial chic look. Use it in unexpected places, like kitchen islands, bathroom vanities, or even as a unique ceiling treatment.
"Incorporating reclaimed wood in outdoor spaces can enhance your garden or patio area. Think planters, garden benches, or even pergolas made from reclaimed beams."
This creates a harmonious transition between indoor and outdoor living spaces.
Whether you use it sparingly or let it dominate your space, reclaimed wood's unique history and charm will enhance any environment, making it not just a place to live, but a place with character and history.

- Smith J, Johnson R. The Art of Reclaimed Wood Craftsmanship. Woodworker's Journal. 2019;44(3):56-62.
- Brown A. Sustainable Design with Reclaimed Materials. Architectural Digest. 2020;77(2):89-95.
- Davis M. Joinery Techniques for Antique Wood Restoration. Fine Woodworking. 2018;269:64-69.