Window Framing Tips
Nothing slows down the wall framing process quite like installing window framing components. There are so many parts that need to be assembled, without good planning and an efficient process, a lot of time will be lost.
Framing Components
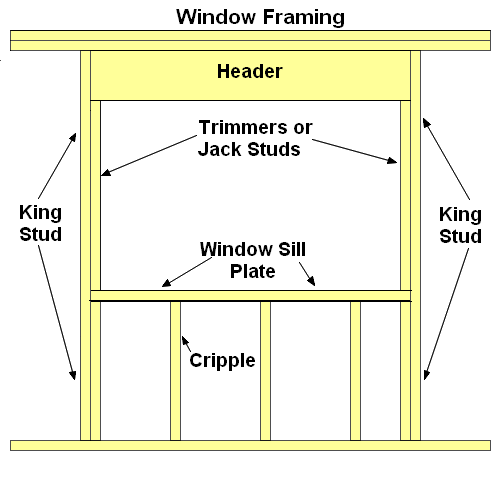
Header – Supports weight of rafters, ceiling, and floor joists from above. Should be built three inches longer than the window rough opening width.
King Stud – Runs from bottom to top plate and is nailed on both ends of the header.
Trimmers – Are nailed to the inside of king studs and under both sides of the header. The trimmers are cut to the same length as the window rough openings height.
Window Sill – Is the same length as the header and nailed to the bottom of the trimmers and to the king studs.
Cripples – Are nailed to window sill lay out marks and king studs to support the window sill.
Diagram showing location of framing components.
After years of trial and error, and discussions with other carpenters, we have decided upon the following procedures for framing window rough openings. The following steps are the best way we’ve found to increase efficiency and reduce the chance of errors.
Framing a Window Rough Opening
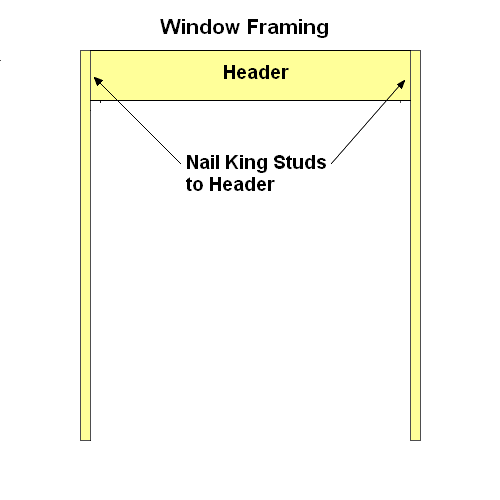
Nail king studs to header.
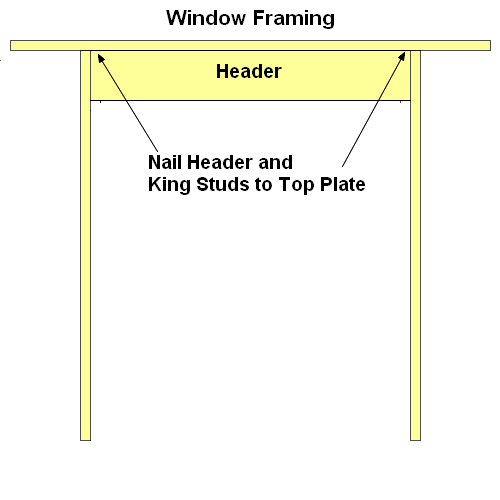
Nail header and king studs to top plate.
Nail trimmers under both ends of header and to king studs.

Nail window sill plate to bottom of trimmers and through king studs.

Nail cripples to window sill plate and to king studs.

You can now precede to nail on the bottom plate. For more information on framing, please visit our framing walls page.
Many carpenters prefer to run the trimmers from the bottom plate all the way to the bottom of the header. Some localities auctually require this so be sure and check the local building codes.
Some builders want the window installed with double sill plates. We usually only do this in two instances. If the window is over five feet wide, or vinyl siding is to be installed.
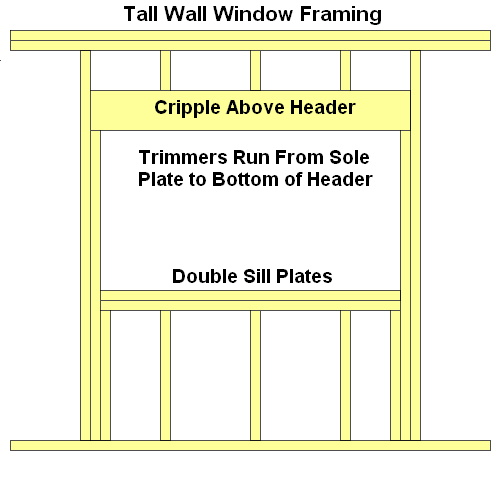
These days many homes are built using nine foot walls. When this is the case cripples must be used above the header. Below is a diagram of window framing in a tall wall. It also illustrates the use of double sill plates and the trimmers running from top to bottom.
Tall Wall Window Framing
Links to Related Carpentry Pro Framer Pages
|
|