
Identifying Rotted Wood
Look for discoloration; the wood's color may appear off compared to the rest. You might notice brown, black, or other odd hues. A spongy texture is another sign. Press the wood firmly, and if it gives in too easily, it's likely rotted.
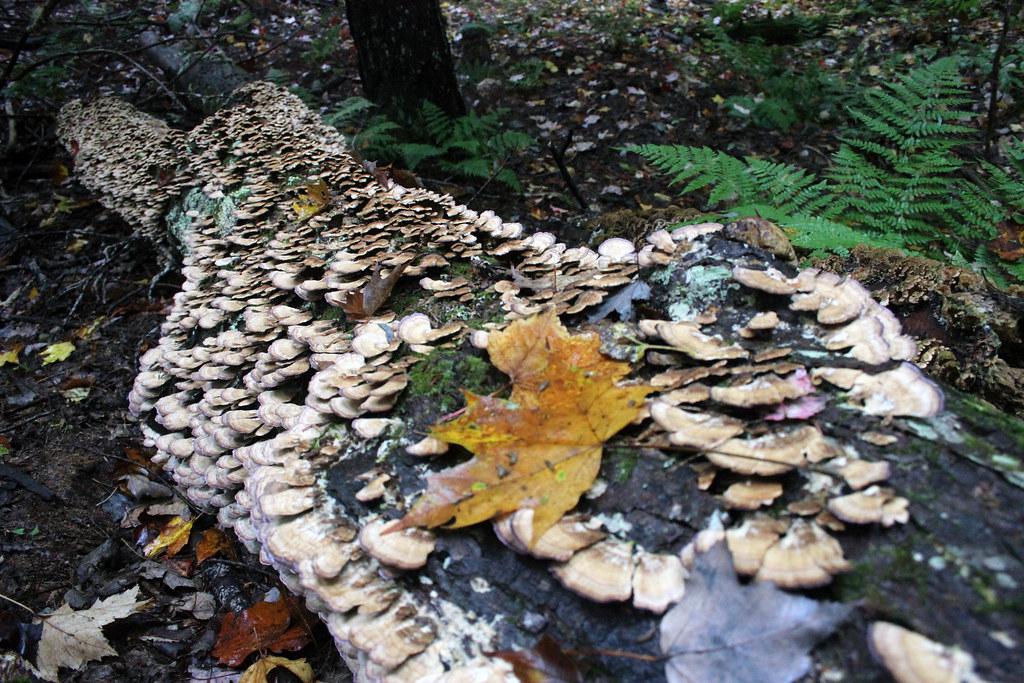
Visible fungus is a red flag. Fungi often indicate wood rot is already widespread. Mushrooms or other growths aren't welcome on window sills, beams, or door frames.
Use a screwdriver to test. Push it into the wood. If it sinks in more than 1/8 inch, you've got a problem. While testing, listen for sound changes. Healthy wood resists with a firm scrape, while rotted sections may sound dull and hollow.
Note the difference between surface-level and deep rot. This helps determine if a simple patch will suffice or if entire wood sections need replacement.
Removing Rotted Wood
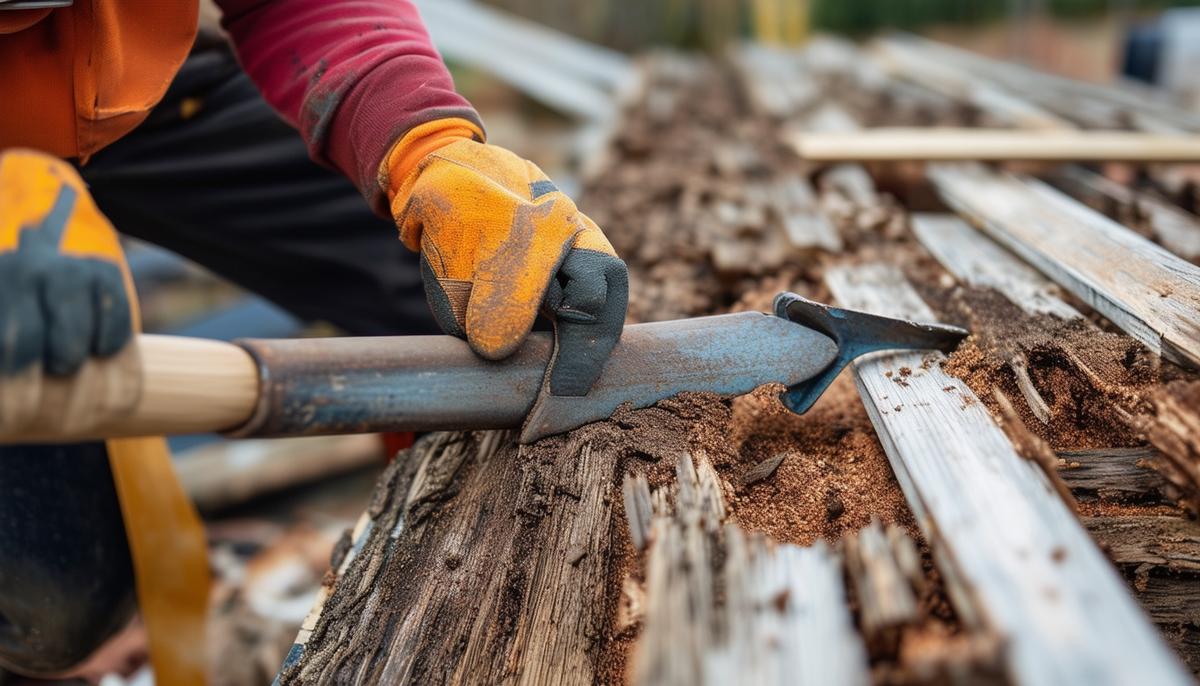
Grab a pry bar or chisel to carefully chip away problem areas. Start by inserting the tool into the rotted wood's edge. Work until you reach solid wood. Dig deep enough to find fresh, unaffected material.
Be methodical and controlled to avoid additional problems. Apply steady pressure with your tools, avoiding aggressive movements that can splinter or damage nearby healthy wood.
- When using chisels, always cut away from yourself
- Keep fingers clear of the blade
- Wear gloves and goggles to protect against splinters and debris
After removing all rotted wood, inspect the newly exposed healthy wood. Use your screwdriver again to ensure you've reached solid ground. Consider using wood hardener if the remaining wood is slightly compromised but salvageable.
Clean up the area, clearing out wood chips and dust. This creates a clean surface for repairs.
Repairing Wood with Fillers
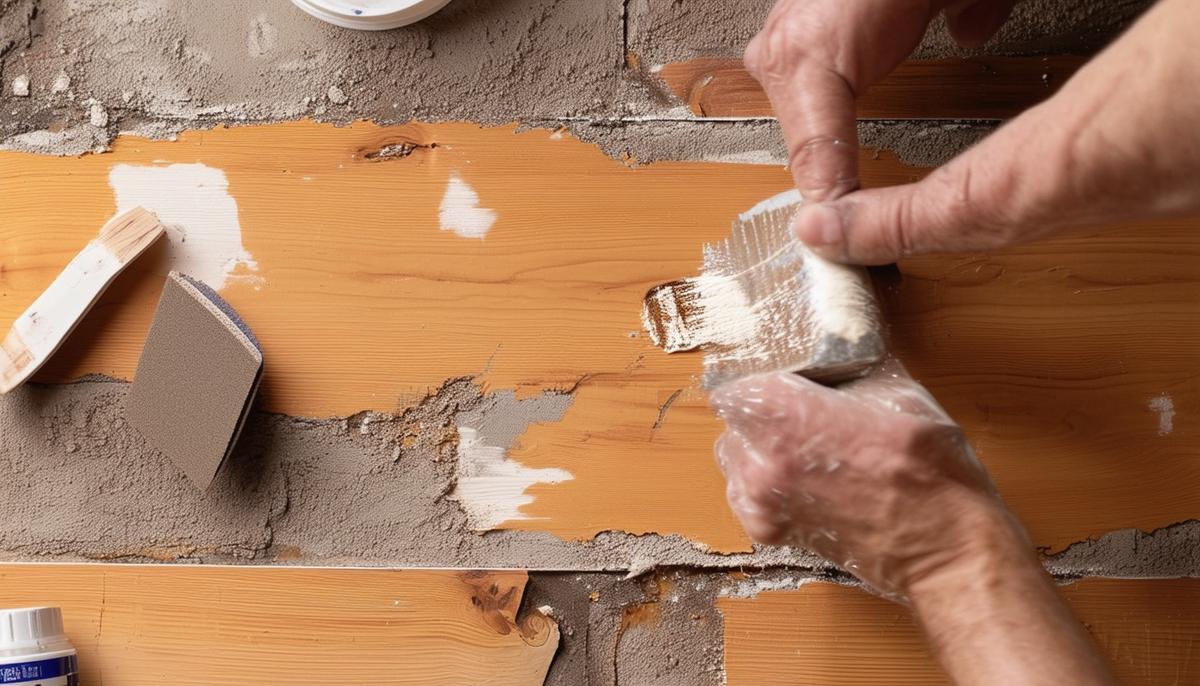
After rot removal, boost the remaining wood with hardener. Apply a generous coat with a brush, ensuring it soaks deep into the healthy wood.
Once the hardener dries, use polyester wood filler or epoxy resin to rebuild gaps. Mix the filler as directed and spread it over the damaged area with a putty knife, pressing it into every crevice. Smooth the surface while the filler is workable.
Let the filler cure fully. This may take hours or overnight, depending on the product.
- After curing, sand the area (start with 80-grit, progressing to finer grits like 150) to make it flush with surrounding wood.
- Wipe down the sanded area to remove dust.
- This prepares the surface for primer, paint, or finish.
Always follow product guidelines for hardeners and fillers. Some brands require specific handling or drying techniques.
Preventing Future Rot
Ensure proper drainage around your home. Water pooling near your foundation or wooden structures invites problems. Check gutters and downspouts regularly; they should direct water at least 6 feet from your house. Clean them twice yearly to prevent blockages.
Address leaks promptly. Whether it's a roof issue, plumbing problem, or small drip, don't ignore it. For hard-to-reach areas, use a water meter to detect hidden leaks.
Ventilation is crucial. In damp areas like basements, crawl spaces, or attics, consider exhaust fans or dehumidifiers. Good air circulation helps keep everything dry.
Schedule inspections twice a year. Look for early signs of moisture issues, such as water stains, discolored wood, or soft spots.
Use quality wood primers, paints, or sealants made for exterior use. For outdoor furniture or structures, reapply coatings every few years or as directed. In high-humidity or rainy areas, consider water-repellent preservatives.
Replacing Severely Rotted Wood
For extensively damaged wood, replacement might be the only option. Start with accurate measurements using a carpenter's square.
Cut the wood slightly longer than needed using a circular saw or reciprocating saw. Do a dry fit to check measurements, using a chisel or sandpaper for fine-tuning if needed.
Apply plenty of exterior wood glue to edges contacting the existing structure. Position the new wood, aligning it precisely with surrounding sections. Secure it with galvanized wood screws or nails, spacing them evenly along the wood's natural lines.
Sand down the edges to make it flush with surrounding wood. Start with 80-grit sandpaper, then progress to finer grits like 120 or 150.
Apply primer, then paint or stain to match surrounding wood. Finally, add a sealant layer to protect against future rot and weather damage.

- Simpson W, TenWolde A. Physical Properties and Moisture Relations of Wood. In: Wood Handbook: Wood as an Engineering Material. Madison, WI: USDA Forest Service, Forest Products Laboratory; 2010.
- Highley TL. Biodeterioration of Wood. In: Wood Handbook: Wood as an Engineering Material. Madison, WI: USDA Forest Service, Forest Products Laboratory; 2010.
- Carll CG, Highley TL. Decay of Wood and Wood-Based Products Above Ground in Buildings. Journal of Testing and Evaluation. 1999;27(2):150-158.