Laying Out Wall Framing
When laying out wall framing, the lead man must be efficient, clear, and concise with the marking of the framing components. This page contains some tips and shortcut’s to speed up this carpentry task.
The job
of marking out wall plates normally falls to the most experienced
carpenter on the crew. Any mistakes made at this stage of the game
will only slow up the progress of wall framing, after all, time is money especially at today’s prices. Once again there is no substitute for good planning. Study the floor plan before you start marking out walls, clear up any question’s that you may have.
General Lay Out Guidelines
1. Begin by marking and chalking exterior lay out lines. I like to start while the sub floor is still being laid, that way the crew can start framing wall’s as soon as their finished.
2. Mark and lay out the interior wall’s
3. Sharpen both end’s of your carpenter’s pencil, then when the lead breaks off, you won’t have to stop and sharpen it.
4.
Carry a black and red pencil. You will most certainly make some error’s
Have you ever tried to erase black carpenter pencil mark’s from
wood? When laying out tell all framing crew member’s that red takes precedence.
5. Work out a plan so the wall framing crew won’t be in your way and vice versa.
6. Build the wall’s in proper order, don’t paint yourself into a corner.
Wall Framing Lay Out
1. Begin with the longest wall.
2. Measure and cut two identical wall plates, one for top and bottom.
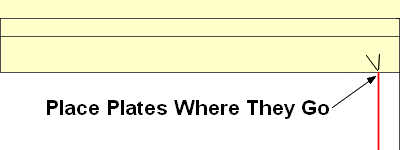
3. Place bottom plate on edge exactly where it goes on lay out line and toe nail it to the deck with 8 penny nails.
4. Toe nail the top plate next to the bottom plate, just good enough to hold it in place.
Typical Wall Layout Marks
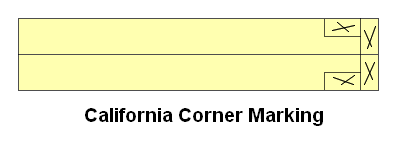
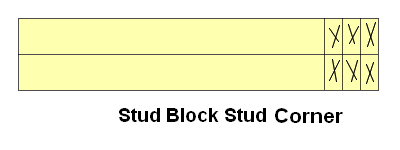
5. Mark corner’s.
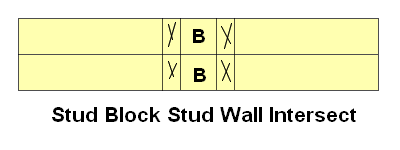
6. Locate and lay out all wall intersection’s.

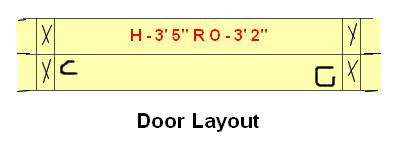
7. Find center’s of all window’s and door’s.
8. Lay out all window’s and door’s, make sure to write down each header and rough opening size in red pencil.

9. Mark all studs and cripples.

10. Measure, cut, and tack final top plate in place, leaving space for wall intersection tie in’s and corner’s
11. On to the next wall.
Links to Related Carpentry Pro Framer Pages