
Tools and Materials
For crown molding installation, you'll need:
Tools:
- Cordless finish nailer
- Hammer
- Nail set
- 2-foot level
- Compound miter saw
Materials:
- Flat crown molding
- Flat stock (optional, for added thickness)
- Caulk
- Paint
- Primer (if molding isn't pre-primed)
- Paint brush
A cordless finish nailer is essential for securing the molding. Keep a hammer and nail set nearby for occasional adjustments. A 2-foot level ensures straight installation. Position your molding about 1/2 inch down to conceal ceiling irregularities.
Caulk is crucial for filling gaps and seams. Use paintable caulk for best results. Have paint and a paint brush ready. If your molding isn't pre-primed, obtain some primer to prevent warping.
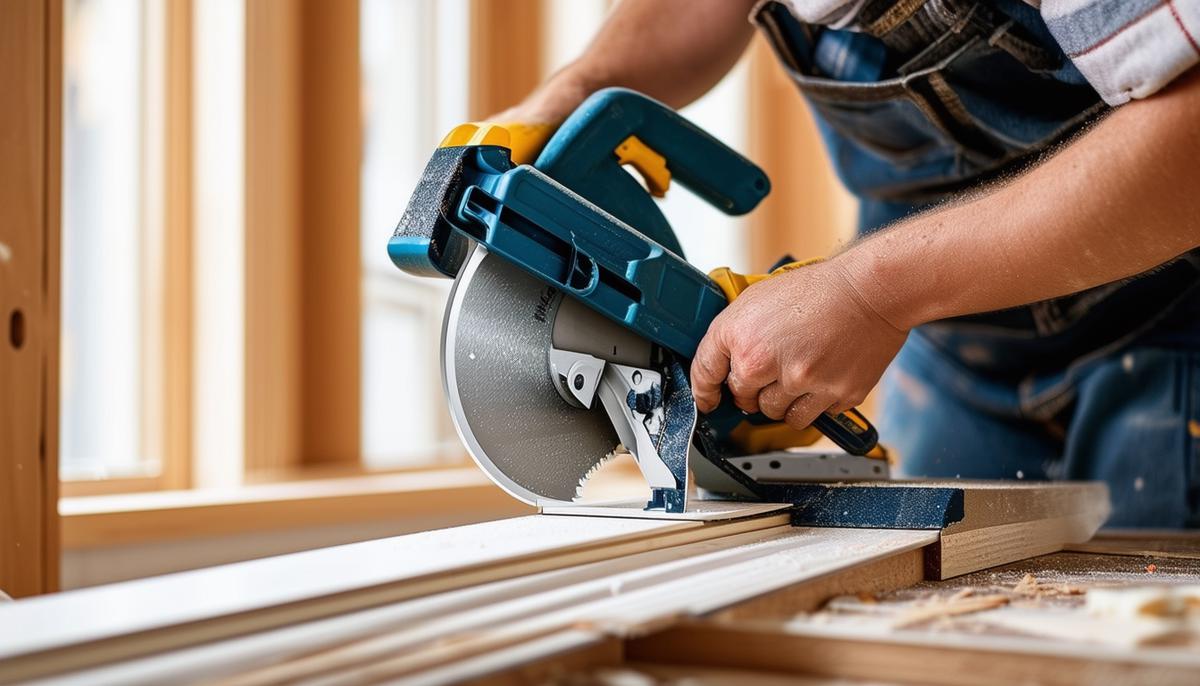
A compound miter saw is necessary for precise cuts. It's worth investing in or renting one for your project.

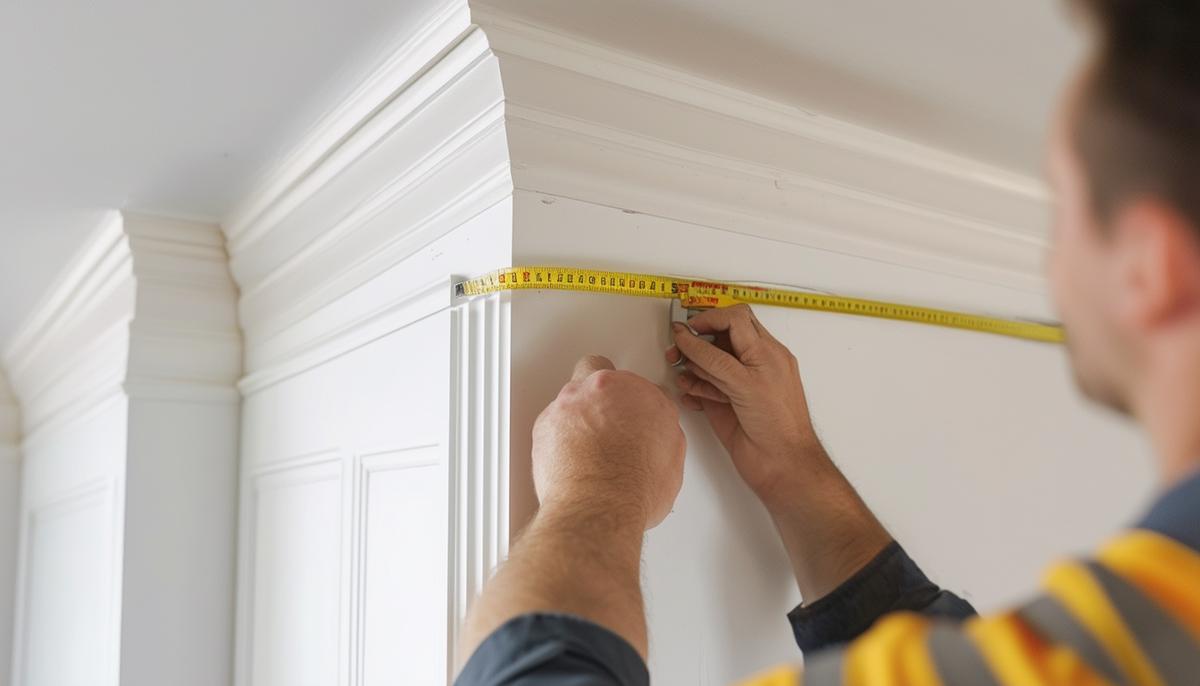
Preparation and Measuring
- Measure from corner to corner, wall-to-wall.
- Draw a faint line on the wall marking the bottom of the crown molding.
- Use a stud finder to locate and mark stud positions for secure anchoring.
- Cut a scrap lumber piece to the correct dimension using a framing square.
- Draw layout lines on the wall and ceiling where the molding will sit.
- Hold the molding against the wall and transfer the stud marks for accurate nail placement.
Start on the wall opposite the door for the best first impression. Plan your approach around the room strategically, coping the molding where necessary for seamless fitting.
Cutting Crown Molding
Cutting crown molding requires precise cuts for inside corners, outside corners, and scarf joints.
Inside Corner Cuts:
- Bottom edge is longer, top edge shorter
- Left side: cut angles up to the left
- Right side: cut angles up to the right
Outside Corner Cuts:
- Bottom edge is shorter, top edge longer
- Right side: cut angles up to the left
- Left side: cut angles up to the right
Scarf Joint:
Used when two molding pieces meet along a long wall. This cut angles in the same direction on both pieces, creating an overlap that conceals the seam.
Cutting Technique: When cutting inside and outside corner crown molding, position each piece upside down on your miter saw. Set the miter saw to a 45-degree angle for most cuts.
For scarf joints, place the molding flat on the saw table without flipping it. Tilt the saw blade to a 45-degree angle and cut.
Pro Tip: Maintain consistency between boards by marking the saw table with a pencil to indicate the molding's position.
Installing Crown Molding
- Begin installation at the most visible corner of the room.
- Gently bend the crown molding into place, adjusting for any wall or ceiling irregularities.
- Attach the molding using a cordless finish nailer, securing it into the marked studs.
- Use a hammer and nail set for any nails that don't sit flush.
- Apply paintable caulk to fill gaps, spaces, or seams between molding pieces or where the molding meets the ceiling.
- Smooth the caulk with a damp finger or wet rag for a seamless look.
- Continue around the room, ensuring each subsequent piece fits perfectly into the preceding one.
- Fill any visible nail holes with caulk as well.

Finish and Paint
Address any nail holes or small gaps with paintable caulk. Apply a small bead of caulk directly into the holes and seams, smoothing it out with a damp rag or your finger.
Once the caulk has dried, prime the molding if it wasn't pre-primed. This prevents wood tannins from bleeding through the paint.1
Paint the molding with your selected color, using a paint brush for precision. Apply light, even coats, allowing each layer to dry thoroughly before applying the next. Multiple thin coats are better than one thick one for even coverage and reduced risk of drips.
Touch up any areas where the caulk might have left a dull finish or where nail holes might still be visible.

Your crown molding is now fully installed, finished, and painted. Take a moment to appreciate the touch of class you've added to your room.
"The details are not the details. They make the design." – Charles Eames
- Wilkinson JM, Moreira RG. Wood tannins and their effects on wood surface characteristics. Wood Sci Technol. 2017;51(4):771-784.