
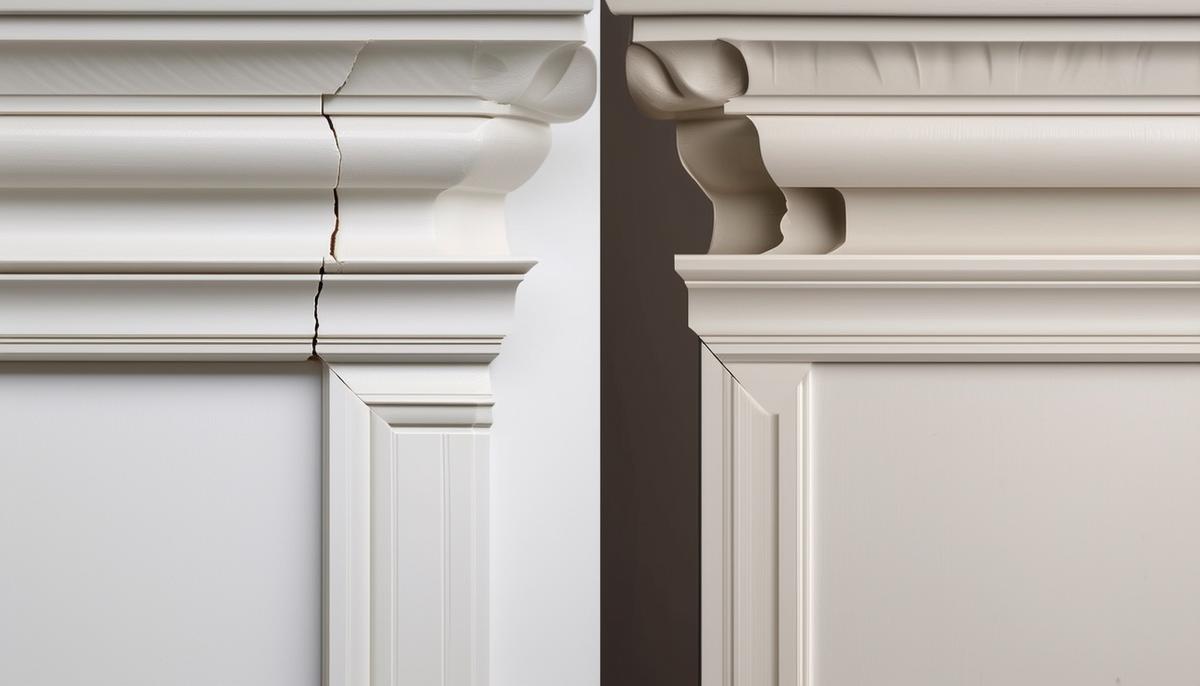
Coped vs. Mitered Joints
Crown molding adds an elegant touch to a room, but getting those joints right is the real challenge. Coped and mitered joints are two techniques you'll use often—knowing when to use each saves you hassles.
Mitered joints join at a perfect 90-degree angle. They work well for perfect corners. Mark where the bottom of the molding will sit. Angle your saw at 45 degrees in the needed direction, with the ceiling edge flat on the table and wall edge against the fence. Remember to position the crown molding upside down—ceiling side down and wall side up.
For outside corners, the process is the same, but the bottom edge will be short, and the top edge long. Fit the pieces snugly before nailing. Make a slash mark to get the direction right before cutting.
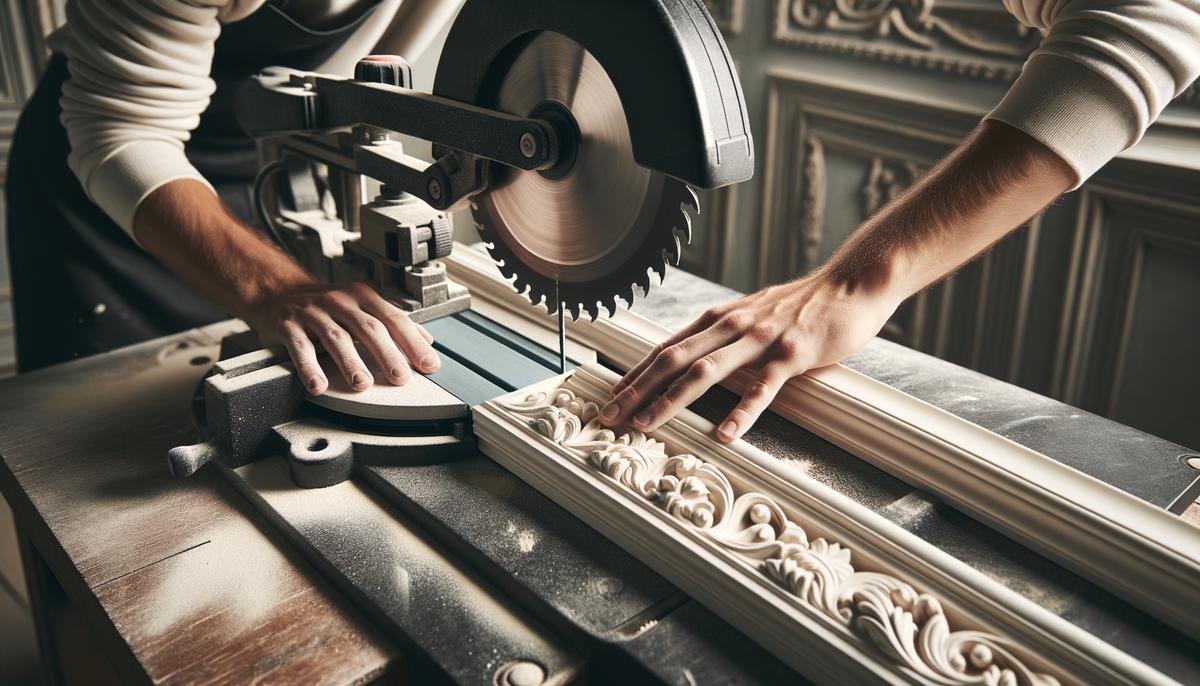
If walls aren't square, coped joints handle uneven corners better. Start with a 45-degree miter cut, leaving a guide edge. Hold your coping saw at an angle and cut along that edge, undercutting slightly behind the molding face for a tight fit.
Test your coped end against a scrap piece. Use a rasp to perfect the fit if needed. Sanding drums on drills help with larger wood removals. Trim until it fits snugly.
Coping might take practice, but the tight fit keeps corners looking cleaner and professional. Use mitered joints for sharp corners and coped joints for imperfect ones.
Cutting Techniques for Crown Molding
For inside and outside corners, as well as scarf joints, cutting your crown molding upside down simplifies the job. The ceiling side goes flat on the saw table, while the wall side rests against the fence—forming an inverted "L" shape.
For inside corners, position the molding upside down and angle the saw at 45 degrees. If cutting the left side, the cut angles up to the left; for the right side, it angles up to the right. The finished bottom edge will be longer than the top.
For outside corners, it's the reverse—the bottom edge will be short, and the top long. Set your saw to the correct 45-degree angle and align your marks carefully before cutting.
The key is consistency. Mark a line on your saw table to keep each cut aligned for a perfect fit. When fitting scarf joints, don't flip the molding. Instead, lay it flat with the edge facing you, tilt the blade at 45 degrees, ensuring seamless joints on long walls.
Always test fit your cuts. Shave off small bits if a piece is too long rather than lopping off chunks. Caulk can fill minor gaps for inside corners and along the ceiling, but aim for outside corners to fit right the first time.
Measuring and Marking
Measure the wall from corner to corner where the bottom of the molding will sit and mark these measurements. Drawing a slash mark indicating the cut direction and angle helps ensure proper fitting.
Use a tape measure to get the exact wall length. Measure twice, as you can't undo a cut. Transfer these measurements carefully to your crown molding.
Before cutting, use a framing square to check for inconsistencies in corner angles. Most walls aren't perfect 90 degrees, and accounting for imperfections prevents misfits.
Place your molding on a flat surface. With the tape measure, transfer the recorded length onto the bottom edge that will sit against the wall. Make a slash mark just past your measurement indicating the cut direction and angle as a guide.
Set up your miter saw at the needed 45-degree angle. For inside corners, the ceiling side should lie flat on the table and wall side against the fence—upside down, forming an inverted "L." This keeps cuts uniform.
Before cutting, double-check the angle and direction against your slash mark to avoid backward cuts. For outside corners, the short edge goes on the bottom, long edge on top.
After cutting, test fit the molding to the wall. Make minor adjustments rather than hasty decisions that ruin the piece.
Don't forget to mark stud locations on the molding to guide nailing during installation and ensure it's securely fastened.

Installation Tips and Tricks
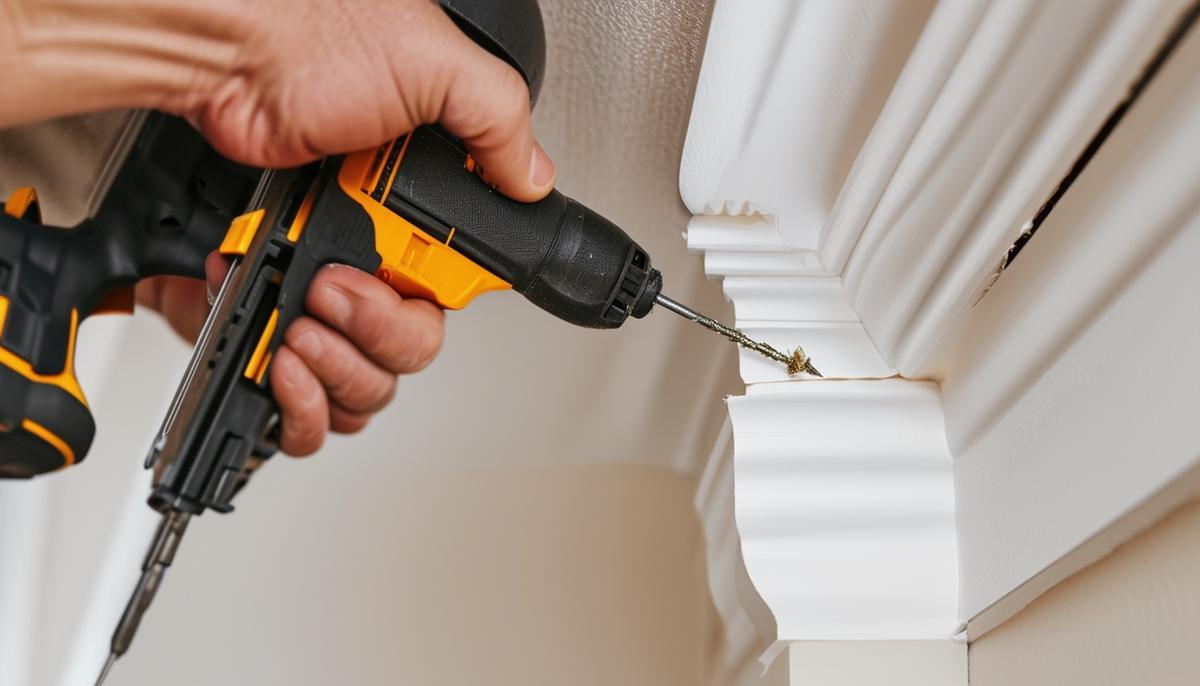
After cutting and testing the fit, it's time to secure the molding in place. A nail gun ensures the molding sticks close to walls and ceilings with minimal effort. Use brad nails every few inches, nailing into studs for the walls and ceiling joists overhead, ensuring a secure hold while preventing splitting.
Pro tip: Countersink the brad nails slightly below the surface using a nail set, then cover the holes with putty for a seamless look.
For inside corners, sand or file down high spots from your coping cuts until the piece fits perfectly. Use shims if needed to ensure the molding sits flush against uneven walls.
Once nailed, use paintable caulk to fill gaps at joints and where the molding meets the ceiling. Apply painters tape first to ensure clean lines, then smooth the caulk with your finger or a damp rag.
After the caulk dries, fill nail holes with putty and sand smooth. These finishing touches create a professional, high-quality look.
Take your time with each step for crown molding that enhances your space and holds up well over time.
Tools Required for Crown Molding Installation
For efficient crown molding installation with a professional finish, the right tools are essential:
- Miter saw – Indispensable for precise 45-degree cuts on inside/outside corners and seamless scarf joints. Ensure an adjustable fence and sharp blade.
- Brad nailer – Your best friend for securing molding tightly without splitting the wood or leaving large holes. Have varying nail lengths on hand.
- Pencil – A sharp pencil is crucial for marking precise measurements and cut lines. A carpenter's pencil offers better grip and durability.
- Measuring tape – Non-negotiable for measuring wall lengths and ensuring consistency across pieces. Choose one that locks in place.
- Caulk gun – Provides controlled caulk application for filling gaps and seams after installation, creating a seamless finish. Use paintable caulk.
- Coping saw – Specially designed for intricate cuts needed for coped joints. Use with a file or rasp to refine the fit.
- Sanding drum – Attached to a drill, this tool makes quick work of removing excess wood for a tighter fit.
Don't forget safety gear like safety glasses and hearing protection when using power tools.
With these tools at the ready, you're equipped to tackle crown molding like a pro, ensuring precision and professional results.

Precision in measuring, cutting, and fitting is crucial for professional-looking crown molding. By taking your time with each step and using the right tools, you can transform any space into something truly special.
- Black & Decker. The Complete Guide to Finishing Walls and Ceilings.
- McGraw Hill Construction. Crown Molding Installation Made Easy.
- Taunton Press. Installing Trimwork: Pro Tips for Capturing the Perfect Look.