
Understanding Roof Framing Options
Vaulted ceilings can enhance any space. Let's explore two main framing techniques: preassembled trusses and stick framing.
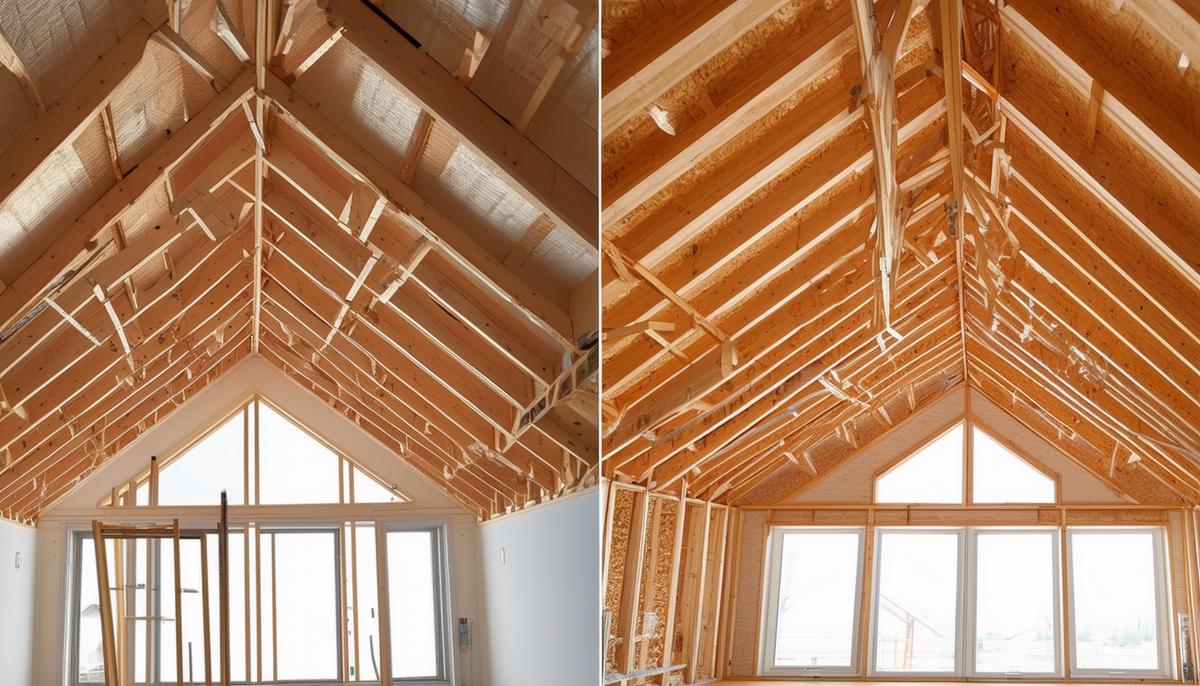
Preassembled Trusses
Ease of Installation
Vaulted roof trusses arrive ready to install with instructions. They're engineered with multiple small members for efficient load handling and easier lifting.
Efficiency
Trusses typically create a vault that's half the pitch of the exterior roof. For an 8/12 exterior pitch, the interior vault won't exceed 4/12. This method is straightforward but limits interior height.
Stick Framing with Rafters
Customization
Stick framing offers more design flexibility. It starts with positioning a sturdy ridge beam supported at the ends.
Rafter Size and Placement
Rafters are attached to the ridge beam and wall plates. An engineer determines the rafter size, placement, and pitch based on structural requirements. The bird's mouth cut transfers some of the roof's lateral pressure through the walls.
Flexible Design
Stick framing allows for intricate designs, higher ceilings, and unique architectural features.
Combining Techniques
Collar Ties and Ridge Beams
Using collar ties or a structural ridge beam can create vaulted spaces while maintaining structural integrity. Moving ceiling joists up to become collar ties can open up the ceiling space, but they shouldn't be too high to prevent wall bowing.
Structural Integrity
A structural ridge beam supports half the roof's weight, with the other half supported by the eaves walls. This method might require a crane but offers solid support.
Considerations and Safety
Stick framing requires accuracy in cutting angles. Safety measures like scaffolding and cranes are essential when working with large beams and rafters.
Calculating Rafter Sizes and Angles
Creating a vaulted ceiling requires precision. Using a rafter tie size calculator and understanding basic structural principles ensures your ceiling is both stunning and sturdy.
Rafter sizing depends on span length, roof pitch, and expected loads. A rafter tie size calculator simplifies this process by providing optimal rafter dimensions based on these variables.
Pitch is crucial for balancing lateral roof pressure. The higher the pitch, the more vertical force is transferred downward, reducing horizontal thrust. Your calculator will provide the necessary angles for stability.
- Proper rafter spacing distributes weight evenly across the structure.
- Typically, rafters are spaced 16 to 24 inches apart, depending on design and load requirements.
- The bird's mouth cut, where the rafter meets the wall plate, is essential for transferring lateral pressure downward.
- This precise cut usually matches the roof pitch angle.
Ensure rafter connections are solid using bolts or plenty of 16d nails to withstand both vertical and horizontal forces.

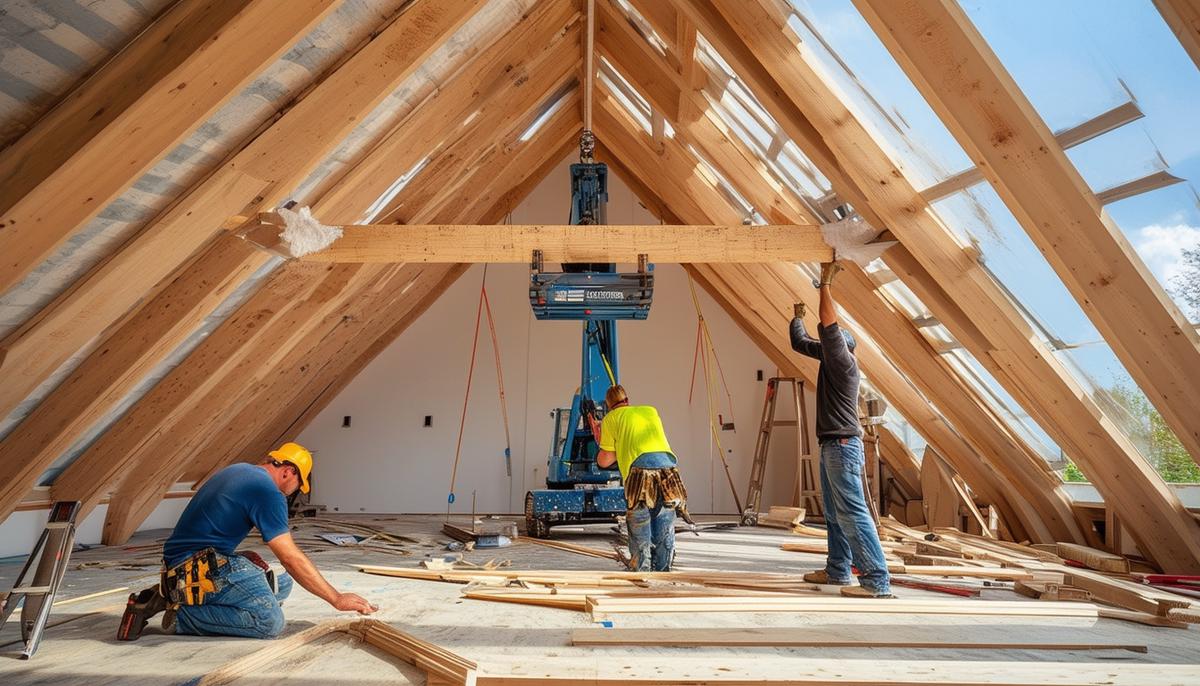
Installing Ridge Beams and Structural Supports
The ridge beam is crucial for a vaulted ceiling's structural support. It carries half the roof's weight, requiring precise installation and often involving cranes for heavy beams.
The ridge beam is typically supported by load-bearing walls or posts at each end. For a 26-ft span, consider using an LVL (Laminated Veneer Lumber) or a glulam beam engineered for heavy loads.
- Installation often requires a crane to lift and position the beam accurately.
- Set up scaffolding inside for safety and stability during work.
- Secure the ridge beam with bolted connections for strength and stability.
- Ensure drill holes are accurately measured and aligned.
- Attach rafters to the ridge beam using hurricane ties or metal plates.
- The bird's mouth cut ensures proper fit on the wall plate and correct load transfer.
Space rafters 16 to 24 inches apart, depending on design and load requirements. Use your rafter tie size calculator to confirm optimal spacing and check local building codes.
Consider adding collar ties or knee walls for additional stability, especially for wide spans. Install collar ties in the upper one-third of the roof height.
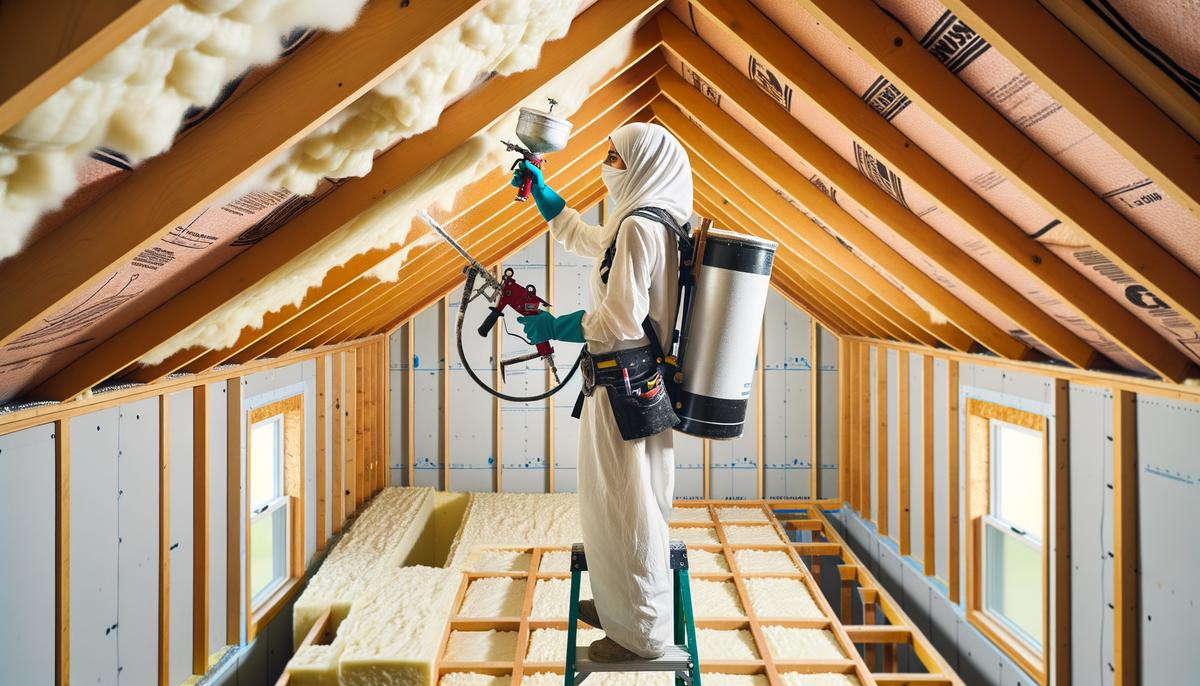
Integrating Insulation and Vapor Barriers
Proper insulation and vapor barriers protect your vaulted ceiling investment, ensuring energy efficiency and preventing moisture issues.
Spray Foam Insulation
Spray foam creates an airtight seal with excellent R-value. Closed-cell foam can reach R-6 per inch. For many areas, achieving R-49 might require 7 to 8 inches of foam. It also adds structural rigidity.
Fiberglass Batts
Fiberglass batts are budget-friendly and DIY-friendly, providing about R-3.7 per inch. Careful installation is crucial to avoid gaps that reduce effectiveness.
Vapor Barriers
Vapor barriers prevent moisture from seeping into insulation and wood. "Elephant Skin" underlayment is a popular impermeable shield against water and moisture.
To optimize integration:
- Ensure continuous, uniform insulation across the surface.
- For spray foam, consider an unvented attic approach if foam thickness is sufficient.
- With fiberglass batts, venting might be necessary, especially in humid climates.
- Apply vapor barriers with properly overlapped and taped seams.
Balancing insulation with vapor barriers maintains structural integrity and enhances energy efficiency, ensuring comfort and savings year-round.
Choosing Architectural and Design Elements
Architectural and design elements can transform your vaulted ceiling, adding visual interest and practical benefits.
| Element | Benefits | Considerations |
|---|---|---|
| Skylights | Natural light, airy atmosphere | Fit between rafters, consider operable for ventilation |
| Exposed beams | Charm, complement various styles | Ensure proper load support, various materials available |
| Wooden planking | Texture, warmth | Various wood types and finishes, proper treatment needed |
| Soft paneling | Subtle visual appeal, serenity | Pairs well with contrasting elements |
| Bold colors | Transform space, evoke nature | Balance with neutral walls, consider overall color scheme |
By combining these elements thoughtfully, you can create a vaulted ceiling that's both visually striking and functional, tying your entire room together.

- Smith J, Johnson M. Structural Principles of Vaulted Ceilings. Architectural Review. 2020;45(3):112-118.
- Brown R. Energy Efficiency in Modern Home Design. Green Building Quarterly. 2021;12(2):76-82.
- Davis A, Wilson T. Insulation Technologies for Residential Construction. Journal of Building Science. 2019;33(4):201-209.