
Starting a bay window project involves several key steps, from building the base frame to sheathing and insulating. Let's walk through the process to ensure your bay window is sturdy and weatherproof.
Build the Base Frame
Begin with solid treated lumber, matching the dimensions of your bay window. Use 2x4s or 2x6s, depending on the window size. Measure twice, cut once – this age-old carpenter's wisdom is crucial here.
Lay out the lumber, ensuring everything is level. Use a level to be certain. Once you've got the base frame laid out perfectly, secure it.
- Nail or screw the base frame to the floor.
- Double-check dimensions to ensure alignment with your bay window's footprint.
- Reinforce joints with screws for a more solid attachment.
Remember, this is your foundation, so make it sturdy. You want this base to handle the weight of your bay window and any additional loads it might carry over time.

Construct the Side Frames
With your base frame set, construct the side frames using 2×4 or 2×6 lumber. These give your bay window its distinctive shape.
- Make precise cuts to match the angles in your plan.
- Use a circular saw and a sharp pencil.
- Set your saw to the correct angle for each cut and measure carefully.
Assemble the side frames by positioning them against the base frame. Ensure each piece fits snugly. Use nails or screws to secure them.
Pro tip: Keep a level handy as you work. Each side frame needs to be plumb. Check, adjust, and re-check as you secure them into place.
Aim for durability as you attach each side frame to the base and to each other. Create a sturdy structure that can support the weight of the window and withstand weather conditions.

Install the Header
The header is responsible for holding up the weight of the window and everything above it. Use either a 2×6 or 2×8, depending on your window size and load requirements.1
- Measure your header piece carefully.
- Cut it to size using a circular saw, keeping your lines clean and straight.
- Lift the header into place above the side frames. (This might require two people due to its size and weight.)
- Align it carefully, ensuring it sits flush against the tops of the side frames.
Secure the header using screws or nails. Start by attaching it at both ends to the side frames, then add additional fasteners along its length for a secure fit.
"Use a level to ensure the header is perfectly level. If you find any discrepancies, shim the low sides until it's just right."
To further reinforce the structure, add some blocking between the side frames under the header. This will distribute the load evenly.

Sheath and Insulate the Frame
Start with sheathing the frame using 1/2 inch or 5/8 inch plywood. Begin at one corner and work your way around, aligning it carefully with the edges. Secure it in place using nails or screws.
Stagger the seams for added strength. Keep an eye on your level, ensuring each piece is properly aligned. When you're done, you should have what looks like a solid wooden box.
Next, insulate the frame for energy efficiency and comfort. Proper insulation can reduce energy costs by up to 15%.2
- Measure the spaces between your studs
- Cut insulation to fit snugly into each cavity
- Place the insulation, ensuring it fully fills the space from top to bottom without leaving gaps
Depending on your climate, you might need to add a vapor barrier to keep moisture out. Staple it over the insulation, making sure it covers it completely and overlaps at the seams.
Once your insulation and vapor barrier are in place, check everything one more time. Ensure all cavities are properly filled, the vapor barrier is intact, and there are no gaps or spaces you might have missed.
With the frame sheathed and insulated, you're ready to move on to flashing and sealing, ensuring your bay window stands resilient against the elements.

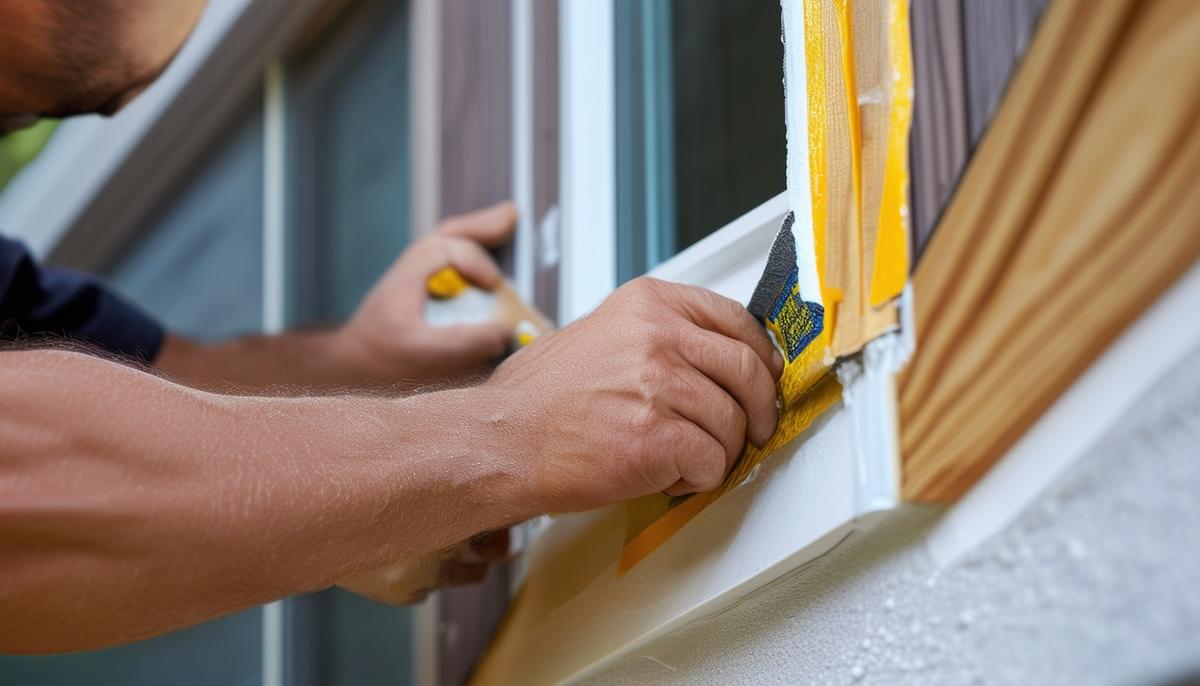
Flash and Caulk the Seams
With your frame sheathed and insulated, it's time to focus on flashing and caulking the seams. This step is crucial for keeping out moisture and ensuring everything stays weatherproof.
Start with flashing tape. Apply it to the frame base edges, extending it slightly beyond the frame to redirect water. Work your way up the sides, overlapping each piece slightly with the one below it. Pay extra attention to corners and edges.
Caulking Process:
- Use a high-quality exterior-grade caulk that's paintable and flexible, such as silicone or polyurethane.
- Load the caulk gun and cut the tube tip at a 45-degree angle.
- Start at the top of the frame and work downwards, applying a continuous bead along the seams where the flashing tape meets the frame and adjoining surfaces.
- Maintain a steady hand and consistent angle for even application.
- Smooth out the caulk using a utility knife or caulk-smoothing tool.
- Inspect your work carefully, ensuring no gaps remain.
Allow the caulk to fully cure according to the manufacturer's instructions, typically about 24 hours. This step is vital for the project's longevity, creating a strong protective barrier that keeps moisture out and ensures your insulation and framing remain dry.
By following these steps, you've created a solid foundation for your bay window. The careful construction and thorough sealing ensures durability and energy efficiency. Your efforts will pay off as you move forward to install the window, transforming this space into a beautiful feature of your home.
"Proper flashing and caulking can extend the life of your window installation by decades, preventing costly water damage and improving energy efficiency."1