
Starting a pergola project requires careful planning and preparation. From checking local building codes to selecting the right materials, each step is crucial for a successful build. Before you begin, make sure you have all the necessary tools and an extra set of hands to help out.
Before Building a Pergola
Safety first! Notify utility companies to mark underground lines before digging. This crucial step prevents costly mistakes and ensures your safety.
Check local building codes – they'll likely dictate how you anchor your pergola and what materials to use. Following regulations prevents potential issues down the line.
- Recruit help: This two-day project requires an extra set of hands, especially for post installation.
- Secure posts: Don't leave posts standing unattended until corner braces are installed to prevent toppling.
Material Considerations: Pressure-treated lumber is cost-effective and durable for outdoor projects. Regular, untreated framing lumber is not suitable.
Choose fasteners rated for your wood type. Ornamental metal joining plates add visual appeal and provide additional support.
Shopping List:
- Pressure-treated 6x6s, 2x10s, and 2x4s
- Lag screws and deck screws
- Eye bolts for cable anchors
- Post bases
- Paver base
- Cut end treatment for pressure-treated lumber
Tools Needed:
- Circular saw, drill, impact driver
- Shovel, level, chisel, hammer
- Wrench, clamps, tape measure
- Square and pencil

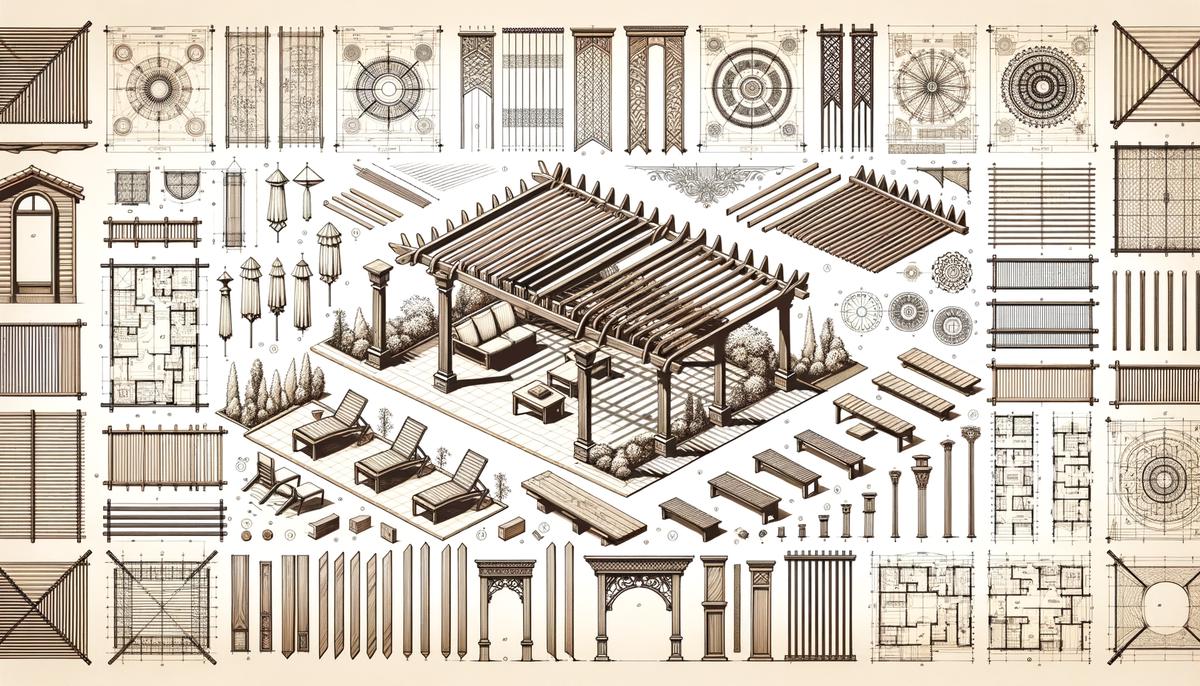
Planning and Designing a Pergola
When selecting lumber, pressure-treated wood offers a good balance of durability and cost-effectiveness. It resists rot and insects better than untreated lumber.1
Fastener Selection: Choose fasteners specifically rated for treated wood to prevent corrosion. Ornamental joining plates can enhance both the structure's stability and appearance.
Design options allow for customization:
- Consider slat spacing for shade and privacy needs
- Overhanging board end cuts can add visual interest:
- Straight cuts for a modern look
- Decorative cuts for added flair
Carefully consider the pergola's size and placement to ensure it complements your outdoor space without causing issues with neighbors or blocking desirable views.
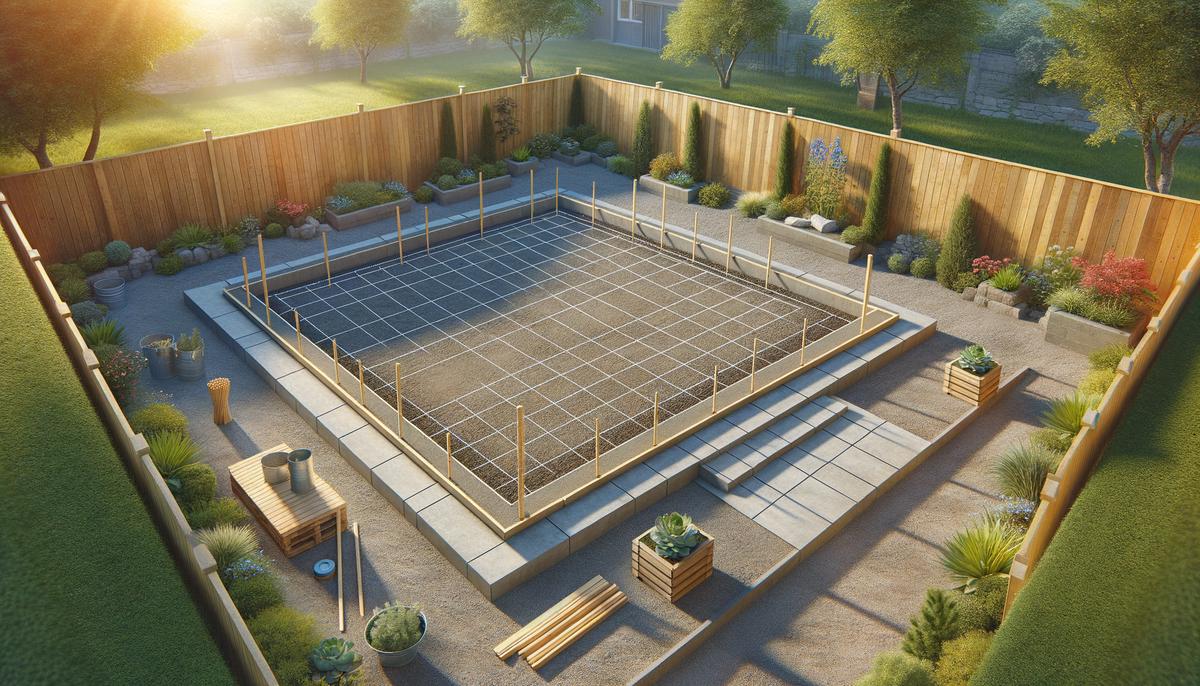
Site Preparation
- Mark out an 8×8-foot area using stakes and mason's string or a laser level. Ensure the outline forms a perfect square.
- Clear the marked area by removing debris, grass, and topsoil to reveal bare earth.
- Compact the soil thoroughly with a tamper to create a solid foundation.
- Spread a 6-inch layer of paver base over the compacted soil. Compact this layer as well, ensuring it's level and firm.
Note: Proper site preparation is crucial for the stability and longevity of your pergola. Take the time to get this step right before moving on to construction.
Building the Pergola Frame
1. Stand and brace the first two posts using post bases and 1×4 temporary braces.
2. Measure down 9 inches from the top of each post and align them using a level.
3. Attach the 2×10 boards across the tops of the posts:
- Use pilot holes and lag screws for secure connections
- Ensure the boards are level and evenly placed
4. Repeat the process for the second set of posts, aligning them with the first set.
5. Double-check all connections to ensure they're tight and secure. The frame should be sturdy with no movement when nudged.
Installing Pergola Slats
1. Cut 2x4s to uniform length for pergola slats. Mark 10 1/2 inches from each end for alignment.
2. Place the first few slats at one end of the pergola frame, using spacers to maintain even gaps between each slat.
3. Secure slats with deck screws rated for treated lumber:
- Work from one end to the other
- Drive screws carefully to avoid splitting the wood
4. Check alignment frequently, ensuring consistent spacing and square attachment. Make adjustments before fully driving in screws.
5. Once all slats are installed, perform a final inspection to verify consistent spacing and secure fittings.

With your pergola now complete, you've added a new dimension to your outdoor space. This spot will become a focal point for relaxation and gatherings. Enjoy the shade and satisfaction of your well-built structure!
- Forest Products Laboratory. The Encyclopedia of Wood. U.S. Department of Agriculture; 2007.