
Woodworking projects can be both rewarding and practical, offering a chance to create functional items while honing your skills. Whether you're looking to build a simple garden table or craft floating shelves, these beginner-friendly projects provide an excellent starting point. With basic tools and materials, you can transform raw wood into beautiful pieces that add a personal touch to your home.
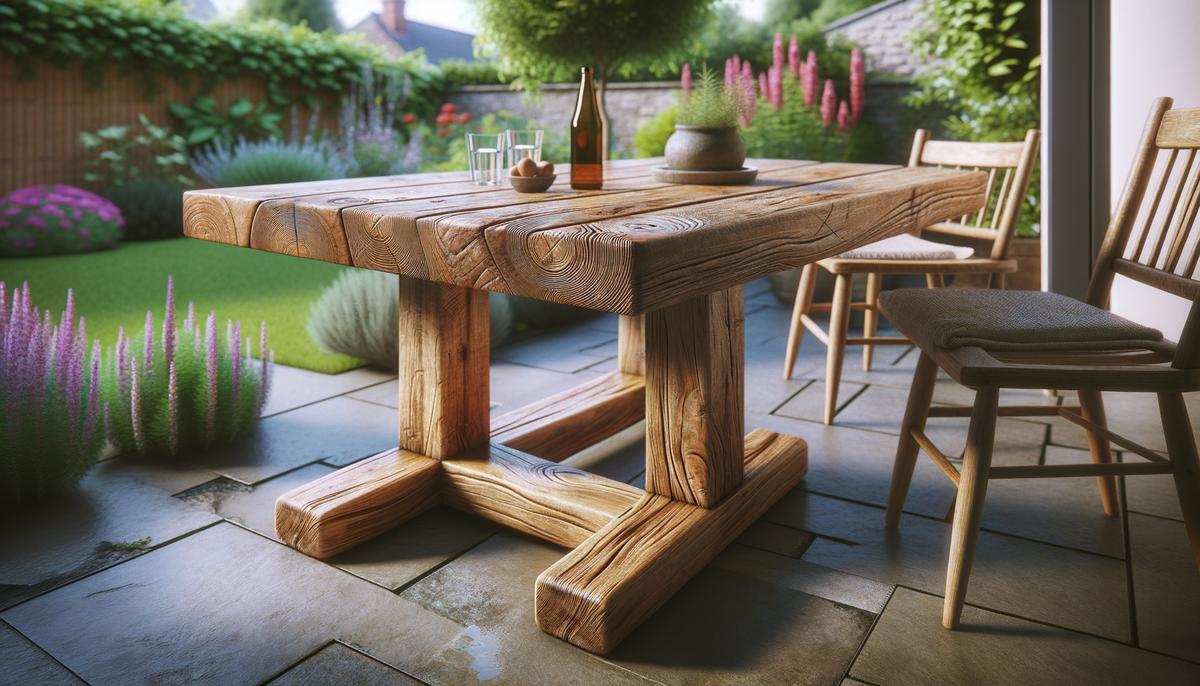
1. Simple Garden Table
Build a simple garden table using lumber, sandpaper, screws, a saw, drill, and paint. Follow these steps:
- Cut the table pieces to the desired size
- Sand the edges smooth to avoid splinters
- Assemble the legs and attach them to the tabletop using screws
- Paint the table for added durability and aesthetic appeal
This project is quick and provides a functional piece for any outdoor setting.
Additional Beginner-Friendly Projects:
- Chair Armrest Cup Holder: Create using plywood, wood glue, and basic tools. Measure, cut, carve out the cup holder space, sand, and finish.
- Floating Shelves: Cut wooden boards into slabs, sand, finish, and mount using brackets or directly into studs.
- Pallet Wooden Shelves for Plants: Reclaim old pallets, cut into desired shapes, sand, and arrange to form shelves. Perfect for adding a rustic touch to any room.
Each of these projects requires basic tools and materials, making them accessible and manageable for those new to woodworking. These creations serve functional purposes and add a personal touch to any space.
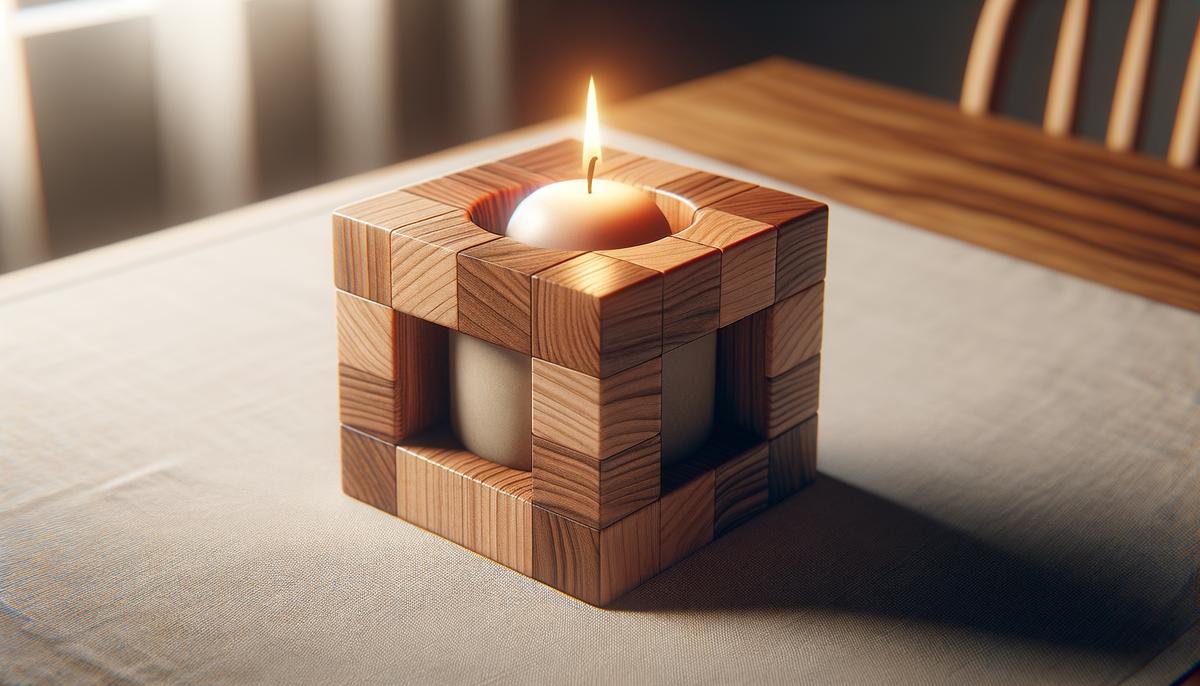
2. Cubic Candle Holder
Craft a Cubic Candle Holder with these simple steps:
- Cut a piece of lumber into a perfect cube
- Drill a hole in the center using a hole saw matching your candle's diameter
- Sand all edges and surfaces thoroughly
- Finish by staining, painting, or leaving natural
This project adds a charming hand-made touch to any room. Use it at your dinner table, on a mantel, or as part of a centerpiece.
Clever Wall-Mounted Bike Rack
Save floor space with this sleek storage solution:
- Cut a sturdy wooden board to desired length
- Drill angled holes for wooden dowels or hooks
- Sand all components for a smooth finish
- Attach to wall using heavy-duty anchors or screws
- Optional: Pad dowels to protect bike frame
Quick Craft: Shoe Organizer
Tidy up your entryway or closet with this simple DIY:
- Cut wooden planks to desired shelf lengths
- Sand edges to remove splinters
- Stack planks at intervals, securing with screws and wood glue
- Add side supports for stability if needed
- Paint or stain to match your décor
Efficient Desk Organizer
Declutter your work area with this compact organizer:
- Cut thin wood strips for compartments
- Create a frame with slots for different office supplies
- Sand and assemble using wood glue and small nails
- Customize with drawers or gadget sections
- Apply a final coat of paint or varnish
Handy Potting Bench
For gardening enthusiasts, create a dedicated space for potting activities:
- Design a sturdy bench with work surface and lower shelves
- Use treated lumber for outdoor durability
- Cut wood to planned dimensions
- Assemble frame and add shelves
- Seal with outdoor finish or paint to match garden aesthetic
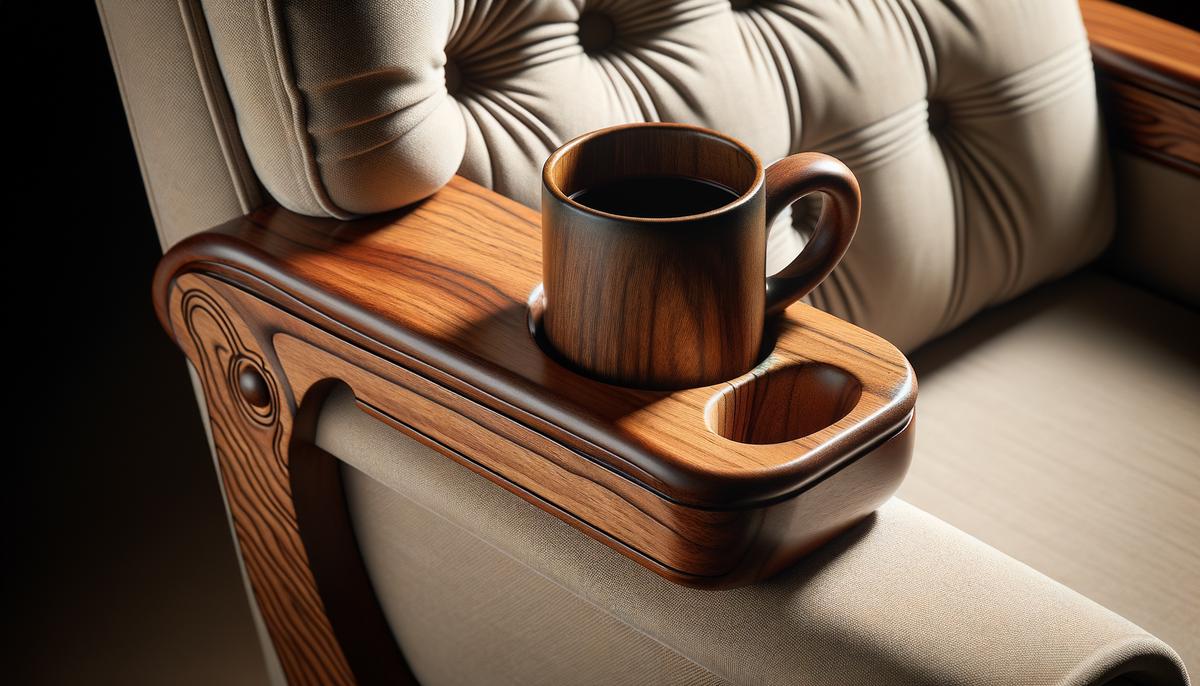
3. Chair Armrest Cup Holder
Transform any cushioned chair into a more functional piece by adding a cup holder. This straightforward project requires basic tools and materials:
- Plywood
- Wooden board
- Wood glue
- Drill
- Hole saw
Follow these steps to create your custom armrest cup holder:
- Measure the armrest for a snug fit
- Cut plywood and wooden board to match measurements
- Use hole saw to drill a circular hole in the wooden board
- Sand all edges and surfaces for smoothness
- Apply wood glue and join the pieces
- Reinforce joints with small nails or screws if desired
- Sand the entire cup holder once more
- Stain, paint, or leave natural to match your décor
Pro tip: Ensure the hole is slightly larger than your typical cup or mug diameter for easy use.
This project adds both function and style to your living space, turning any standard cushioned chair into a more practical piece of furniture.
4. Floating Shelves
Floating shelves combine function with style, making them a versatile addition to any home. Follow these steps to create your own:
- Select wood: Choose boards that fit your aesthetic and desired thickness.
- Measure and cut: Use a circular saw or hand saw to cut boards to desired length.
- Sand: Thoroughly sand all edges and surfaces with fine-grit sandpaper.
- Finish: Apply paint, wood stain, or clear coat to protect and enhance appearance.
- Prepare wall: Locate studs using a stud finder and mark shelf placement with a level.
- Mount: Attach brackets or create a cleat system for a true "floating" appearance.
Note: Ensure shelves are securely fastened to studs or heavy-duty wall anchors to safely support weight.
Versatile Uses for Floating Shelves:
- Kitchen: Display dishes and store spices
- Living room: Showcase books and décor
- Bathroom: Organize towels and toiletries
Floating shelves maximize space while keeping everything neatly organized and easily accessible, making them a practical and stylish addition to any room.

5. Pallet Wooden Shelves for Plants
Transform discarded pallets into charming plant shelves with this eco-friendly project:
- Select pallets: Choose those in decent condition, avoiding rotted or overly splintered wood.
- Dismantle: Carefully take apart the pallet using a pry bar and hammer.
- Inspect and select: Choose the best boards for your project.
- Measure and cut: Size the boards according to your desired shelf dimensions.
- Sand: Thoroughly smooth all surfaces and edges to remove splinters.
- Assemble: Construct the shelf frame using screws and wood glue for stability.
- Finish: Apply a clear coat or wood stain to match your décor.
- Mount: Secure shelf brackets to wall studs or use heavy-duty anchors.
"Repurposing pallets is a great way to be eco-friendly and creative at the same time."
These rustic shelves are perfect for:
- Displaying potted plants
- Creating an indoor herb garden
- Showcasing decorative items
By repurposing old wood, you're not only creating a personalized touch for your living space but also contributing to sustainable practices in home décor.

Each of these woodworking projects offers functionality and the satisfaction of creating something with your own hands. From garden tables to plant shelves, these tasks are designed for beginners yet yield impressive results. So gather your tools and start building – you'll likely find the process rewarding and enjoyable.
- Smith J, Johnson A. The Art of Woodworking: A Beginner's Guide. Woodcraft Press; 2019.
- Brown T. Sustainable Home Decor: Upcycling and Repurposing. Green Living Publications; 2020.
- Davis R. DIY Furniture Projects for Small Spaces. Compact Living Press; 2018.