
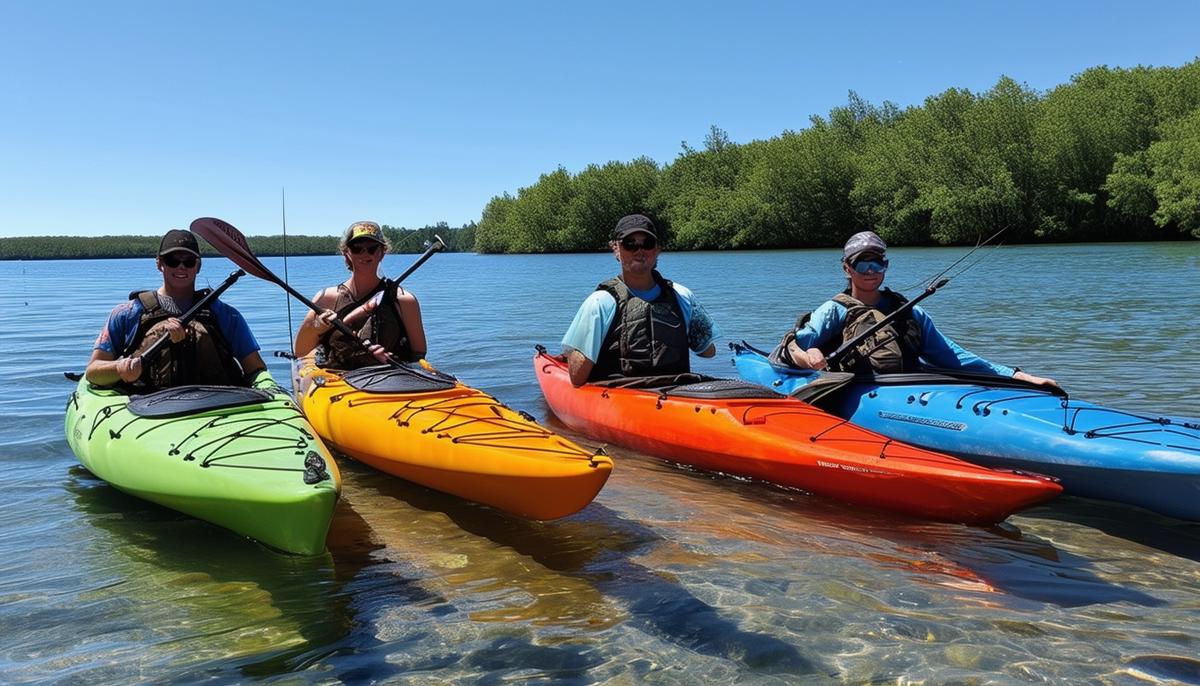
Choosing a Kayak Design
Choosing a kayak design depends on your intended use:
- Sea kayaks (15-18 feet): Fast but less stable, ideal for long distances
- Recreational kayaks (9-12 feet): Offer stability and comfort for casual paddling
- Whitewater kayaks (6-8 feet): Short and agile for rapids
- Fishing kayaks: Wide and stable with rod holders
Consider where you'll paddle most – calm lakes, ocean waves, or rivers. Longer kayaks are faster, while wider ones offer more stability. Also think about capacity if you're planning multi-day trips.
When building, choose plans that match your skill level. Plywood and stitch-and-glue methods are simpler, while strip-built kayaks are more challenging but rewarding.
Preparing the Platform and Forms
Start by building a strongback – a long, sturdy table that serves as the foundation for your kayak. Ensure it's straight and level. Secure it well to prevent wobbling.
Next, cut the forms precisely from your kayak plans. These define the shape of your craft. Align and secure them on the strongback using removable techniques. This allows you to take them out later when the kayak takes shape.
Accuracy is crucial in this stage. Measure carefully and double-check your work. A well-prepared platform and properly aligned forms will make the following steps much smoother.

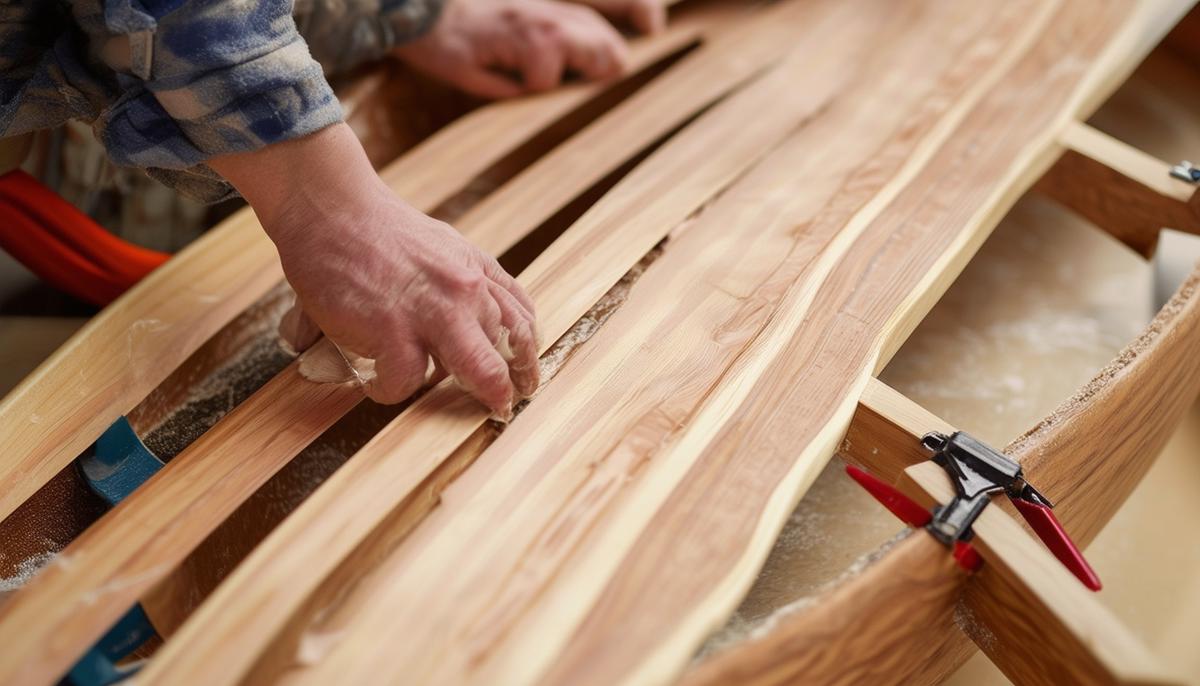
Stripping and Shaping the Hull
- Begin laying cedar strips at the sheer line, working your way down to the keel.
- Staple or clamp each strip to the forms, ensuring they fit snugly against each other.
- Apply wood glue along the cove side of each strip for a solid bond.
- Work symmetrically, adding strips to both sides of the hull to maintain balance.
- If gaps appear, use wedges or clamps to bring strips into alignment.
- Wipe away excess glue immediately.
Once stripped, shape and smooth the surface with a plane or sandpaper. Feel for unevenness with your hands to avoid over-sanding. Aim for sharp edges and graceful curves.
This process transforms your kayak from a basic structure into a sleek, water-ready craft. Take your time to ensure each strip is properly placed and shaped.
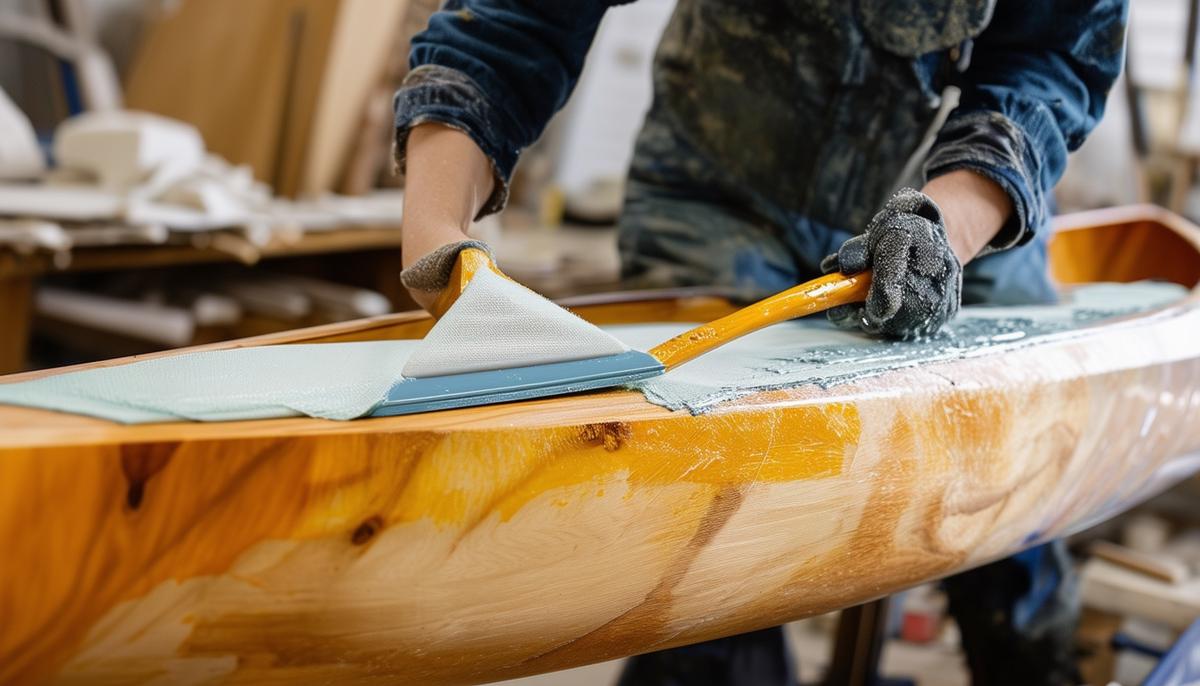
Fiberglassing the Kayak
Fiberglassing strengthens and protects your kayak. Follow these steps:
- Drape fiberglass cloth over the hull, extending a few inches beyond the edge.
- Smooth out any wrinkles or bubbles.
- Mix epoxy resin and hardener according to instructions.
- Apply it evenly with a squeegee or foam roller, saturating the cloth without creating pools or drips.
- The fabric will become translucent, revealing the wood grain beneath.
- Let the initial coat cure to a tacky stage before applying additional coats.
- Use a fill coat to smooth the surface and fill the cloth weave.
- Sand lightly between coats if needed.
Once cured, apply a UV protectant varnish to shield your kayak from sun damage. This final step completes your durable, ready-to-paddle craft.
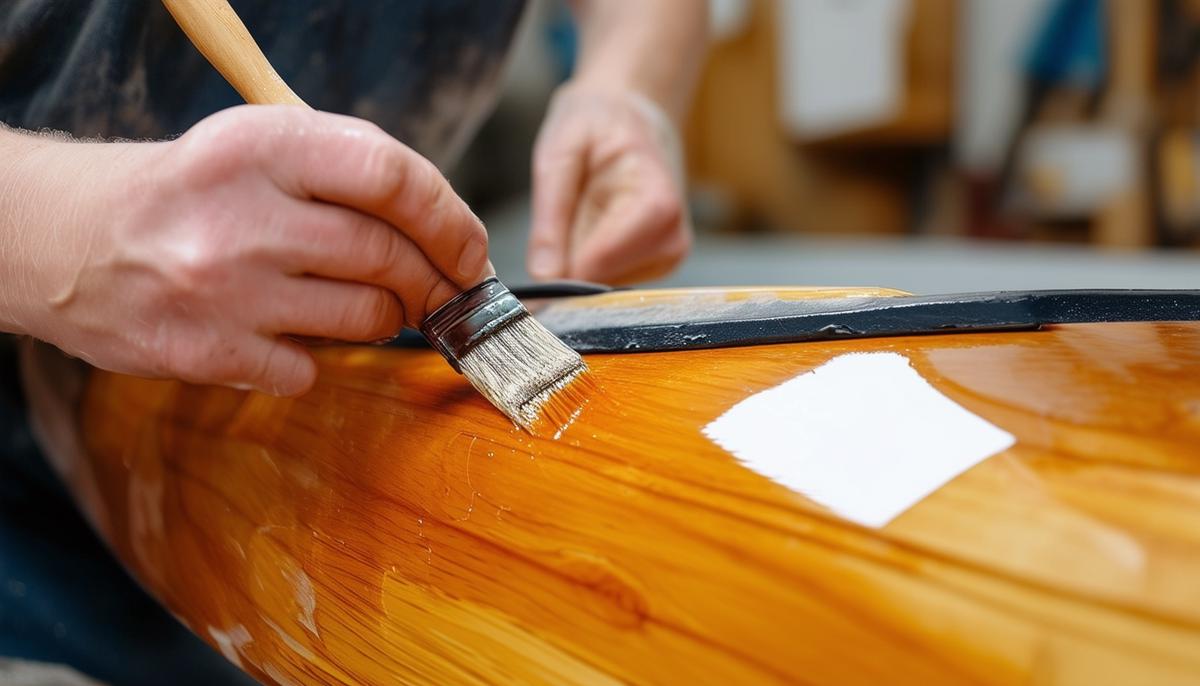
Adding Final Touches and Varnishing
With your kayak's structure complete, it's time to focus on the cockpit, bulkheads, and varnishing. These steps are crucial for water-readiness.
For the cockpit, start by sizing the opening. Use templates and careful measurements to ensure a proper fit. Cut the opening and install the coaming – the rim that keeps water out and provides an edge for a spray skirt. Use thin plywood strips or pre-cut forms for the coaming, shaping and sanding for comfort. Secure everything with epoxy.
Bulkheads are important partitions that improve buoyancy and contain water intrusion. Make these from marine-grade plywood or high-density foam, fitting them snugly inside the hull. Secure with epoxy fillets for a watertight seal.
Next comes varnishing, which protects your work from UV rays. Choose a spar varnish with UV inhibitors. Apply smoothly with a quality brush, starting with thinned coats and working up to full-strength. Sand lightly between coats with fine-grit paper. Apply up to six coats or more in sunny areas, letting each cure fully before the next.
The varnish not only enhances appearance but also increases durability. Take a moment to appreciate the glossy finish protecting your handiwork.
As you launch your handcrafted kayak, remember that each stroke showcases your dedication and skill. Enjoy your time on the water in the vessel you've created.