
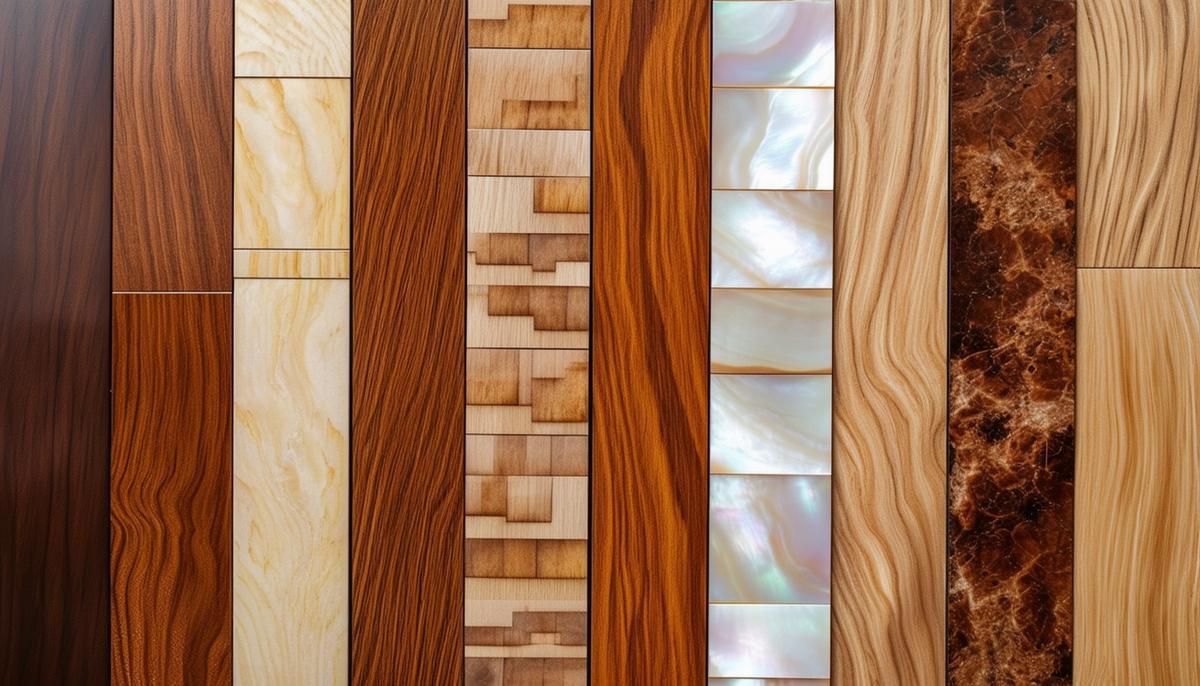
Selecting Materials for Inlay
For inlay work, choosing appropriate materials can transform an ordinary piece into a standout creation. Consider wood veneer as a starting point. This thin, flexible material offers various colors and grains, perfect for adding contrast to your base wood.
Mother of pearl provides a luminous finish that attracts attention. It's often used in guitar necks and high-end furniture. Unlike wood veneer, it's harder to cut but produces a remarkable sheen. Use a good respirator when cutting mother of pearl; the dust can be harmful.
Bone or ivory inlay, though less common now for good reasons, can add elegance. These dense materials require sharp cutting tools. For legal and ethical reasons, consider synthetic alternatives that mimic their appearance.
Choosing Veneers:
- Select pieces without knots or cracks
- Opt for thin veneers around 1/16 inch for intricate designs
- Try different wood species like ash, birch, cherry, beech, and maple
Your base wood is equally important. Softer woods like pine may not hold an inlay well and can be damaged easily. Hardwoods like oak, walnut, or maple are better options. They provide a solid foundation and are less likely to splinter during the inlay process.
Glue selection matters too. Use wood glue for wood-to-wood inlays. For materials like mother of pearl or bone, epoxy resin works best due to its strong bond. Pro tip: Mixing sawdust from your base wood into the glue can hide tiny gaps, creating a seamless look.
Combining different material types can elevate your project. The key is balance and contrast. Too many materials can complicate the design, but a well-planned mix adds sophistication.
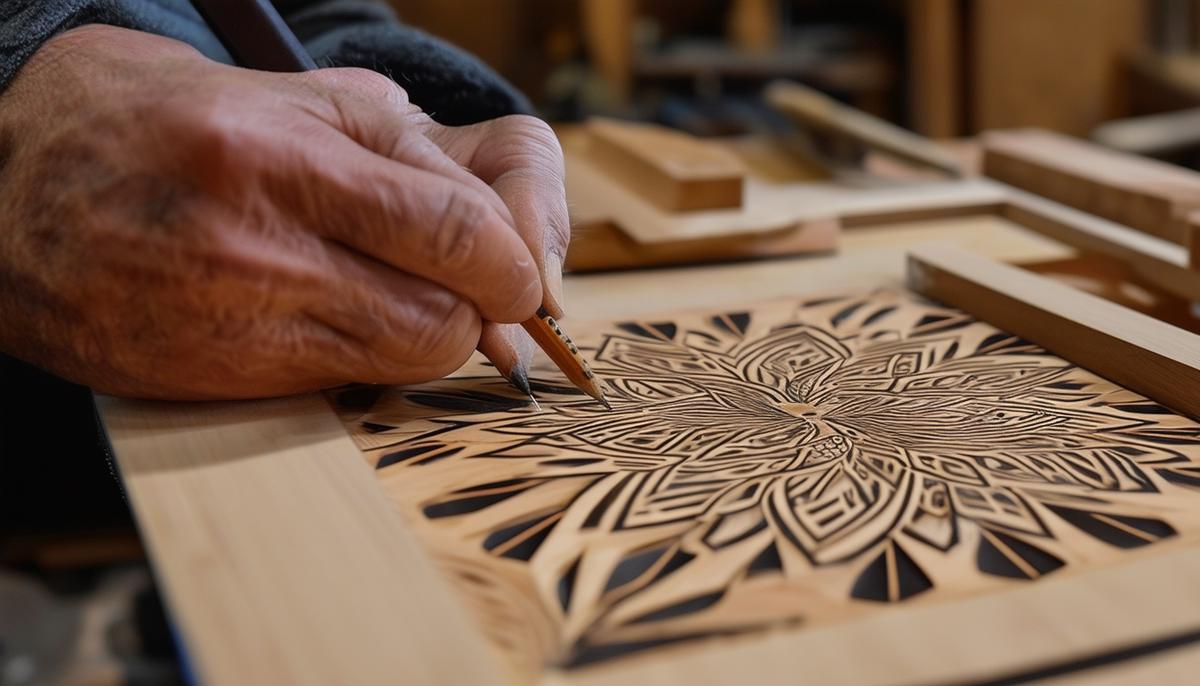
Tracing and Cutting Inlay Shapes
Begin with your design on tracing paper. Sketch your inlay pattern, ensuring it's bold enough to stand out but simple enough to follow precisely.
Transferring the Design:
- Place carbon paper on your chosen inlay material
- Position the tracing paper on top
- Carefully trace over your design with a pencil
For intricate designs or delicate materials like mother of pearl, a scroll saw works best. Its fine blade allows precise cuts along curves and angles. Angle the scroll saw table slightly if you plan to key the pieces together for a snug fit.
A bandsaw suits larger, simpler pieces. Its wider blade cuts through tougher materials like wood veneer easily. Secure the material firmly and follow the lines steadily to prevent splintering or deviating from the design.
An x-acto knife is useful for small details or fine adjustments. It's ideal for trimming corners or making minor changes after bulk removal. Score lightly first, then gradually cut deeper to maintain control and preserve your design.
Precision is key throughout this process. Even slight errors can create gaps or warped edges, affecting your inlay quality.
If you overcut, don't worry. Minor mistakes can often be fixed by sanding edges to fit or filling gaps with wood glue and sawdust mix.
Safety First: Wear a respirator mask when working with materials like mother of pearl, and use protective eyewear. Keep tools sharp and your workspace tidy to avoid accidents and ensure good results.
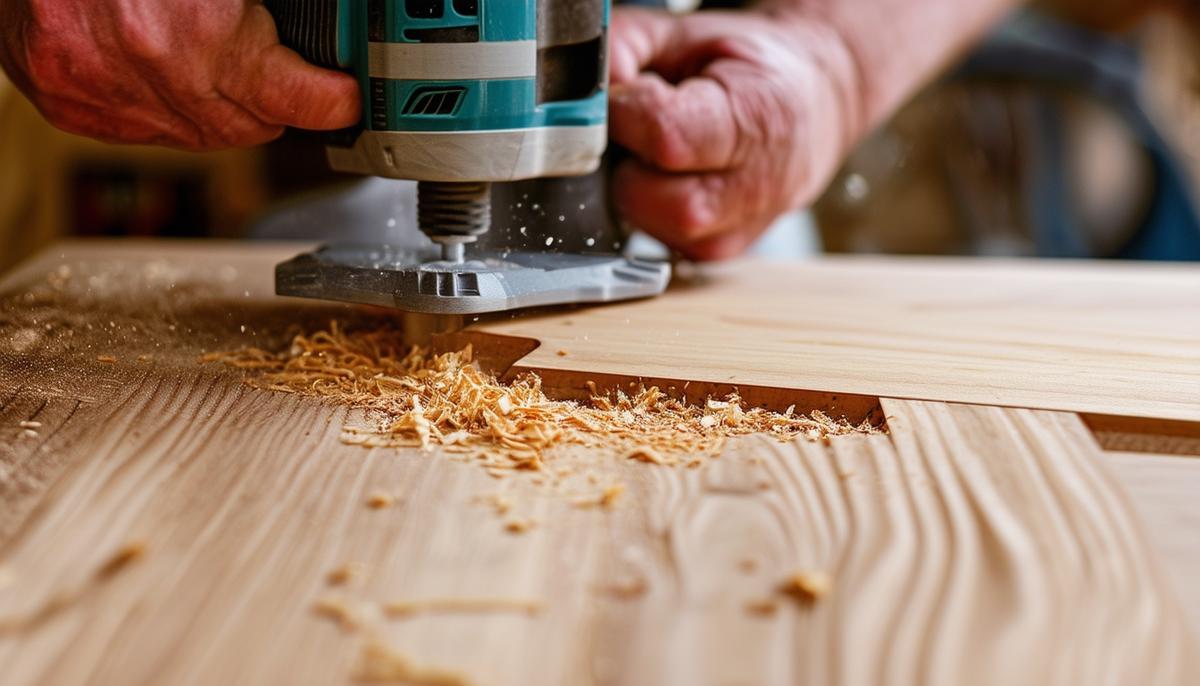
Creating Recesses in Base Wood
With your inlay piece ready, it's time to carve the recess in your base wood. This step ensures the inlay sits flush with the surface, giving your project a polished look.
Preparing Your Workspace:
- Secure your base wood firmly to your workbench using clamps
- Equip your router with a larger bit, like a 1/8" bit
- Set the depth just shy of your inlay thickness
Carefully guide the router along the inside of the scribed lines at a steady pace. Don't rush, as this could lead to mistakes or uneven depths. Focus on removing material rather than getting close to edges at this stage.
Switch to a smaller, more precise bit, such as a 1/16" bit, to approach the edges of the traced shape. Use a magnifying headset to see fine details clearly, especially for intricate designs. This smaller bit helps define the recess edges cleanly without damaging your scribe lines.
Pro tip: Stop periodically to test-fit your inlay piece. It should fit snugly but remain removable for adjustments.
Fine-Tuning the Fit:
- If too tight: Carefully shave small amounts from the recess sides with a chisel or fine file
- For high spots: Use a sharp blade or sandpaper to even them out
Once the recess is shaped correctly and the inlay fits well, clean out any remaining wood dust. Apply glue evenly to the recess interior and inlay bottom. Place the inlay into the recess, aligning it perfectly, and gently tap it down with a mallet for a snug fit.
Clamp the assembly and let it dry for the recommended time, usually 4-6 hours. After drying, use a scraper or block plane to make the inlay flush with the base wood surface. Sand the area with fine-grit sandpaper to remove excess and smooth the surface, ensuring a seamless, professional look.
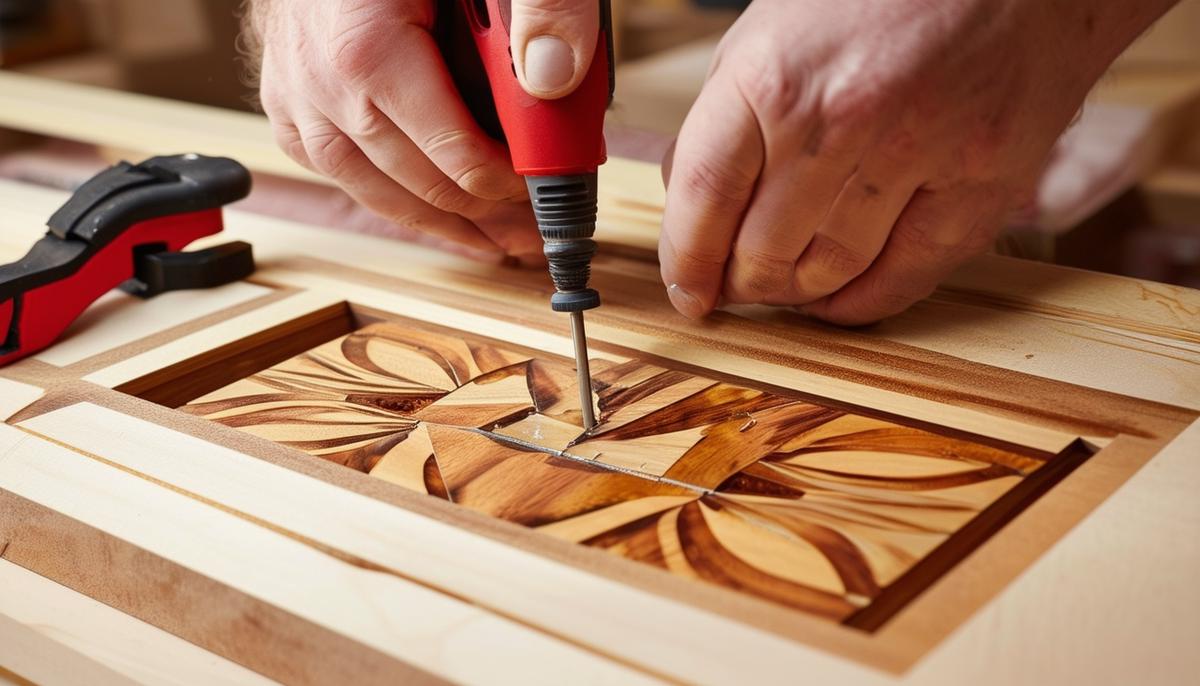
Fitting and Gluing Inlay Pieces
After test fitting the inlay, proceed to gluing. This step is crucial for your inlaid design's durability. Prepare your workspace with all necessary materials: glue, a small brush for application, clamps, and a damp cloth for cleanup.
Recheck your inlay piece against the recess. It should fit snugly. Address any slight misalignments or uneven spots by sanding high points or gently shaving material from recess edges until the inlay fits perfectly.
Glue Selection Guide:
| Material | Recommended Glue |
|---|---|
| Wood-to-Wood | Wood Glue |
| Mother of Pearl, Bone, Synthetics | Epoxy Resin |
Apply ample but controllable glue to both the recess and inlay piece bottom. Spread it evenly with a small brush, ensuring complete coverage to create a bond that fills tiny gaps and secures the inlay firmly without air pockets.
Position the inlay piece over the recess and press it gently into place. For very tight fits, use a small, soft mallet to tap it down carefully. Avoid excessive force to prevent breaking delicate inlay materials or damaging the surrounding base wood. Seat the inlay fully so it sits just above the surface.
Quickly clean off excess glue that squeezes out using a damp cloth. This prevents hardening and marring the surface around the inlay, which would require additional sanding later. Be thorough but careful not to move the inlay piece while cleaning.
Apply clamps to secure the inlay as the glue sets, ensuring even pressure across the surface for a strong, uniform bond. For flat surfaces, use a caul—a flat, protective barrier—between the clamp and wood to prevent marks or dents. Adjust your clamping strategy for curved or complex surfaces, using specialty clamps or soft padding if needed.
Allow the assembly to rest for the full recommended drying time, typically 4-6 hours for wood glue, but follow manufacturer guidelines strictly. It's better to wait longer than risk compromising the bond.
Final Steps:
- Remove clamps carefully after full drying
- Inspect the inlay for secure attachment without gaps or misalignment
- Use a scraper or block plane to level the surface
- Sand the area with fine-grit sandpaper, starting around 220 grit and progressing to finer grits
Focus on the edges where the inlay meets the base wood. Aim for a perfectly integrated piece where the inlay feels like a natural extension of the base material. This attention to detail showcases your craftsmanship and precision, elevating your project from simple DIY to artistry.
- Smith J, Johnson T. The Art of Wood Inlay: Techniques and Materials. Woodworker's Journal. 2019;34(2):45-52.
- Brown A. Modern Applications of Traditional Inlay Methods. Fine Woodworking. 2020;281:64-69.
- Davis R. Safety Considerations in Woodworking: A Comprehensive Guide. Journal of Occupational Safety. 2018;22(4):112-120.