
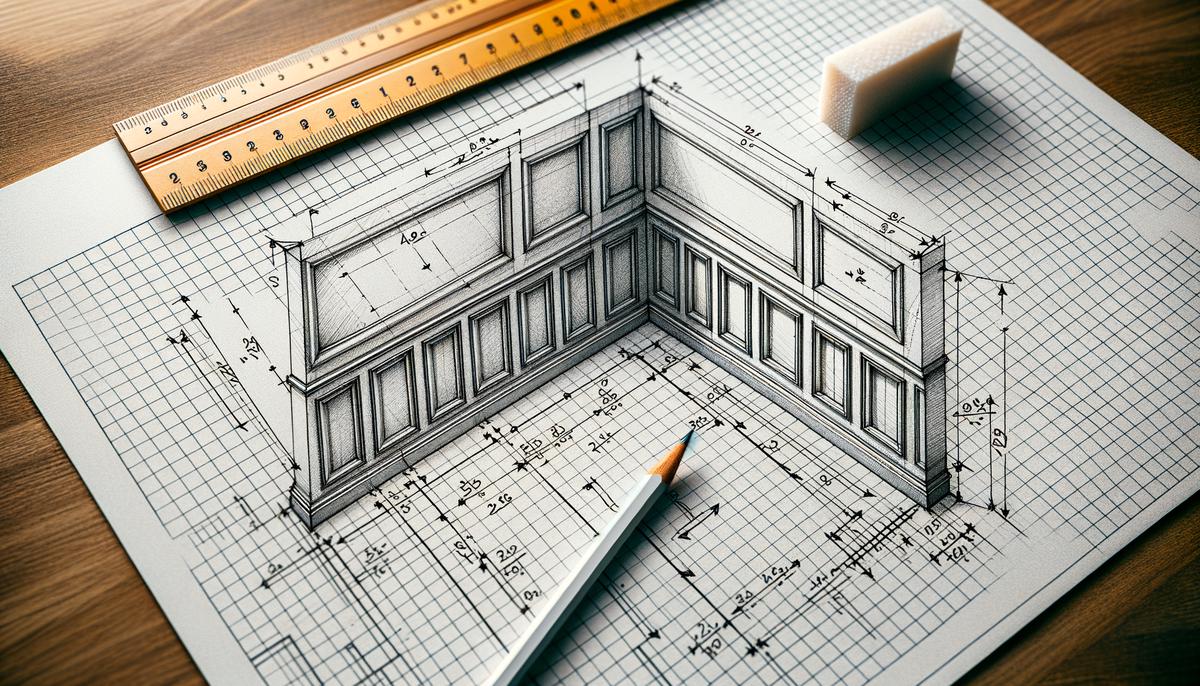
Planning Your Wainscoting
Sketch out a plan for your wainscoting. Determine the number and size of boxes for each wall. Measure twice, cut once—map out your design on paper.
- Determine Box Number and Size: Decide how many boxes you want on each wall and their size. Consider half walls, vertical boxes, or feature walls.
- Calculate Box Width: Measure wall length and divide by desired box number, accounting for spacing. For example, a 12-foot wall with four boxes means each box spans roughly 3 feet, minus spacing.
- Measure Box Height: Decide the height from ceiling to box top and from baseboard to bottom. Keep boxes proportional with consistent spacing.
- Consider Trim Placement: Plan for trim around windows and doors. Measure openings carefully and adjust your plan if necessary.
- Equal Spacing: Ensure uniform spaces between boxes. Use a small wood piece as a spacer while marking spots.
Architectural Style Matters
Choose a wainscoting profile that matches your home's architecture. Colonial homes suit classic profiles, while modern homes work well with sleek, minimalist lines.
Making the Room Symmetrical
Aim for symmetry. Adjust box sizes if one wall has unusual measurements. Symmetry helps achieve a professional finish.
Remember: Accurate measurements now save headaches later. Each box should be a perfect rectangle with precise 45-degree corner cuts.
Cutting and Preparing Trim
Use a miter saw to cut the four sides of each box with precision. Make clean, accurate 45-degree cuts at each corner for seamless joints. Measure box dimensions twice before cutting to avoid waste.
Prepare walls by repairing holes, dents, or dings with spackle or filler. Sand rough spots for a smooth surface. This prep work ensures trim adheres well and highlights craftsmanship.
Apply a fresh coat of satin paint to walls. Satin paint is durable, easy to clean, and provides a subtle sheen that contrasts nicely with semi-gloss trim. This creates a uniform background for installation.
Accuracy is key. Thorough cuts and wall prep may take extra time but result in a professional, high-quality finish.

Installing Wainscoting Trim
Apply trim from outside to inside. Start with outer box sides as guides. Use a level to ensure each piece is straight.
Use a small wood piece as a spacer to maintain consistent gaps between trim pieces. Mark placement for the next piece as you go.
Apply a small bead of adhesive to the back of each trim piece before pressing it against the wall. Secure with a pneumatic 16-gauge nail gun, placing a nail every 12-18 inches.
Pay close attention to alignment. Even small misalignments can affect the overall look. Having an extra set of hands can be helpful; one person can hold the trim while the other nails it in place.
This careful method will give you a stunning end result and save time fixing mistakes later.

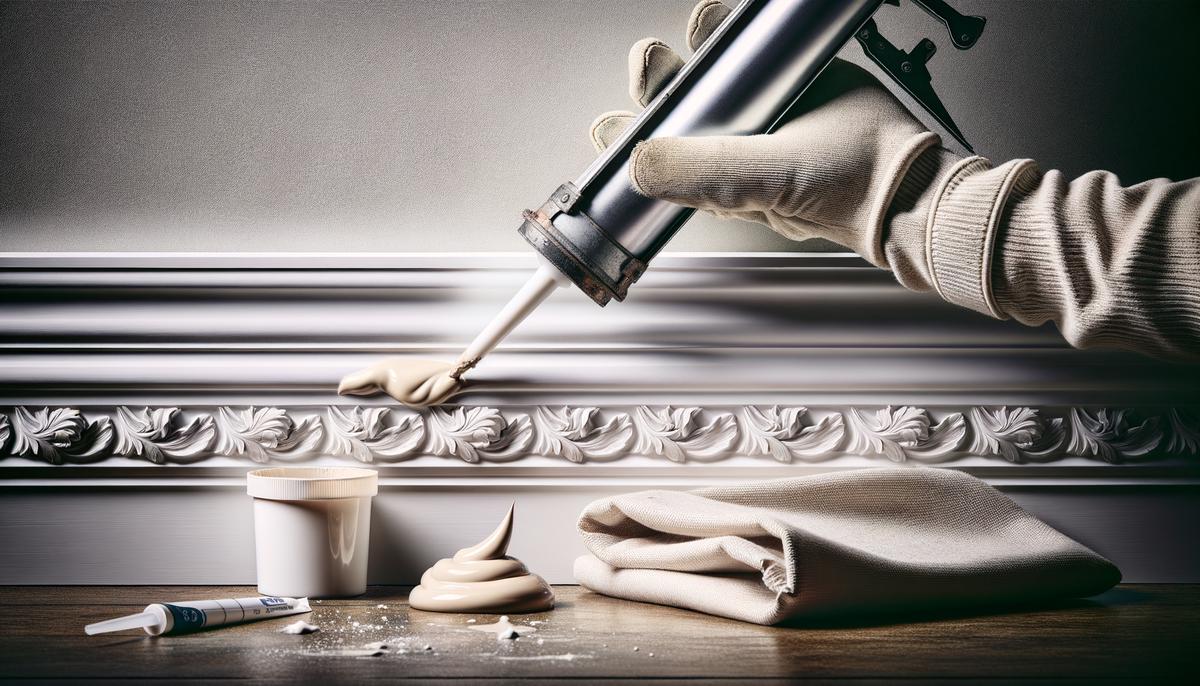
Finishing Touches
Apply caulk to inner and outer edges of the trim to seal gaps and cover minor imperfections. Use a caulk with a fine applicator tip for clean lines. Keep a wet cloth handy to smooth caulk and wipe away excess.
Once caulk is dry, apply a fresh coat of semi-gloss paint. This enhances appearance and provides durability. Tape off areas not to be painted. Use a high-quality brush designed for trim work, starting at the top and working down with long, steady strokes.
Let the first coat dry before applying a second. Lightly sand between coats if necessary, wiping dust with a tack cloth before reapplying.
These finishing steps elevate your wainscoting from good to stunning, creating a cohesive and professional look.
Choosing Materials and Tools
Select between MDF (Medium-Density Fiberboard) and solid wood for your trim. MDF is moisture-resistant and budget-friendly, making it great for bathrooms and kitchens. Solid wood offers natural beauty and durability but at a higher cost.
Choose trim profiles that match your home's style. Colonial homes pair well with ornate profiles, while modern homes suit minimalist trims.
Essential tools for your project:
- Miter Saw: For precise 45-degree cuts.
- Level: Ensures straight trim placement.
- Nail Gun: A pneumatic 16-gauge nail gun for efficient, secure installation.
- Adhesive: Quality construction adhesive for extra strength.
- Primer: Especially important for MDF or bare wood.
- Paint: Durable semi-gloss paint for the trim.
Investing in good materials and tools can make your wainscoting project look professional and last longer.

By following these steps and paying attention to detail, you can create wainscoting that transforms your room with craftsmanship and style. Remember, proper installation can increase your home's value by up to 5%1.
- Remodeling Impact Report. National Association of Realtors. 2019.