
Framing is the backbone of any home addition, setting the stage for a stable and secure structure. From understanding anchor bolts to selecting the right materials, getting familiar with framing basics can make your project smoother and more efficient.
Understanding Framing Basics
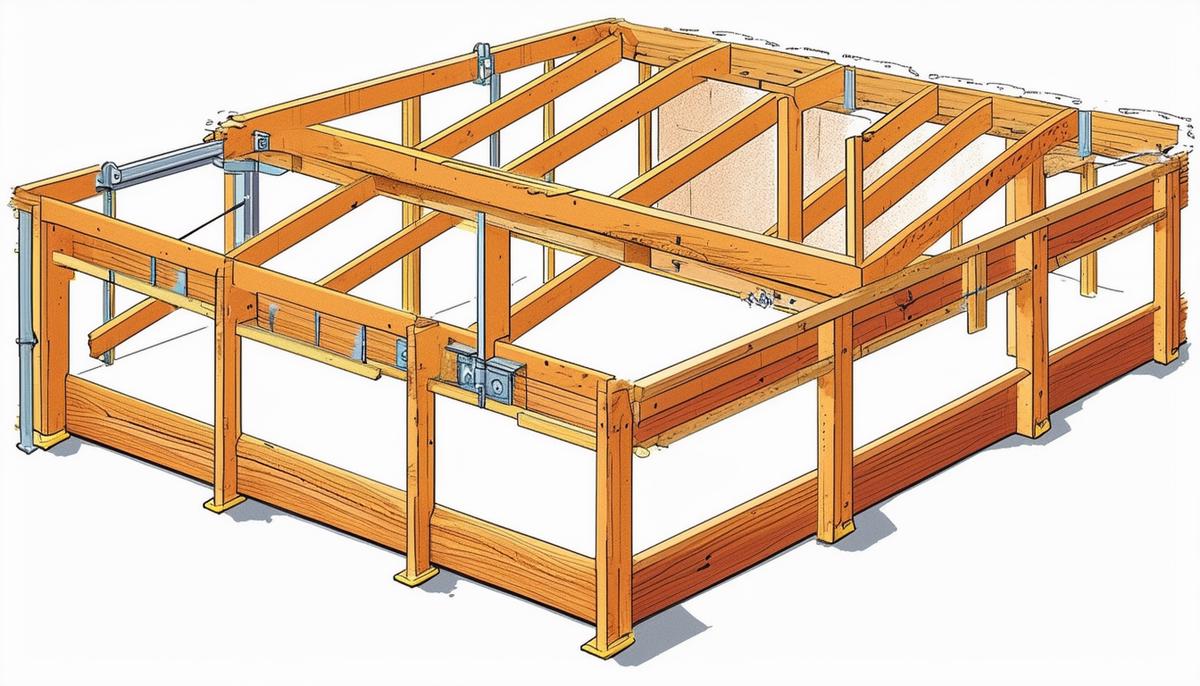
Framing for home additions is where your new space starts to take shape. Let's break down the basics:
- Anchor bolts stick up out of the foundation, spaced every six feet and within a foot of corners or door openings. They attach the main frame to the foundation.
- Sill plates are boards that lay flat on the foundation with holes for anchor bolts. They're attached with washers and nuts, creating a stable base.
- Rim joists run along the perimeter of the sill plate. Floor joists get end-nailed into the rim joist.
- Bottom plates and top plates define where walls begin and end. The bottom plate runs along the floor, and the top plate sets the wall height.
- Wall studs are attached to the plates, spaced 16 inches apart from center to center. Corners require extra studs for nailing drywall from both sides.
- Roof trusses are pre-designed structures that include rafters, supports, and ceiling joists in one piece.
- Sheathing covers the structure, adding rigidity and providing a surface for exterior finishes. Use 5/8-inch plywood or oriented strand board (OSB) in a staggered pattern.
For doorways and windows, king studs run full height, headers span the top, trimmer studs support the header, and sills form the bottom of window openings.
Assemble walls on the ground before raising them. This saves time and ensures everything is squared up. Check for square and level before lifting walls to avoid adjustments later.
Whether DIY or hiring out, understanding framing basics helps ensure your home addition is stable and ready for the next steps.
Cost Considerations
Understanding framing costs helps you manage expenses effectively. Here are the key factors:
- Materials: Wood is most common and affordable, ranging from $0.65 to $1.10 per linear foot. Steel framing costs around $9 to $11 per square foot, while Insulated Concrete Forms (ICF) run $14 to $18 per square foot.1
- Labor costs typically make up 30 to 50 percent of the total expense, ranging from $4 to $8 per square foot. Rates vary based on project complexity, crew expertise, and location.
- Size and scope affect costs significantly. A small bedroom addition might cost around $6,000, while a larger project could reach $25,000 or more.
- Enhancements like sheathing ($2 to $5 per square foot) and building wrap ($1 to $2 per square foot) add to the budget.
- Insulation for traditional wood-framed walls can cost between $2.40 and $3.75 per square foot.
Don't forget smaller elements like sill plates, rim joists, and anchor bolts, which add up quickly.
By understanding these cost factors, you'll be better prepared to manage your home addition project without surprises. Plan carefully to avoid financial setbacks later.

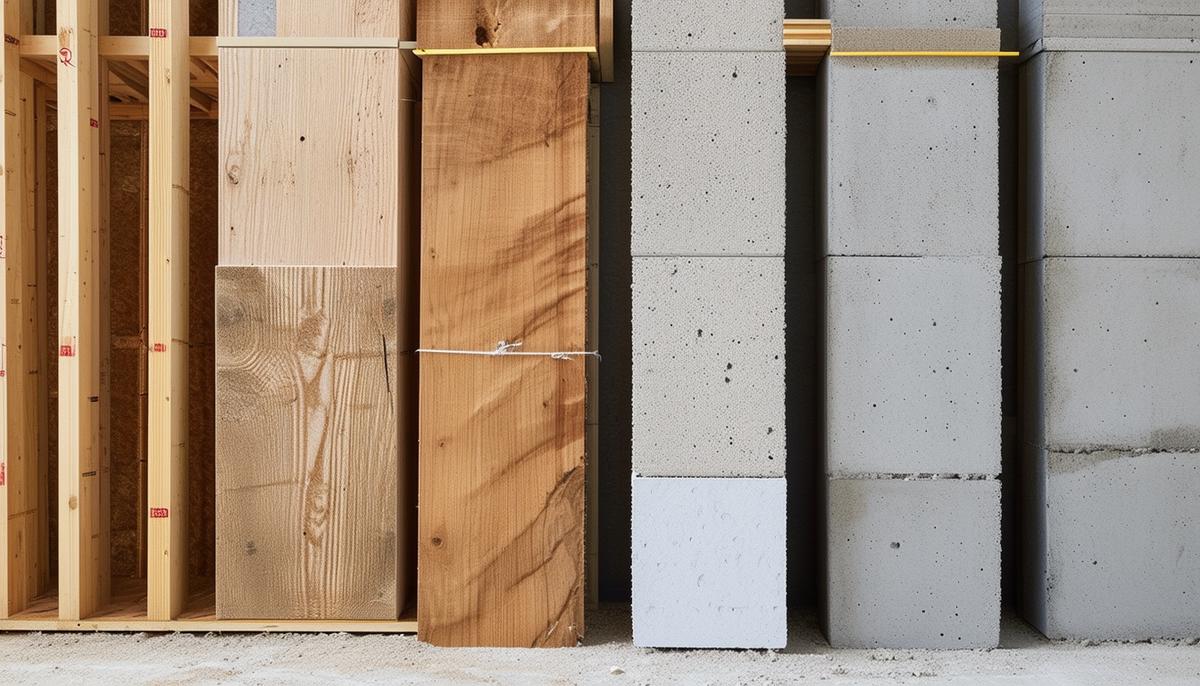
Framing Material Choices
Selecting the right framing material is crucial for structural integrity, cost, and durability. Common options include:
| Material | Cost | Benefits | Considerations |
|---|---|---|---|
| Wood | $0.65 to $1.10 per linear foot | Versatile, easy to work with | Requires proper treatment for longevity |
| Concrete Masonry Units (CMU) | $3 to $5 per square foot | Excellent durability and strength | Labor-intensive installation |
| Steel | $9 to $11 per square foot | Superior strength, fire-resistant | Requires specialized tools and knowledge |
| Insulated Concrete Forms (ICF) | $14 to $18 per square foot | Built-in insulation, energy efficient | Higher initial investment |
Consider your project needs, budget, climate, and available labor skills when choosing. Each material has unique benefits, so scrutinize your requirements to ensure a strong, durable, and efficient build.
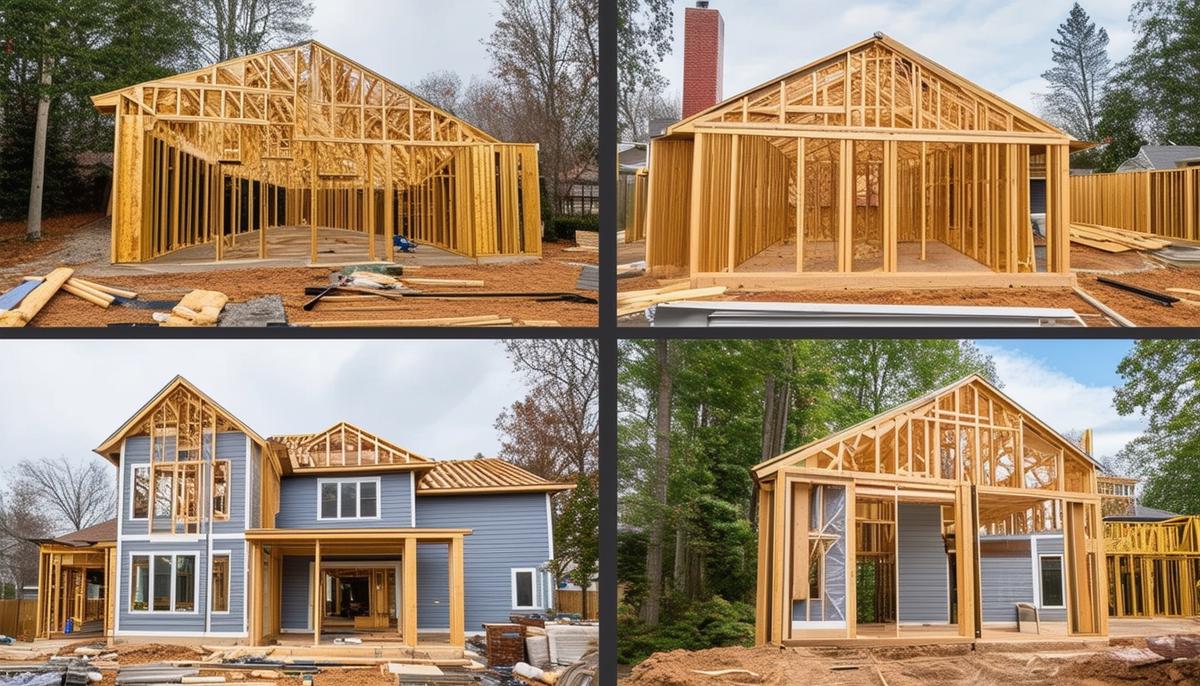
Building Process and Techniques
- Start with planning and excavation to set a level, solid foundation.
- Install sill plates using pressure-treated wood and secure with anchor bolts.
- Place floor joists on sill plates, typically 16 inches apart on-center.
- Frame walls by laying out bottom and top plates, marking stud positions, and nailing studs between plates.
- Lift and secure walls, ensuring they're plumb and properly fastened to floor joists.
- Install roof trusses or rafters, accurately spaced and secured to wall top plates.
- Apply sheathing to walls and roof, using 5/8-inch plywood or OSB in a staggered pattern.
Throughout the process, follow local building codes for safety and durability. These cover everything from fastening techniques to material specifications.
Use efficient techniques like pre-drilling holes for large screws, and always double-check connections for security. Measure diagonals to ensure walls are square, and use a long level to check for plumb.
By mastering these processes and techniques, you'll create a solid, durable frame for your home addition.
Labor and Permits
Skilled labor is essential for framing a home addition. Carpenters handle most of the framing work, interpreting blueprints, cutting and assembling lumber, and erecting the initial framework. Their expertise ensures every wall, floor, and roof component fits correctly, streamlining the rest of the construction process.
Electricians and plumbers need to get involved early in the framing process. After the initial structure is up, they route wiring and plumbing through the studs before walls are enclosed. This step requires coordination with carpenters to meet codes without compromising structural integrity.
Acquiring permits is crucial before any physical work begins. Depending on location and project scope, permit costs can range from $400 to $1,850. Building without proper permits can result in fines, stop-work orders, or even demolition of non-compliant work. Visit your local building department to understand the specific permits required for your home addition.
Applying for permits involves submitting detailed plans and specifications. Authorities review these documents to ensure compliance with local building codes and zoning laws. This process helps catch potential issues early, potentially saving time and money.
Benefits of Proper Documentation:
- Protects you legally
- Proves project compliance
- Valuable in case of disputes
Passing all inspections is another crucial aspect of the permit process. Different stages require inspections, such as after framing but before drywall, or during the rough-in phase for electrical and plumbing. These inspections ensure work meets safety and code requirements.
Both skilled labor and proper permits are investments in the safety, legality, and longevity of your home addition. By carefully following these steps, you ensure a smoother construction process and a final product that lasts.
Managing Unexpected Issues
Despite careful planning, issues like weather disruptions, site conditions, and structural surprises can arise. Quick and efficient reactions are key to keeping your project on track. Always have a backup for weather delays, such as renting tarps or temporary coverings to protect your worksite. Maintain open communication with your contractor to promptly discuss any disruptions and plan the best course of action together.
Site conditions can present challenges—like hitting an underground utility during excavation or discovering poor soil drainage. Address these issues immediately. Call experts if you encounter unplanned underground obstacles and reassess your drainage plans to prevent future water problems.
"Structural surprises, such as rotted wood in your existing structure or walls that aren't as square as assumed, need immediate attention."
Replace compromised materials and reinforce the structural integrity of your build. Ignoring or postponing these problems can lead to bigger, more expensive repairs later.
Water intrusion during framing can cause warping, swelling, and mold growth if left untreated. Quickly address leaks or water damage. Use fans, dehumidifiers, and professional restoration services if necessary to thoroughly dry the area. Inspect damaged framing components and replace them promptly to maintain structural soundness.
Regularly review and update your project timeline to account for delays or added tasks. This keeps everyone informed and ensures efficient adjustments. Stay flexible and be prepared to adapt plans when unforeseen issues arise.
By being proactive and communicative, you can handle surprises without derailing your project. Quick action and systematic problem-solving mean fewer stressors and a smoother overall process.

Understanding the basics of framing helps you manage costs and ensures that your home addition is sturdy and long-lasting. By being aware of potential challenges and preparing for them, you can navigate the framing process with confidence and achieve a successful home addition project.